Understanding The Why of Why Your Photo Turned Out Well.

Random late-night thought.. A friend of mine implied that people who take nice photos have nice equipment. This is a common thought and yes nice equipment helps and yes most people who take nice photos are very invested into photography and therefore own nice equipment but when you have nice equipment you also need to understand how to use it! And we all have heard of the iphone fashion shoot, showing us you can still take nice photos with less nice equipment.
Anyways the whole point of this blog post is to explain something important: Anyone can and very likely will capture the occasional stunning image based on pure luck. A professional understands how to make the stunning image happen on purpose. I am truly amazed by all the consideration that goes into a photo before taking it if you are looking at it with a trained eye!
Some things to take into consideration before taking a photo: your camera settings, your background/location, the direction the person you are taking photos of is facing, where the light is coming from and where the light is landing on your person you are photographing, where the sun is at in the sky, how the person/people are posed, how cropped into the image you are/how close or far away you are from the people/the background-to-person ratio, the angle of your camera, how the image is composed, what the focal point is, keeping lines parallel, keeping open space even, if you are using a flash or not. etc.
You can still get nice photos by shooting wherever you want without taking these things into consideration but the question is: can you replicate the nice images you get on purpose? I was taking photos for many years before starting a business. I never knew when the right time to become a business was. In retrospect, I think the right time was when I finally understood the many many elements that go into a photo so that I knew exactly where to place people and how to make sure I wasn’t riding just on luck. It also took awhile (and lots and lots of practice) to train my eyes!
I remember the first time I learned the rule of composition concerning “parallels” (keep your lines parallel) I decided to practice and it was so awkward for me to try paying attention to parallel lines in the image! Now it’s just totally natural and instinctual. I also missed many details like an unbuttoned button or a collar not folded down nicely. Now I notice stuff like that pretty easily :).
So train your eyes to notice the details, start paying attention to your photos and take note of what you like about the image and do not like. Pay attention to how the light was hitting the person you photographed and what time of the day it was and what your settings were set to. This is all pretty awkward at first but it all comes with practice! It’s like when you first learned how to type.. super awkward and uncomfortable and now it’s just a natural instinct!

IMG_8006astamped

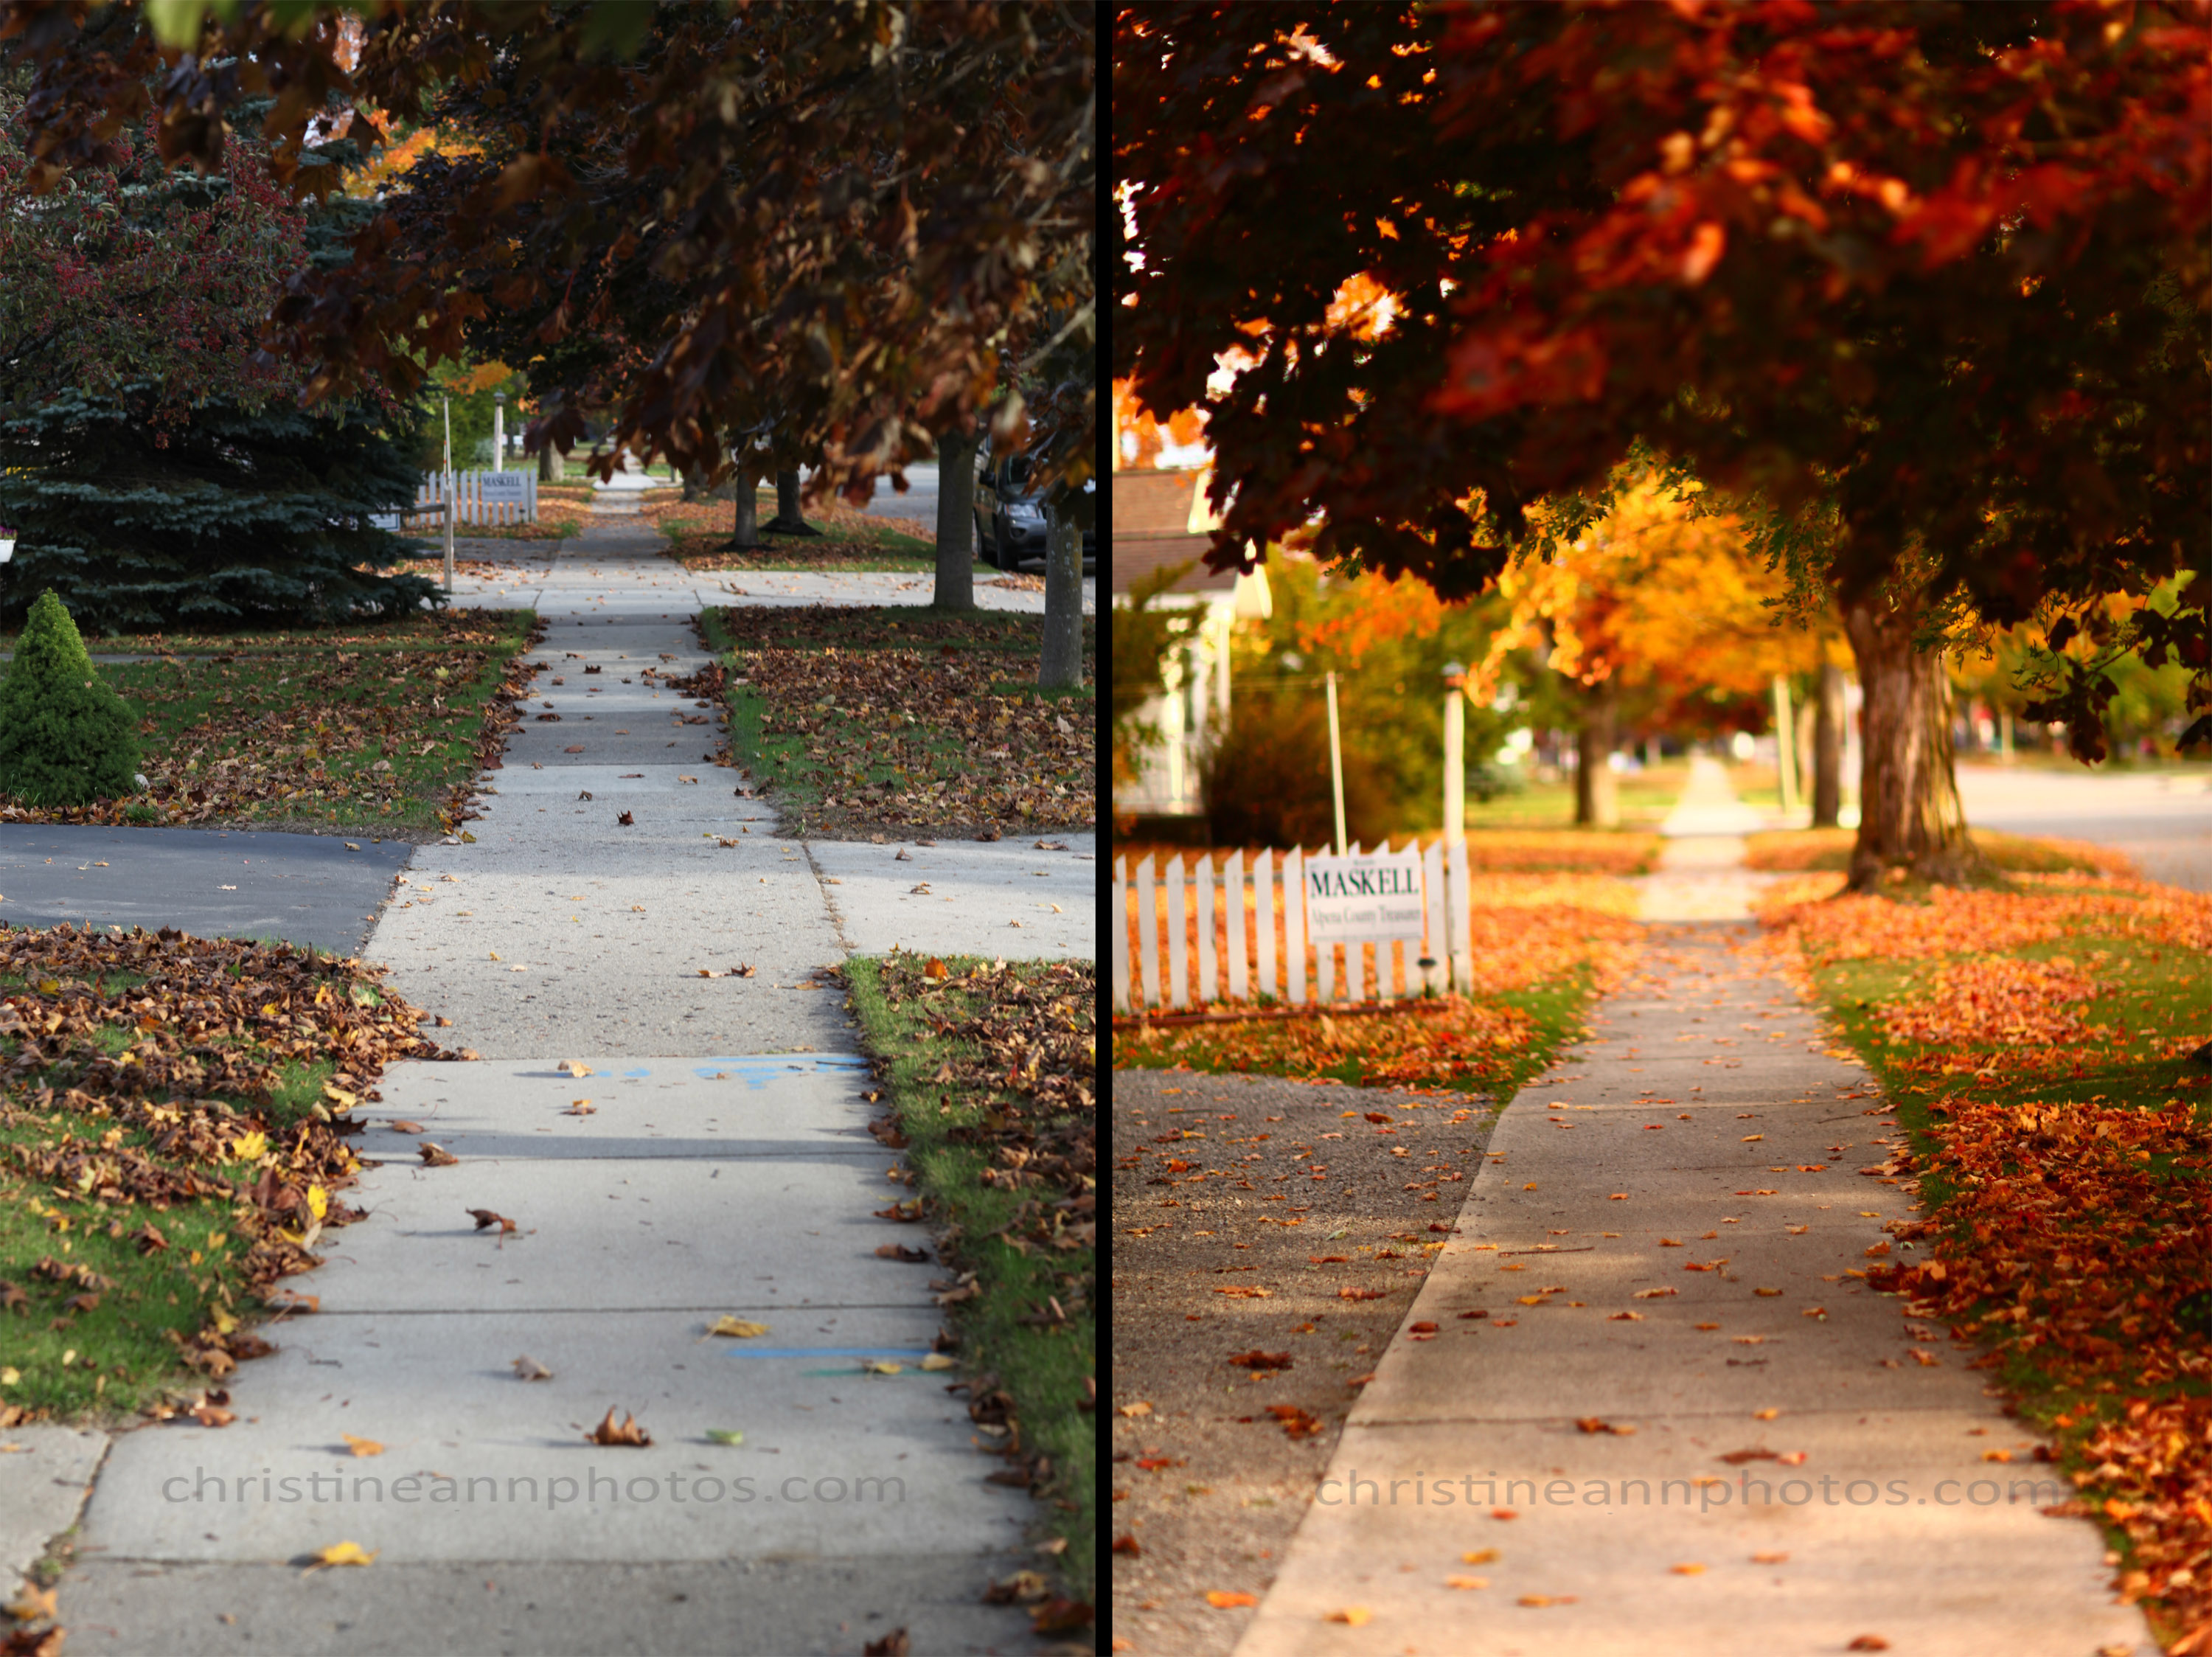
This photo could have gone horribly wrong had I positioned them at a different spot.. but because of the knowledge I have accumulated, I understand how to position people for the best results.

IMG_8033aastamp2

-Christine Ann
www.christineannphotos.com
www.facebook.com/christineannphotos
Duluth Minnesota/Superior Wisconsin Photographer

How to Capture A Sparkler’s Movement Tutorial (/How to do bulb photography).

With 4th of July recently coming and going, you may be seeing photos around of people drawing pictures with a sparkler and wonder how it is done.

Untitled-1stamped

What you need: a tripod, a camera on which you can leave the shutter open for various lengths of time, a remote clicker, and a black outfit (if you don’t want to be seen in the background).

Set your camera on the tripod, set it to BULB mode (different on all cameras, you will have to refer to your manual if you do not know. One typical way is that you set your camera to M and then make your shutter speed as slow as possible.. once it gets maxed out to “as slow as possible” it will say BULB. My camera has a B setting on the settings wheel to get there, so all cameras are different). Once the camera is on the tripod in bulb mode, determine exactly where you want to stand. Mark the spot! Set the camera to Manual Focus, then manually focus on the spot you are standing because the camera will have a hard time auto focusing in the dark). Once the focus is set, then press down on your remote clicker, do a few trial runs to figure out the best settings. My settings for the above photos were around f/16, ISO 640, 4 second shutter speed. I also worked at f/11 ISO 500. Other settings will definitely work too that’s just what I chose to do. My camera also handles high ISOs quite well so I don’t get scared to bump it up though as a general rule I prefer keeping it much lower. Once the camera is on the tripod, the focus is set, and the settings are right, stand in the spot, activate the shutter and move the sparkler around in the shapes you want and when you are done let go. That’s it!

When a shutter is open it captures all movement that occurs while it is open (this is why it needs to be on a tripod! If your hands move at all the camera will capture the movement of the camera). The tricky part is that while it is open it is also absorbing light.. so if you leave it open too long the photo can be blown out if you have streetlights around you especially.

You see in the lower right photo there is a red light streak behind it, that is the taillight of a car driving by.. so this idea works for lots of different things!

Oh and I recommend wearing black because I was wearing pink at first and you can see me pretty easily standing behind the sparklers (as you can see in the lower left-hand corner photo). I later changed to black and the problem was solved. The other adjustment I made is I was initially working with a streetlight behind me and I later figured out was sort of ruining the photos. I moved to a spot about 10 feet away and it solved that problem 🙂 .

My favorite shot of the night I ended up compositing 2 shots together 🙂 and then editing a couple little blurbs in the background so that it all looked totally black/dark.

IMG_3714zzzzzstamp

Remember if you are writing a word you have to write it backwards! 😮 . It is both easier than it sounds AND harder than it sounds haha.

Oh and if I have one more tip for everyone.. buy the big huge sparklers and maximize your time much better!

-Christine Ann
http://www.christineannphotos.com
“like” me on Facebook 🙂 ! https://www.facebook.com/christineannphotos
Duluth Minnesota Photographer

Importance of Understanding How to Take Photos with Manual Settings.

AutoVsManualstamp

After posting “Why Photographers Hate the Words “Your Camera Takes Such Nice Photos” yesterday I thought I would do another version of it today. Yesterday’s blog was a reference to choosing the angle and background etc, today I want to refer to understanding camera settings. You can do so much in camera! I have a billion examples of auto vs manual and things you can do in M that you cannot do in auto. For example you can capture the slight movement of a dog’s tail to show that it is wagging. You can prevent a photo from blurring when the people in it are moving. You can have a better chance at photos in low lighting. You can insert artistic twists to things by “blowing out” (giving it a really washed out/white look which is fun to do sometimes) or enhancing colors or whatever it is you want to do. In auto mode you just have to hope it works out. In Manual you know you can make it work out! Here is a photo example of auto vs manual. I am not saying the manual version is better (I personally think it is but not everyone would agree.. just a matter of taste) but what I am saying is that you can gain a lot by spending some one on one time with your camera and some tutorials to ensure you get the images to look the way you want them to! Neither of these photos are edited.. both are right out of the camera.

-Christine Ann
Duluth Minnesota Photographer
http://www.christineannphotos.com
“like” me on Facebook 🙂 ! https://www.facebook.com/christineannphotos

Why Photographers Hate the Words “Your Camera Takes Nice Photos”.

Today I was photographing some flowers and my kids asked me why I was taking them in the spot I was. The reason was because it put greenery in the background and the lighting was hitting the spot nicely. I considered the background, how the light hit it and caused reflections, I set my camera settings manually to what I thought would capture the image best. I kept the flowers far enough ahead of the background to cause a nice blur. I decided which camera and lens to use for the shot. I applied knowledge about composition and which rules I would want to follow and not follow (and why). I positioned myself at the right angle to hit it in the right direction. After my kids asked me about why I was photographing at that spot I decided to try a shot at a spot I wouldn’t usually choose to illustrate that yes you may have a nice camera that helps you take nice images but you are still responsible for a large portion of how the image turns out.

The photo I took using my knowledge:
IMG_6010stamp

The photo I shot in a spot I wouldn’t choose with the knowledge I have, though I did manually set the settings to good settings which gave it any nice quality it does have as far as the coloring and vibrance goes:
IMG_6020stamp

Both images are right out of the camera and unedited.

This is why photographers hate the words “your camera takes such nice photos”. If you’ve developed an eye for the “right” spots, you can get great images off less nice cameras.. if you have not developed an eye for the right spots, a nice camera isn’t going to help you much, at least not consistently/predictably 🙂 .

-Christine Ann
Hermantown Minnesota Photographer

http://www.christineannphotos.com/
www.facebook.com/christineannphotos