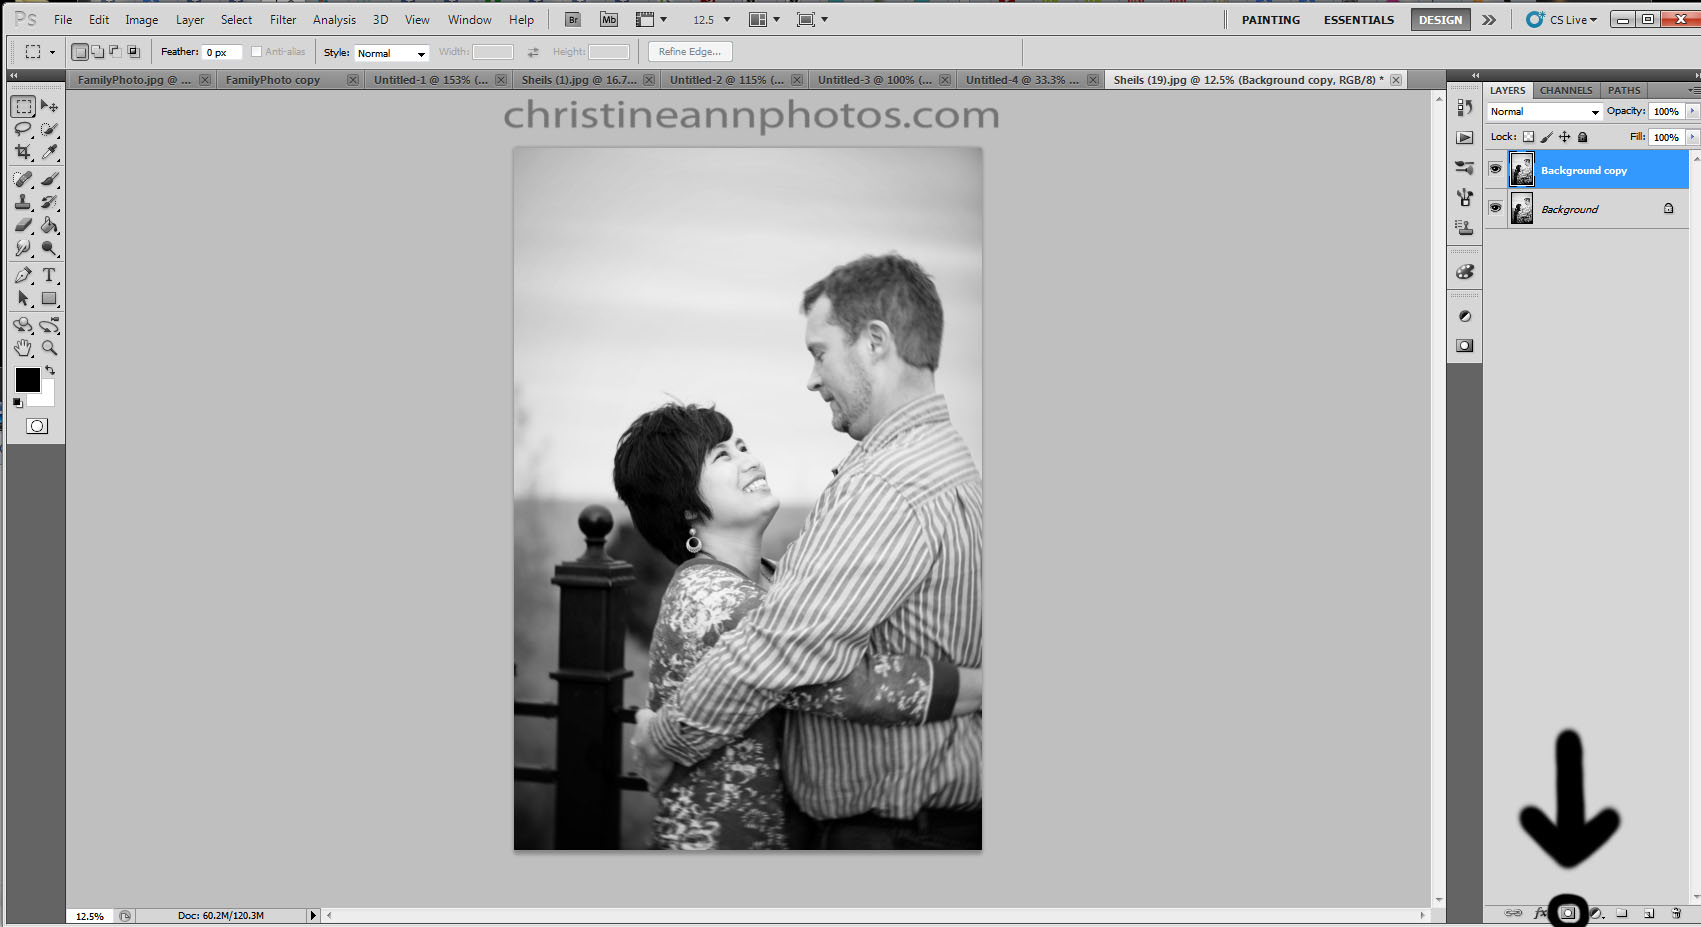
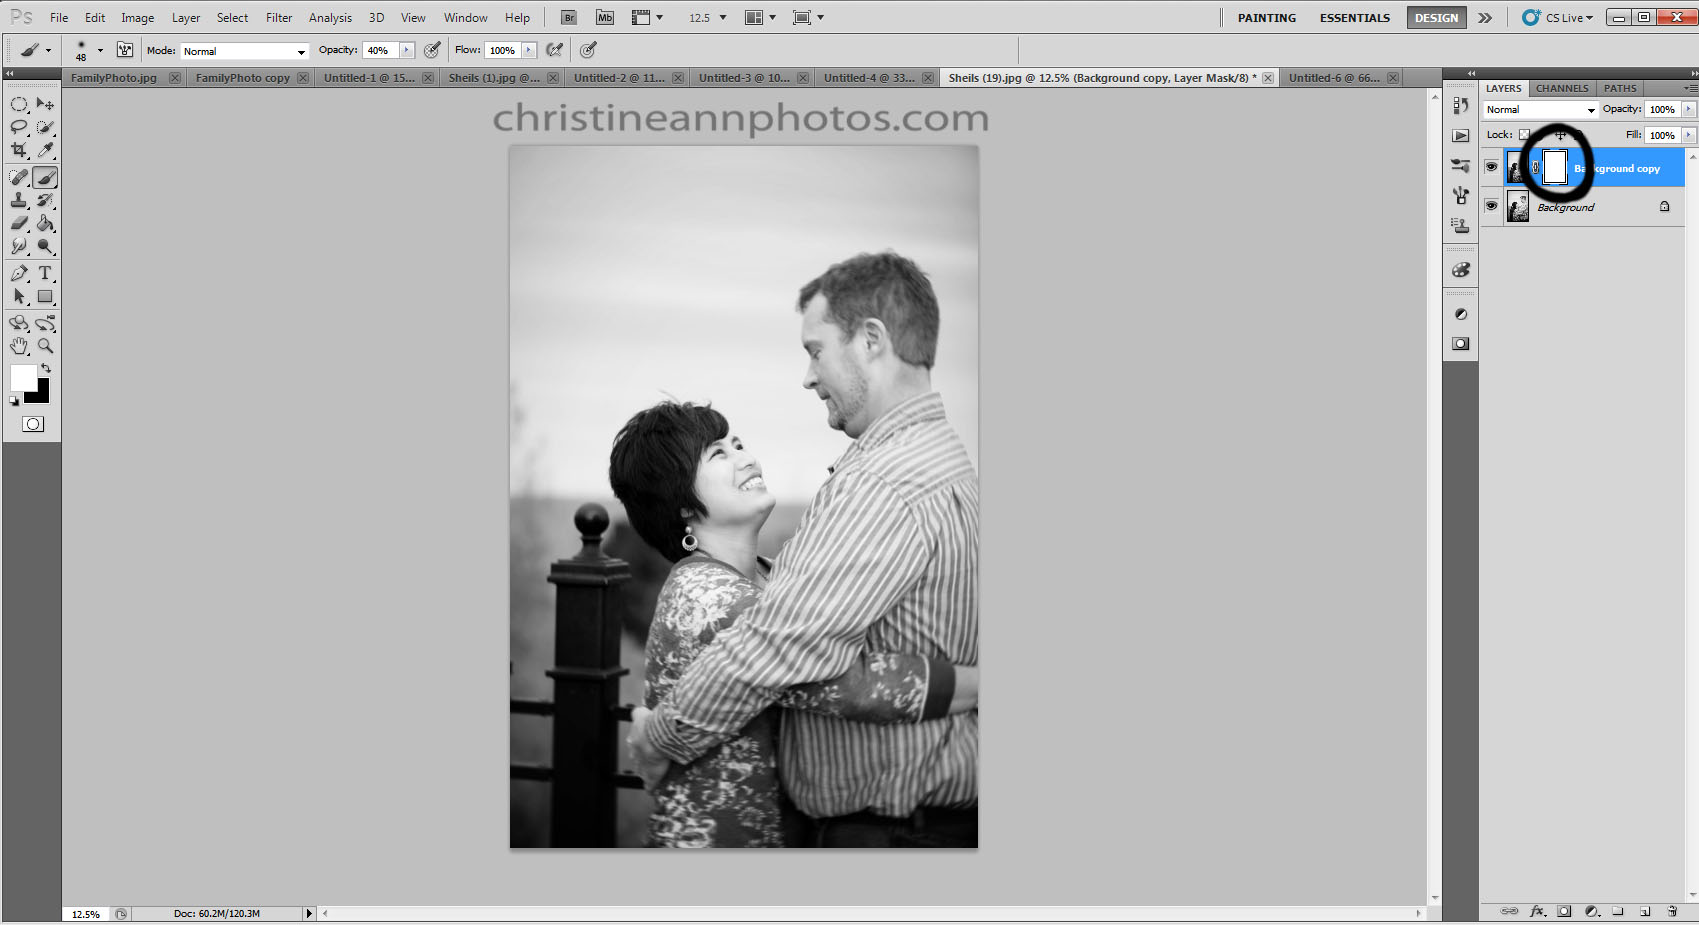
There are about 5 million different things you can do to edit a photo in Photoshop. Some of the things you learn will be totally pointless and some will be invaluable. I am going to brush up on one of the most valuable editing techniques (in my opinion): how to add a layer mask to your layers and why they are important. This will benefit you in so many ways! And it is SO EASY! Learning new things in Photoshop is always intimidating but this is literally something you can do in a couple clicks. (To summarize: you layer 2 photos on top of each other, click the layer mask button, select a black or white paintbrush to hide/reveal the bottom image and that’s it!). Directions for adding a layer mask: Open up a photo in Photoshop. Pick another photo to layer on top of it (you can just copy and paste it on top). Click on the top layer so it is highlighted and then click the square with a circle inside it at the bottom of the layer palette (The layer palette is where you see all your layers towards the right side of Photoshop). The icon I am referencing, if you hover your mouse over the top of it it will say “add layer mask”. It looks like this:  Click on the white box that appears next to your top layer.
 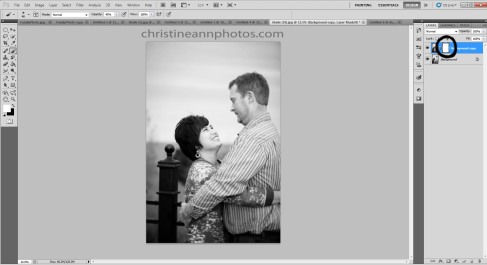 That’s it! You are done, you’ve applied a layer mask! Now how do you use it? Also very easy. Select the paintbrush icon and make the color that it paints white. (Image below shows where to select the paintbrush and where to change the color of it at).
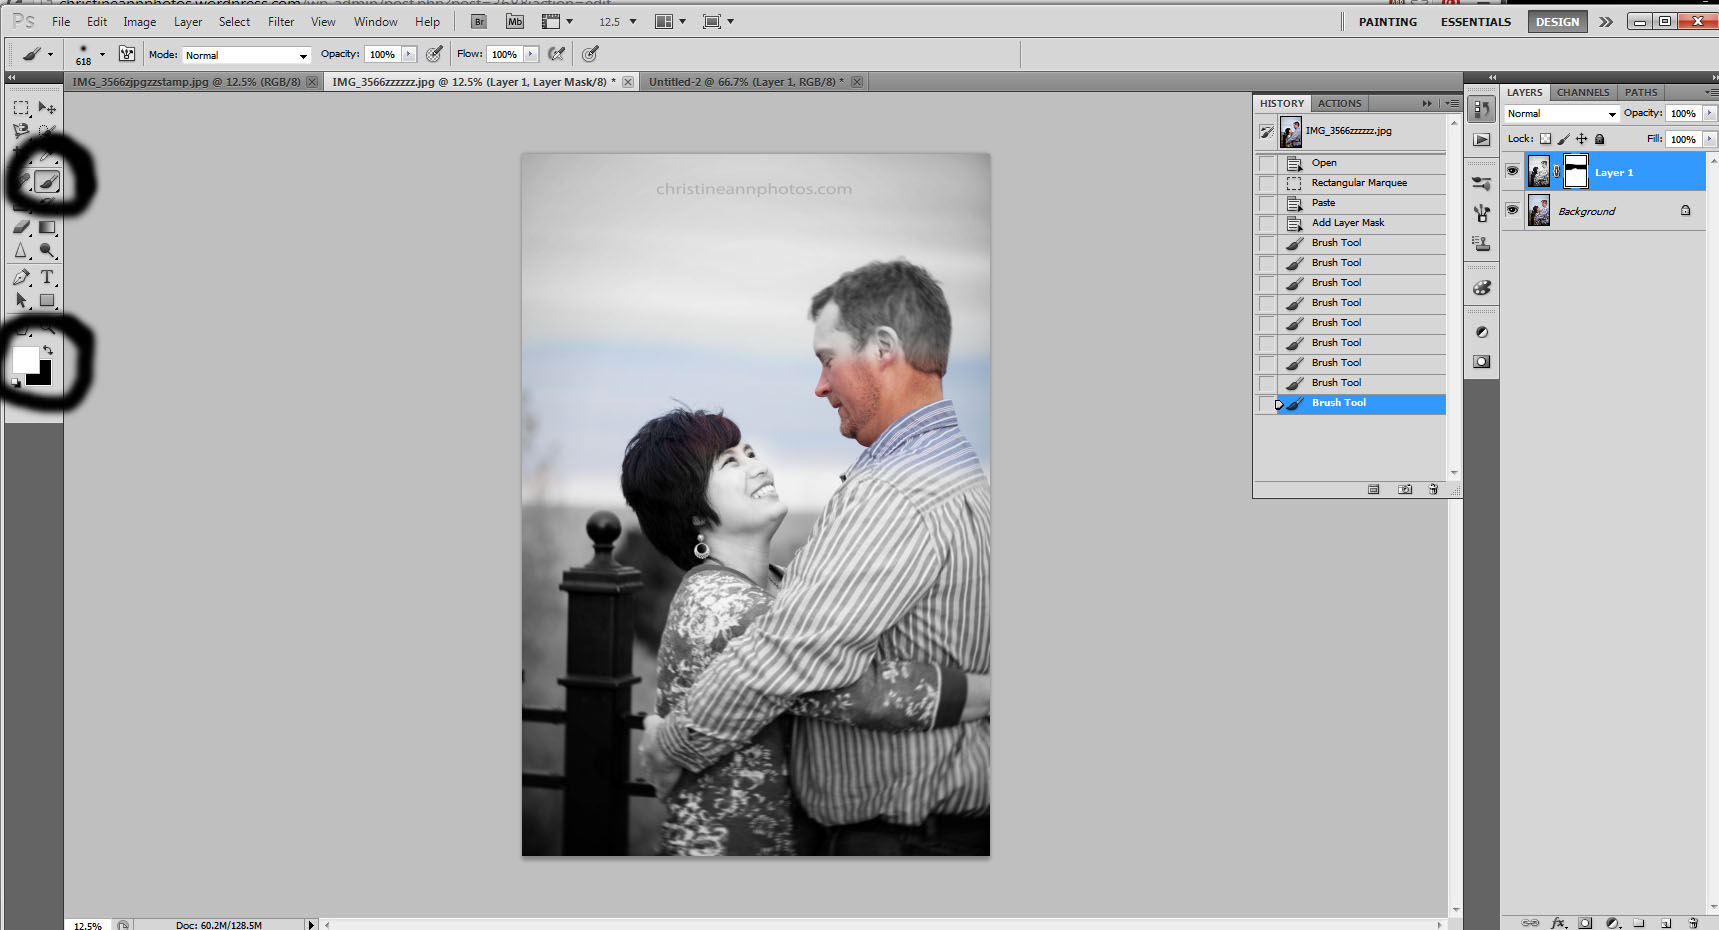
 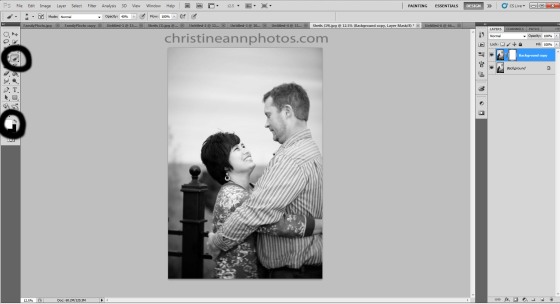 Paint wherever you’d like to reveal the image below and you will reveal the image beneath it! If you make a mistake simply change the “white” color of the brush to black and it brings back the original image.
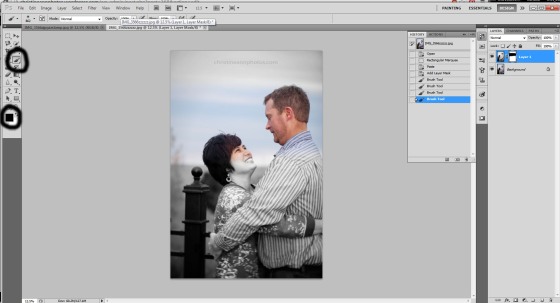
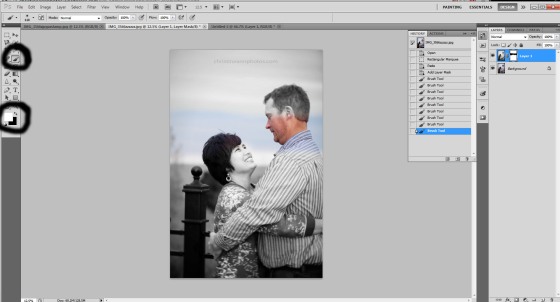 ^ Example Photos: Color photo on bottom, black and white photo on top, layer mask selected (you select it by just clicking on it), select the paintbrush and make it black and just start painting.. it will reveal the photo beneath it. If you make a mistake and want to bring the black and white image back, simply turn it white, like in the second photo. :). Boom. Done :). This method is perfect for head swaps (place the new face underneath the one you want to change and reveal the photo below it). It is also perfect for doing selective coloring (adding color to black and white images). You can change the background of your photo by adding a nice background behind the image and masking the original background off. You can edit things out like power lines by moving the bottom image a few centimeters to the right and masking them out. There are so many possibilities! TIPS: 1. You can change the opacity of your brush.. so if you only want to kind of reveal the background but not entirely, just set the opacity of your brush 50% (vs 100% and it will only bring 50% of the background in and leave 50% of the original intact. You can also build on it by changing it to 10% and doing another round, bringing it to 60% revealed). It looks much more natural if you build up in that way vs just doing it at 100%! 2. If you right click on the “background” (the bottom) layer and select “layer from background” you “unlock” the layer and can now move it around. You need to be sure to highlight (click on) this layer when you want to apply changes to it (such as moving it. You can move it using the move tool).. and then when you want to apply the layer mask with the white and black brush, be sure to click the white box next to the top photo :). Any changes you make will occur on whatever is highlighted in the layer’s palette. 3. There is a learning curve to using layer masks in a realistic way.. such as when you get to the edges you need to make the brush smaller and that it really helps to lower the opacity of the brush to blend it better. But after a few rounds of practicing you’ll start learning how to do it better and better. If you have any questions, please feel free to ask! -Christine Ann [website] Duluth Photographer Christine Ann Photography Facebook Maternity, newborn, senior, wedding, family, children, portrait photography.