Apply An Action Set And Using Layer Masks In Photoshop
Did you invest in some actions and now are not sure how to use the action in Photoshop?
Read on :).
First install the actions into Photoshop.
Once installed, click on the action set you want to run (you can run the individual action or an entire set – this highlights running a set but running them individually involves the same steps. So, anyway, click the action set, and hit the “play” button at the bottom of the palette.
Step 1. Highlight the action you want to run
Step 2. Hit “play”
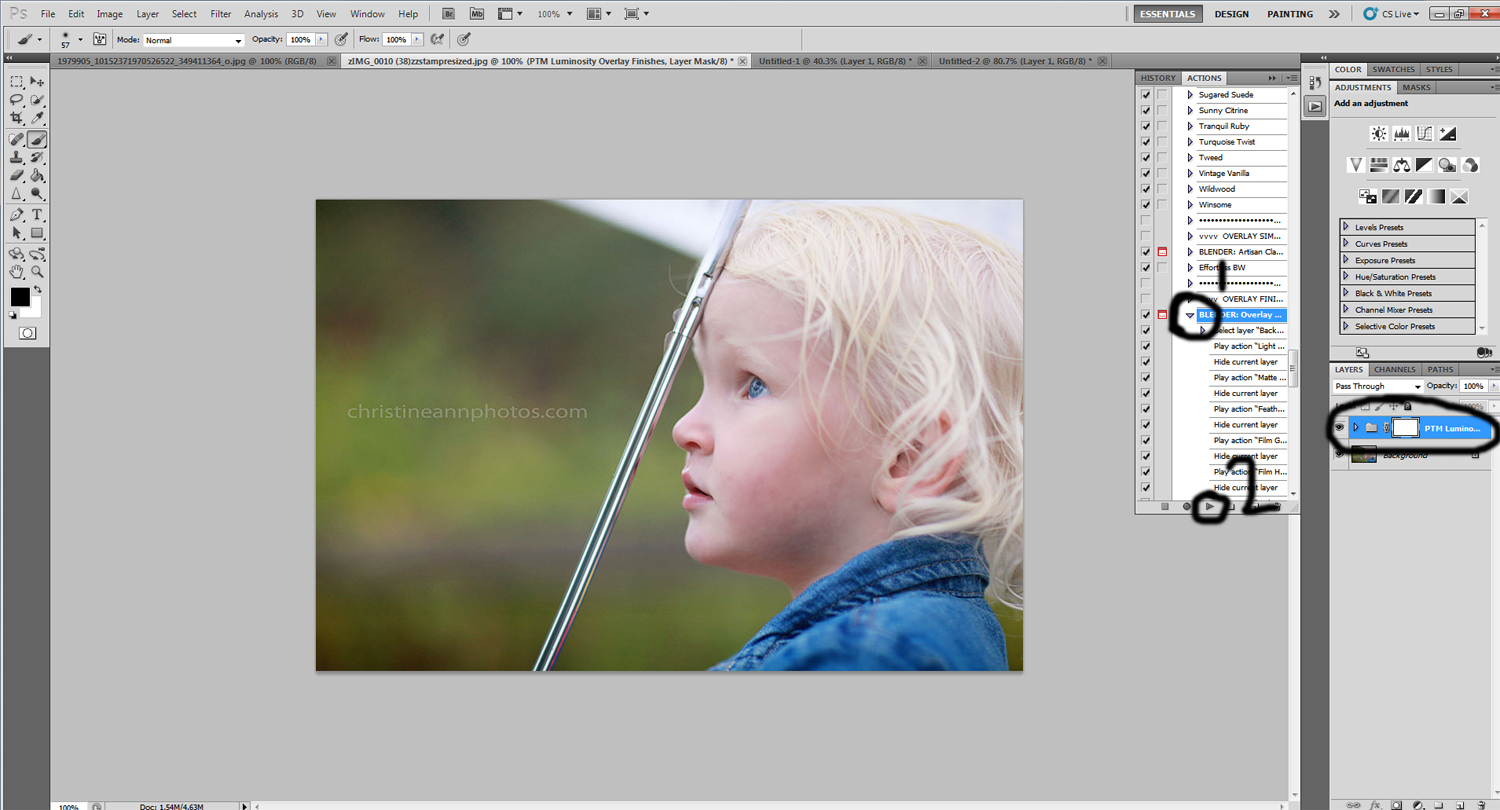
Once you run it, you will see a new icon appear in the layers palette (what is circled on the far right of the screen in the photo above).
_____
Activate Your Action
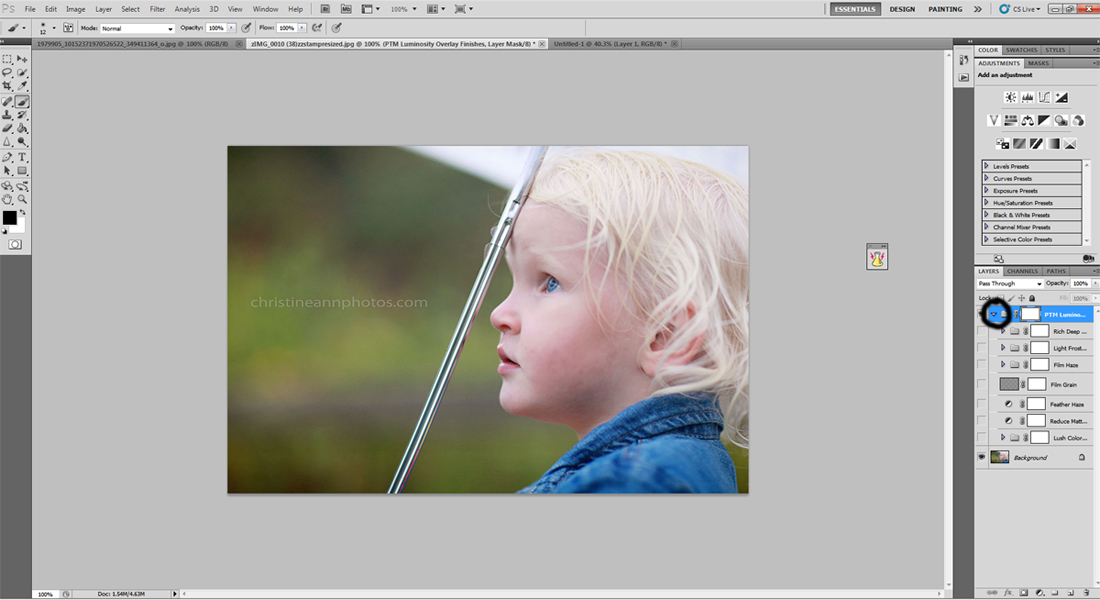
Since this is a set, there are numerous actions you can activate from here, however they are all consolidated into the one folder. To make them all visible just click the arrow next to the folder like this:
_____
Select Your Action
Now there are several actions that you can see but none of them are being applied to the photo (your photo would look awful). Instead, you have to decide which ones you want applied to the photo and click the “box” next to each action. Once you click in the box an eye will appear. The eye means that action is now visible, if there is an empty box/no eye, that action is not applied to the photo.
For this blog post, I will choose “Film Haze” to apply.
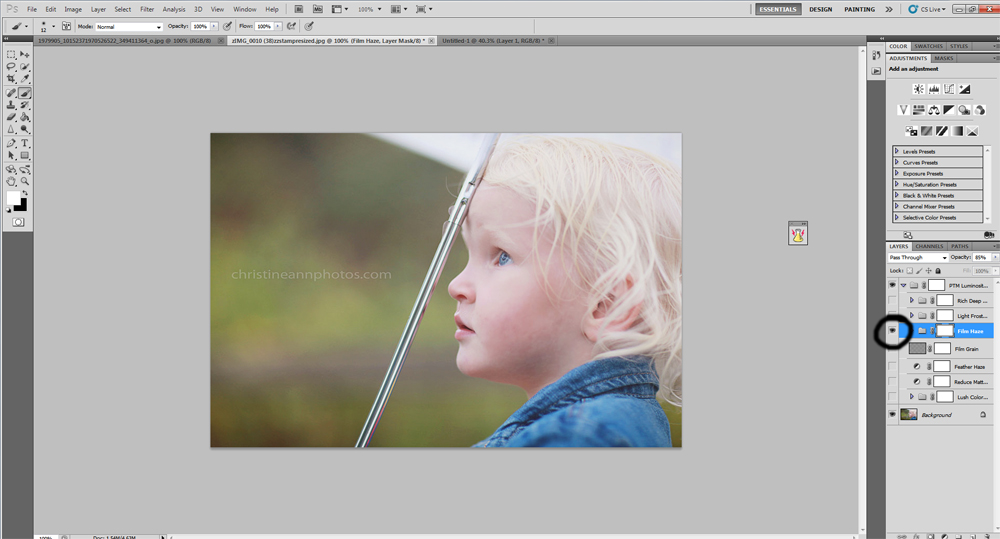
^Click the empty box to make the layer visible – an eye will appear.
_____
Apply Your Action
.. using a white or black paintbrush
Now that your action is visible and ready to be used there are 2 ways to apply it to the photo.
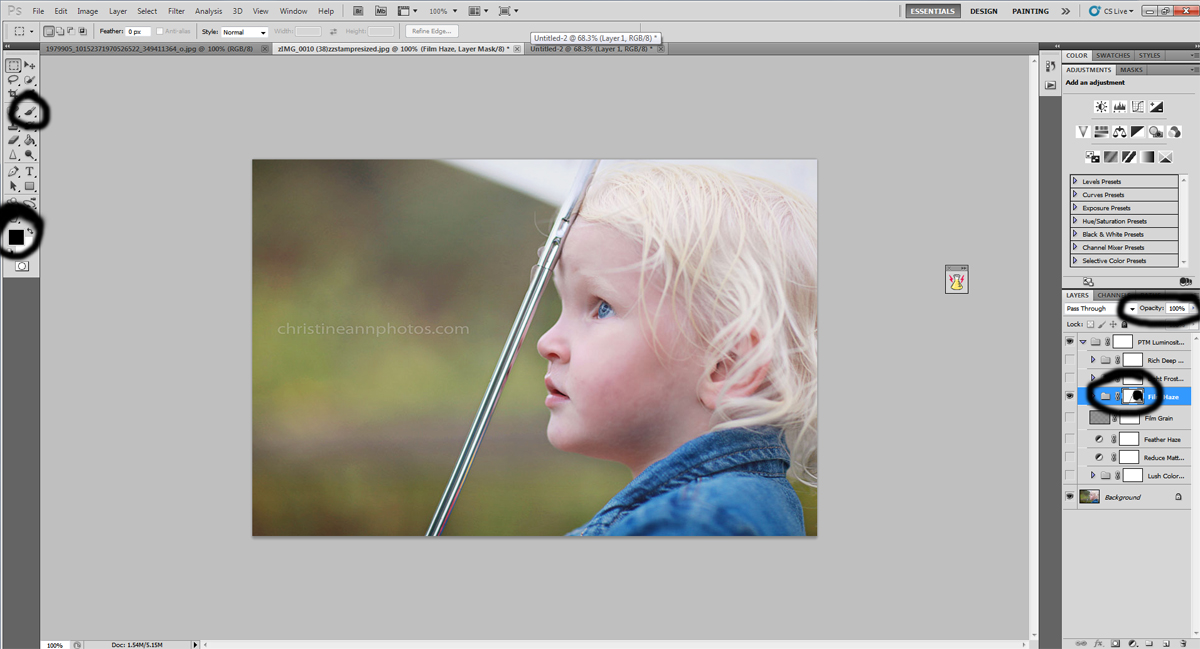
The first way is adjusting the opacity (what is circled in the upper right in the photo below). 0% opacity will make 0% of the action appear, 100% will apply it full force, and 50% is half strength (and so on). Even if the opacity is set to 100%, if the action is a layer mask you still may not see any change in the photo – which brings us to the next way to apply the action tothe photo. Many actions use a layer mask which means you have to “paint” it on (or off). The layer mask will either be black or white.
If the box that appears after you run the action is black, it means you won’t see a change and you will use a white paintbrush to apply the action (turn the paintbrush black to undo the action). If the box turned white it means it was applied to the entire image and you set your paintbrush to black to remove the action from where you do not want it visible. In the photo below, I selected the paintbrush, set it to black, and removed the action at 100% from the umbrella pole and the face and hair. I removed it at 50% from the jean jacket. In the area circled on the bottom right (in the photo below) you can see the pure black is where it is removed at 100% and at the bottom where the jean jacket is it looks grey, because the action is at half strength there.
I hope that helps to explain how to use a layer mask :).
Here is one more photo using an action I have from CoffeShop Blog which uses both white and black layer masks to help drive the point home (It’s done sloppily but just to help make what I did more noticeable
 🙂 ).
🙂 ).
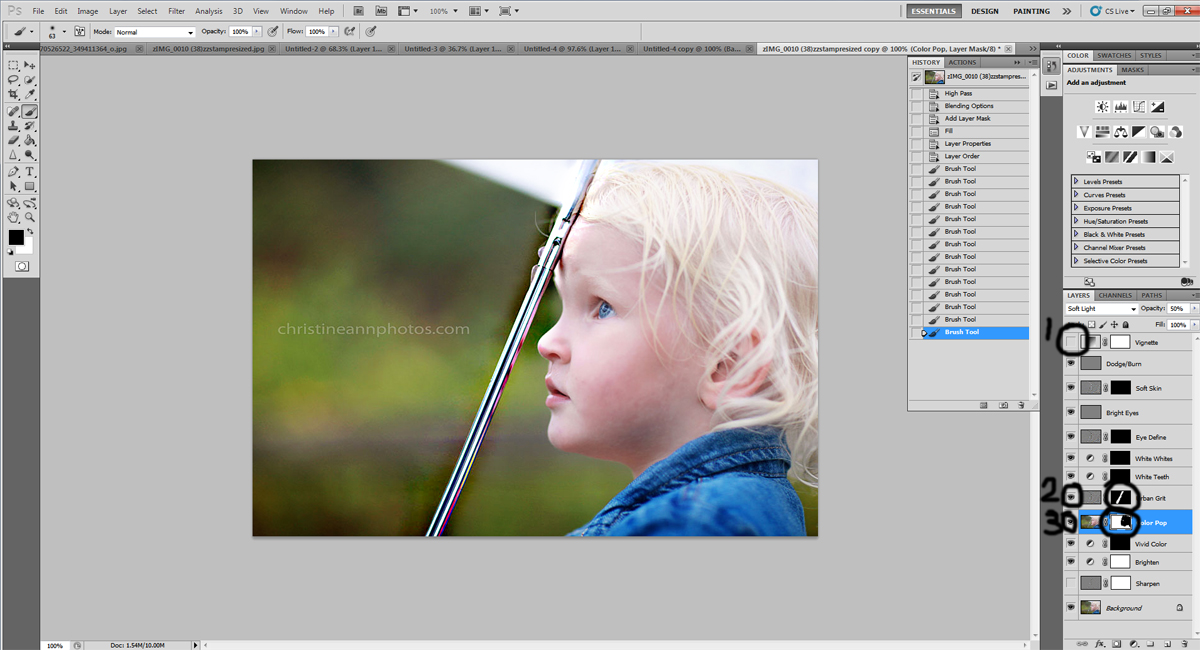
A couple notes about the image:
1. I made the action is called “vignette” – it apllied a vignette to the image and I didn’t like how it looked so I made it invisible (see how there is no “eye” there – I unchecked it). When the action runs it automatically applies to the entire image (because the box is white) at 50%. If the box were black I would have to paint it on with a paintbrush. I also could have just reduced the opacity to 0 to make it invisible or greatly reduced it to make it less noticeable.
2. This layer is called “Urban Grit” – it basically sharpens and increases color wherever it is applied. When I ran the action, the box is black, meaning that it did not apply to the photo.. I had to paint it on with a white paintbrush.. I applied it on to the umbrella bar (you can see how the photo looks different where the umbrella bar is.. that is where I applied that action) – it is not visible anywhere else in the image. If I wanted to remove it I would turn the paintbrush black and paint over it to remove it. If I wanted to reduce the effect I would change the opacity on the paintbrush. If I only wanted to reduce it a little I would make the paintbrush 20% opacity, if I wanted to remove most of it I would turn it to around 80%.
3. The box was white when the action ran so it applied to the entire image. The action is a “color pop” action, which enhances the color wherever applied. I turned the brush black to remove from her face so the color enhanced to all the rest of the image.
If you want to learn how to apply your own layer mask to images to help with editing (you can layer a black and white image on top of a color image and reveal the photo below it to add color to certain spots, do face swaps, change skies, change backgroudns etcetc by layering your photo with whatever you want to add into your photo by using a layer mask – this is a very useful tool to help you with your editing – and extremely easy to do! Read how to do this in my Add a Layer Mask article!
-Christine Ann
