One of the first lenses I invested in is the Canon 50mm 1.8 lens. I do think this is a fantastic lens, especially when compared with the kit lens, and I use it without hesitation.
That said..
I also own a dreamy L lens. (You can see my lens comparison blog post here)
The L lens is amazing but very heavy. When my husband and I decided to go on a vacation backpacking overseas this summer, I hit a crossroads: Do I bring the 50mm 1.8 or the 85mm 1.2?
The 85mm is the superior lens however it is very heavy. However on a vacation I want the best quality.
The solution?
We invested in a 50mm 1.4 lens.
It’s not as nice as the 85mm 1.2 but nicer than the 50mm 1.8 – a great compromise.
The day I got it I was anxious to try it out and see what I thought. I wasn’t sure what to expect, but what I discovered really surprised me.
Based on my one test (I plan to do more!) the 1.4 seems greatly superior to the 1.4!
These are the test shots I did.. Keep in mind I sat at the same spot, used the same camera, with the same settings, with no lens hood and no filter on either lens & none of the photos are edited in any way except the text and size. The only thing that changed is the lens.
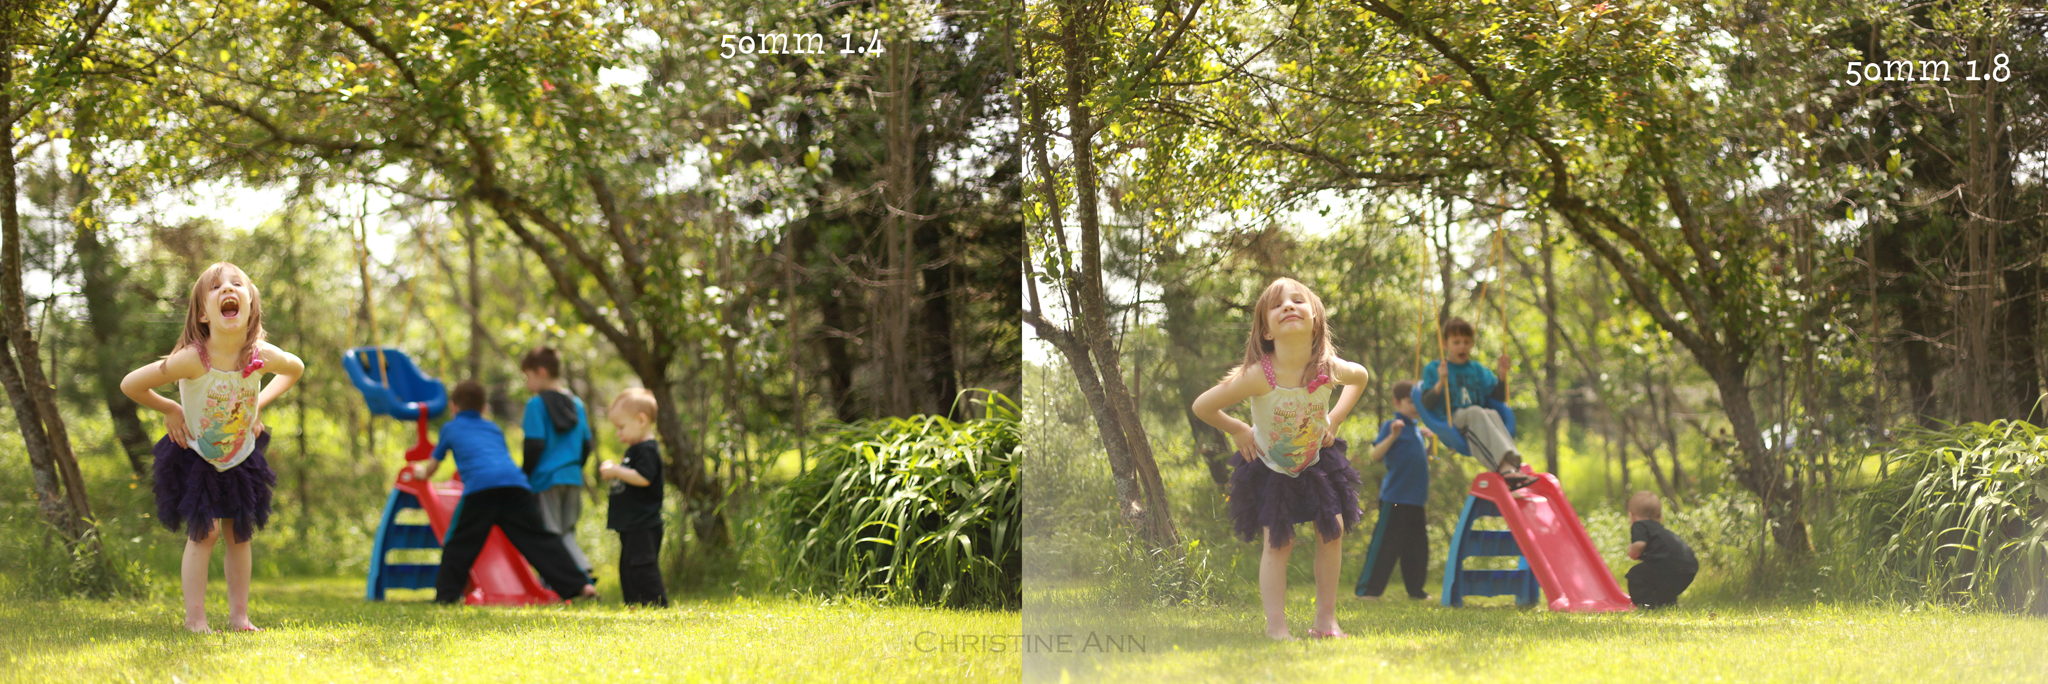
Left side is the 50mm 1.4 and the right side is the 50mm 1.8
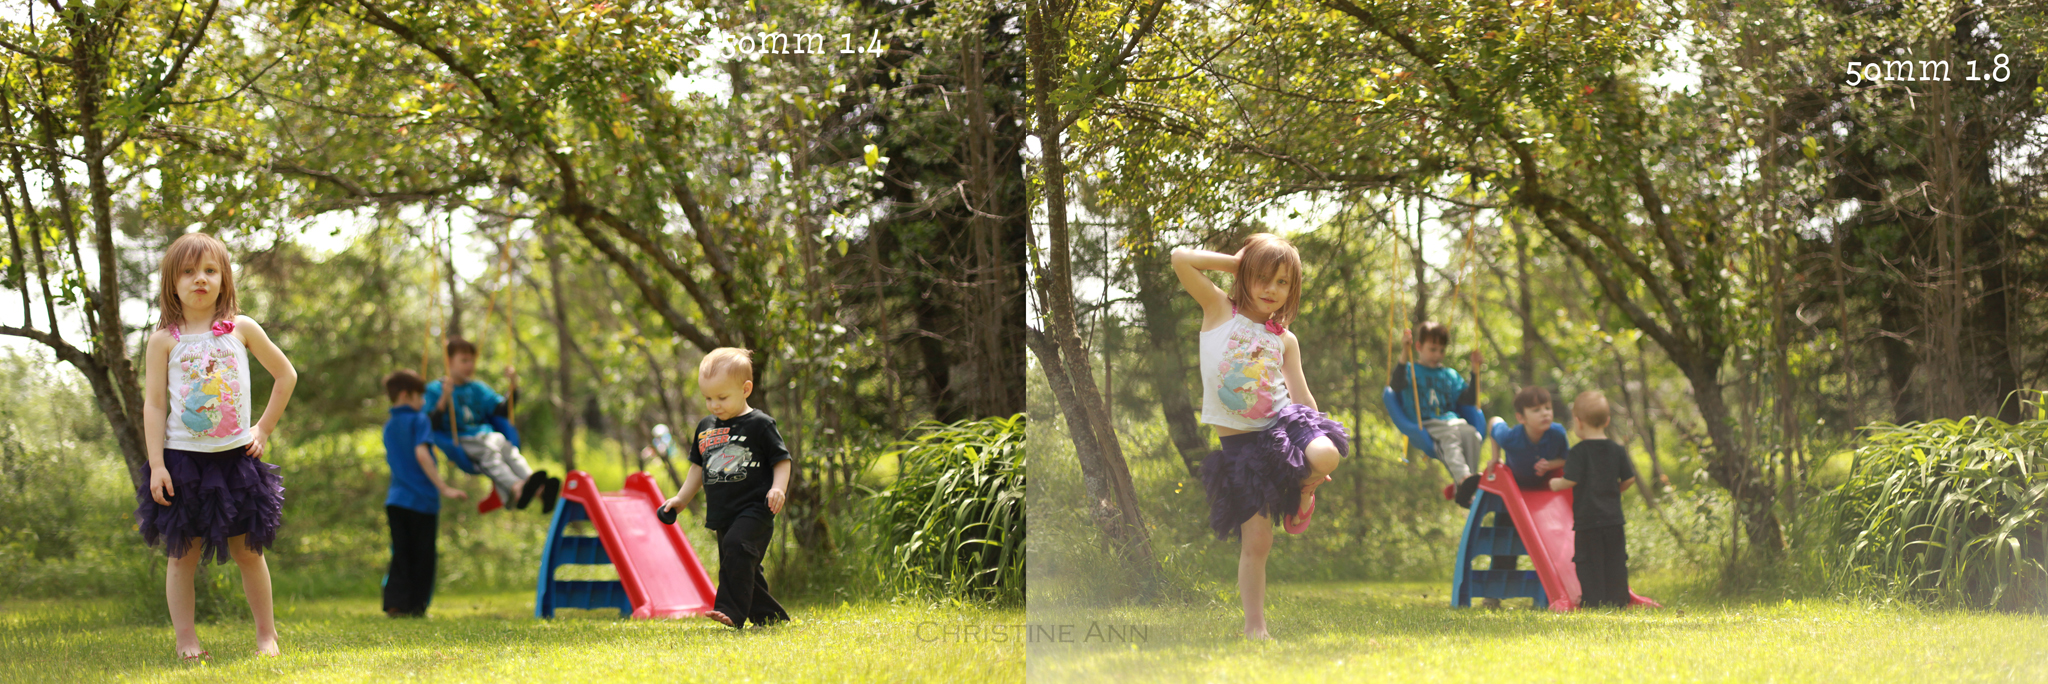
Left side is the 50mm 1.4 and the right side is the 50mm 1.8
So there are my side-by-side image comparisons using 2 different lenses – remember they were taken with all things equal and they are not edited in any way except for adding the text to the image and reducing the size of the image to post online.
If you’re well convinced that you would like a 50mm 1.4, here’s a link to the lens on Amazon.
I will try to do another round at a different location soon!
-Christine Ann
Duluth MN Family Photographer

