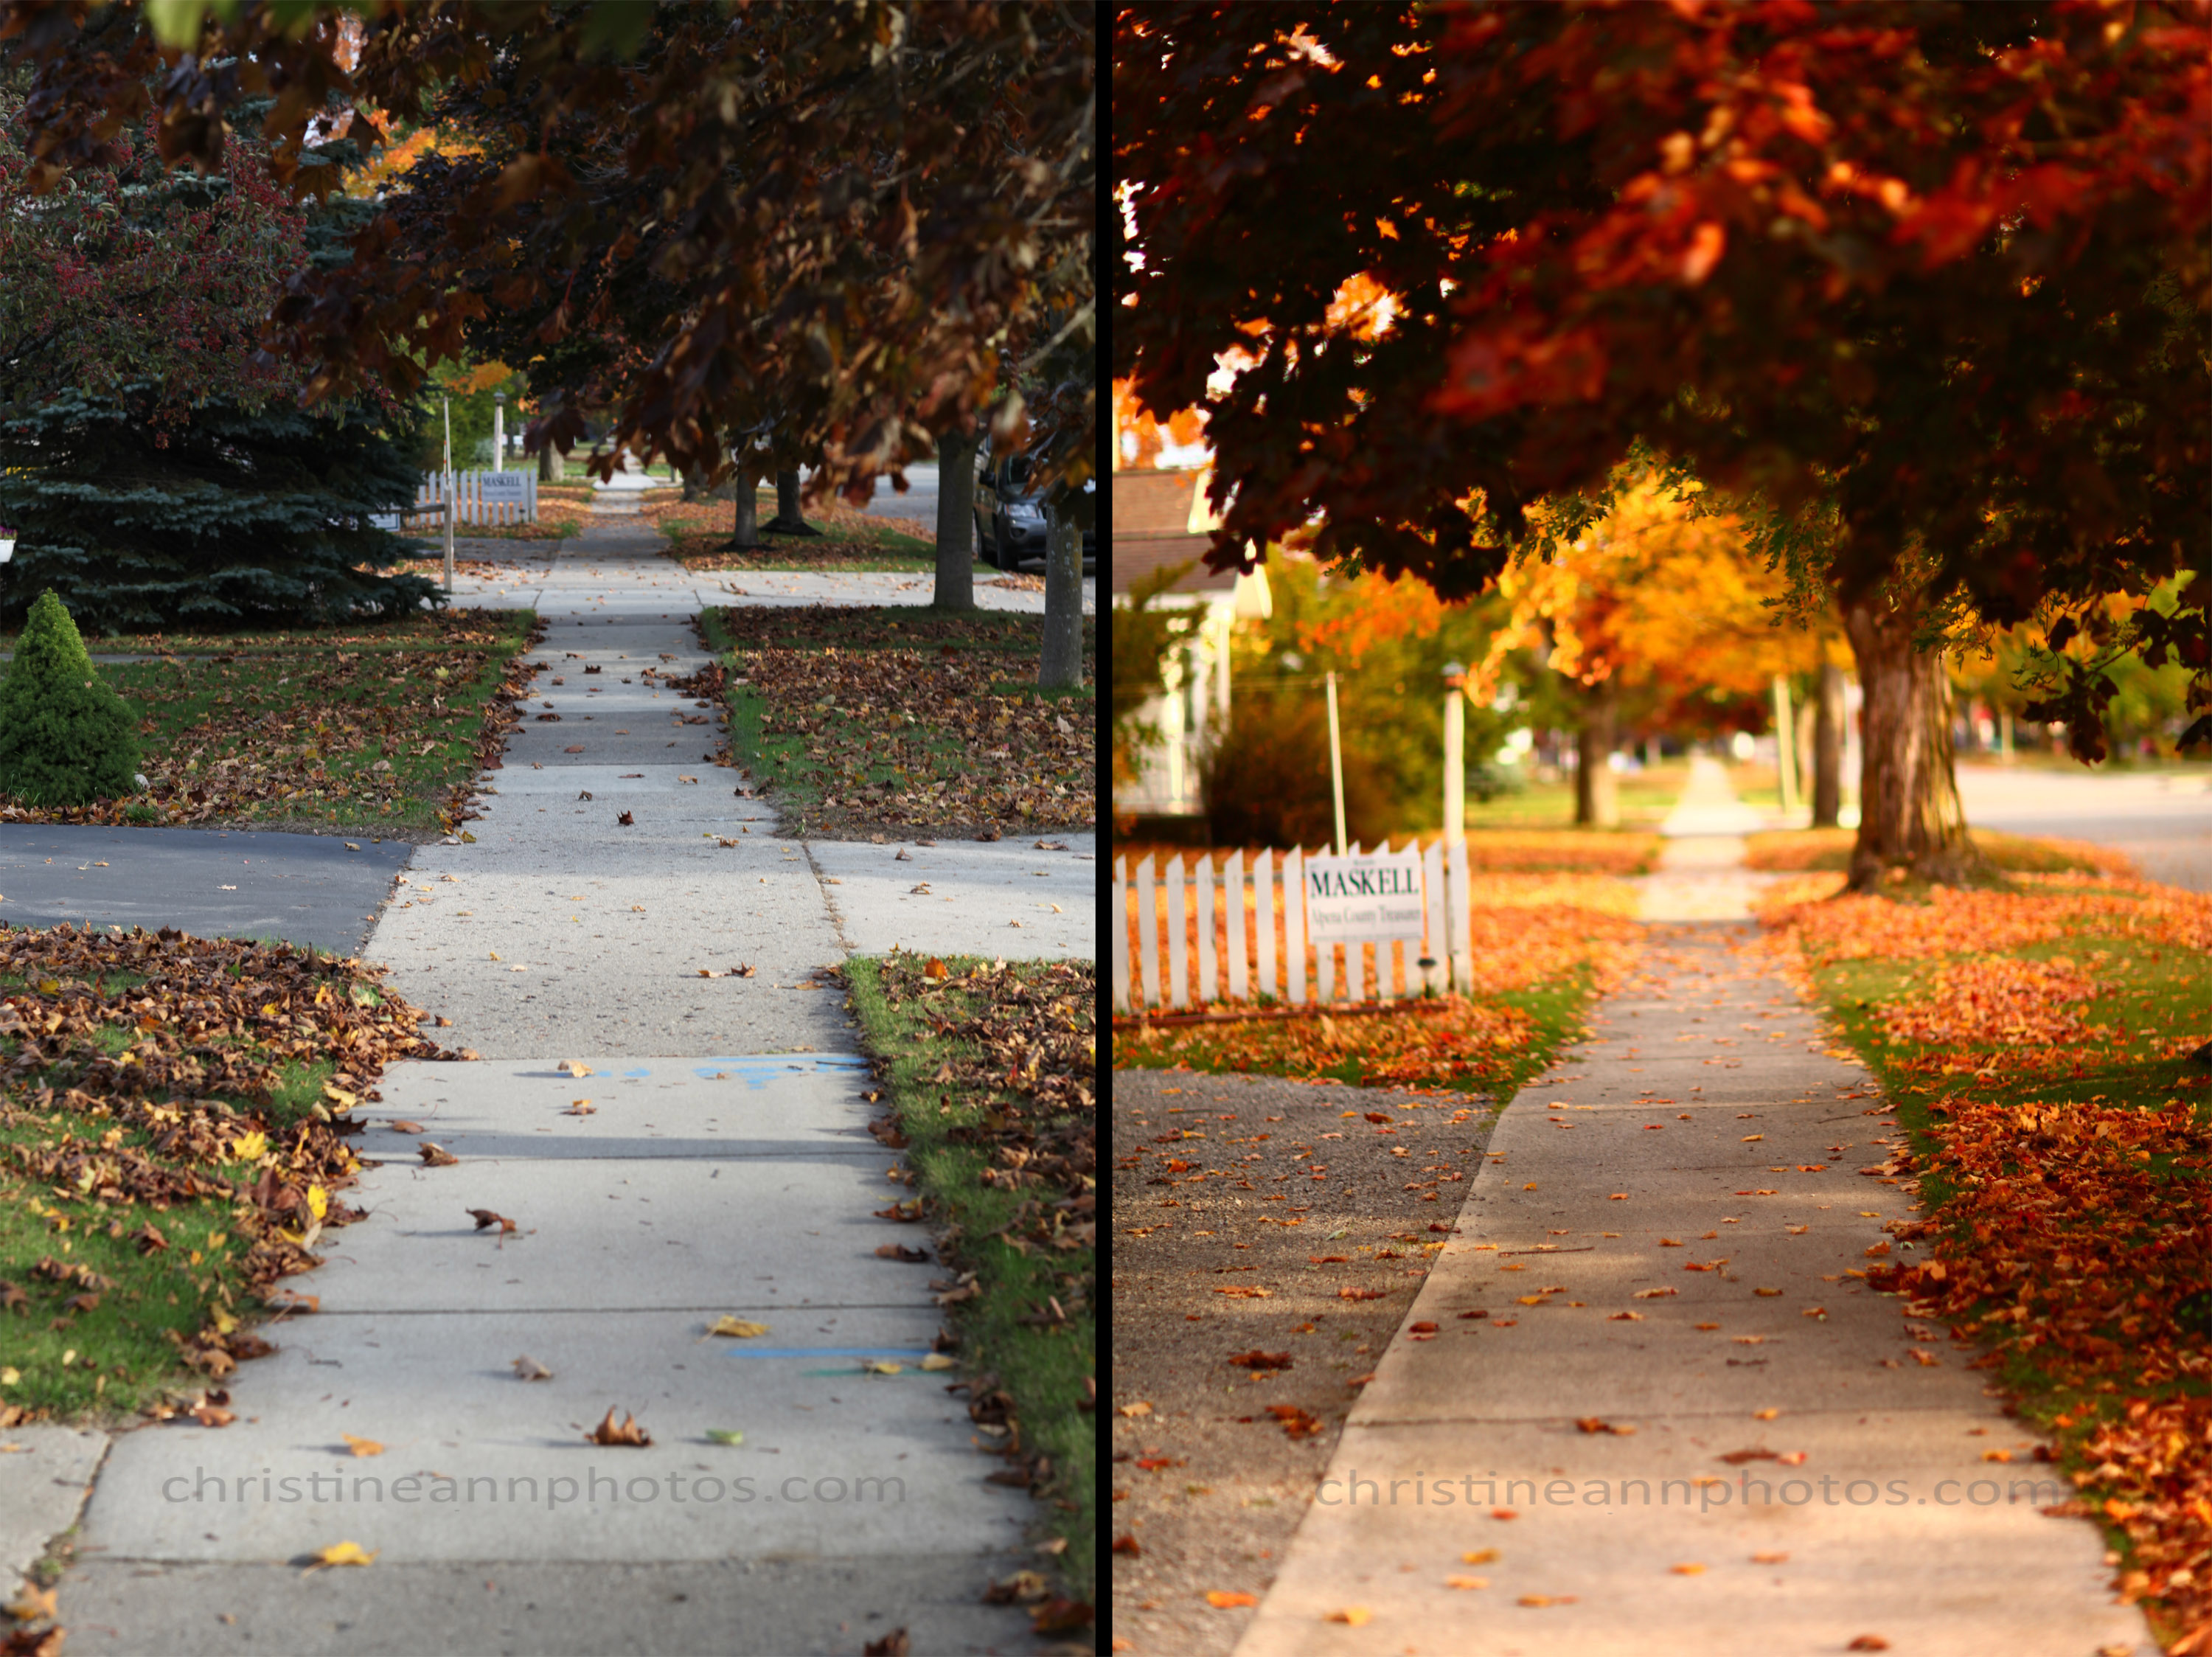
After posting “Why Photographers Hate the Words “Your Camera Takes Such Nice Photos” yesterday I thought I would do another version of it today. Yesterday’s blog was a reference to choosing the angle and background etc, today I want to refer to understanding camera settings. You can do so much in camera! I have a billion examples of auto vs manual and things you can do in M that you cannot do in auto. For example you can capture the slight movement of a dog’s tail to show that it is wagging. You can prevent a photo from blurring when the people in it are moving. You can have a better chance at photos in low lighting. You can insert artistic twists to things by “blowing out” (giving it a really washed out/white look which is fun to do sometimes) or enhancing colors or whatever it is you want to do. In auto mode you just have to hope it works out. In Manual you know you can make it work out! Here is a photo example of auto vs manual. I am not saying the manual version is better (I personally think it is but not everyone would agree.. just a matter of taste) but what I am saying is that you can gain a lot by spending some one on one time with your camera and some tutorials to ensure you get the images to look the way you want them to! Neither of these photos are edited.. both are right out of the camera.
-Christine Ann
Duluth Minnesota Photographer
http://www.christineannphotos.com
“like” me on Facebook 🙂 ! https://www.facebook.com/christineannphotos
