A Beginner’s Tutorial On How To Use Photoshop Layers, Layer Masks, And Bring Back Color To A Black And White Image (All-In-One!) With Image/Screenshot Examples
*Note: This article might look long/hard but it’s because it’s written assuming you know nothing about how to use Photoshop so it’s just very thorough.. this is VERY easy and fast to do!
Many years ago my husband got Photoshop for me. I was super excited.. I opened it up and was so overwhelmed I didn’t open it up again for another year!!!! WHen I did open it up a year later, it was because I had seen an image on Facebook and someone noted on it “Edited with auto color in Photoshop”. “Auto edit???? I can do that!”. And I excitedly opened it back up. Once it was re-opened I started playing around with it more and learning new things about it. I was still very confused about how you could add color to a black and white image and my husband explained it like this: Imagine you have 2 photographs.. a color photograph, and a black and white version of the exact same photograph. Imagine you put the black and white photograph on top of the color photograph and then take an eraser and erase away parts of the black and white image to reveal the color beneath it. ta-da! Like magic, I now understood the concept of Photoshop layering! The very first thing I learned how to do with layers was add a pop of color to a black and white image. You can do it as I stated above (layer a bw image on top of a color image and use the eraser tool to erase away the bw image to reveal color) but the issue with doing it that way is.. what if you make a mistake? What if you erase away too much? You cannot go back to add the black and white back. For that reason I want to teach everyone how to use a layer mask. With a layer mask (VERY easy to do!!!!) you can remove parts of the top layer AND bring them back again! And you can use it for endless different projects beyond a selective coloring/color pop image! I’m a very visual learner so that’s how I like to explain things as well.
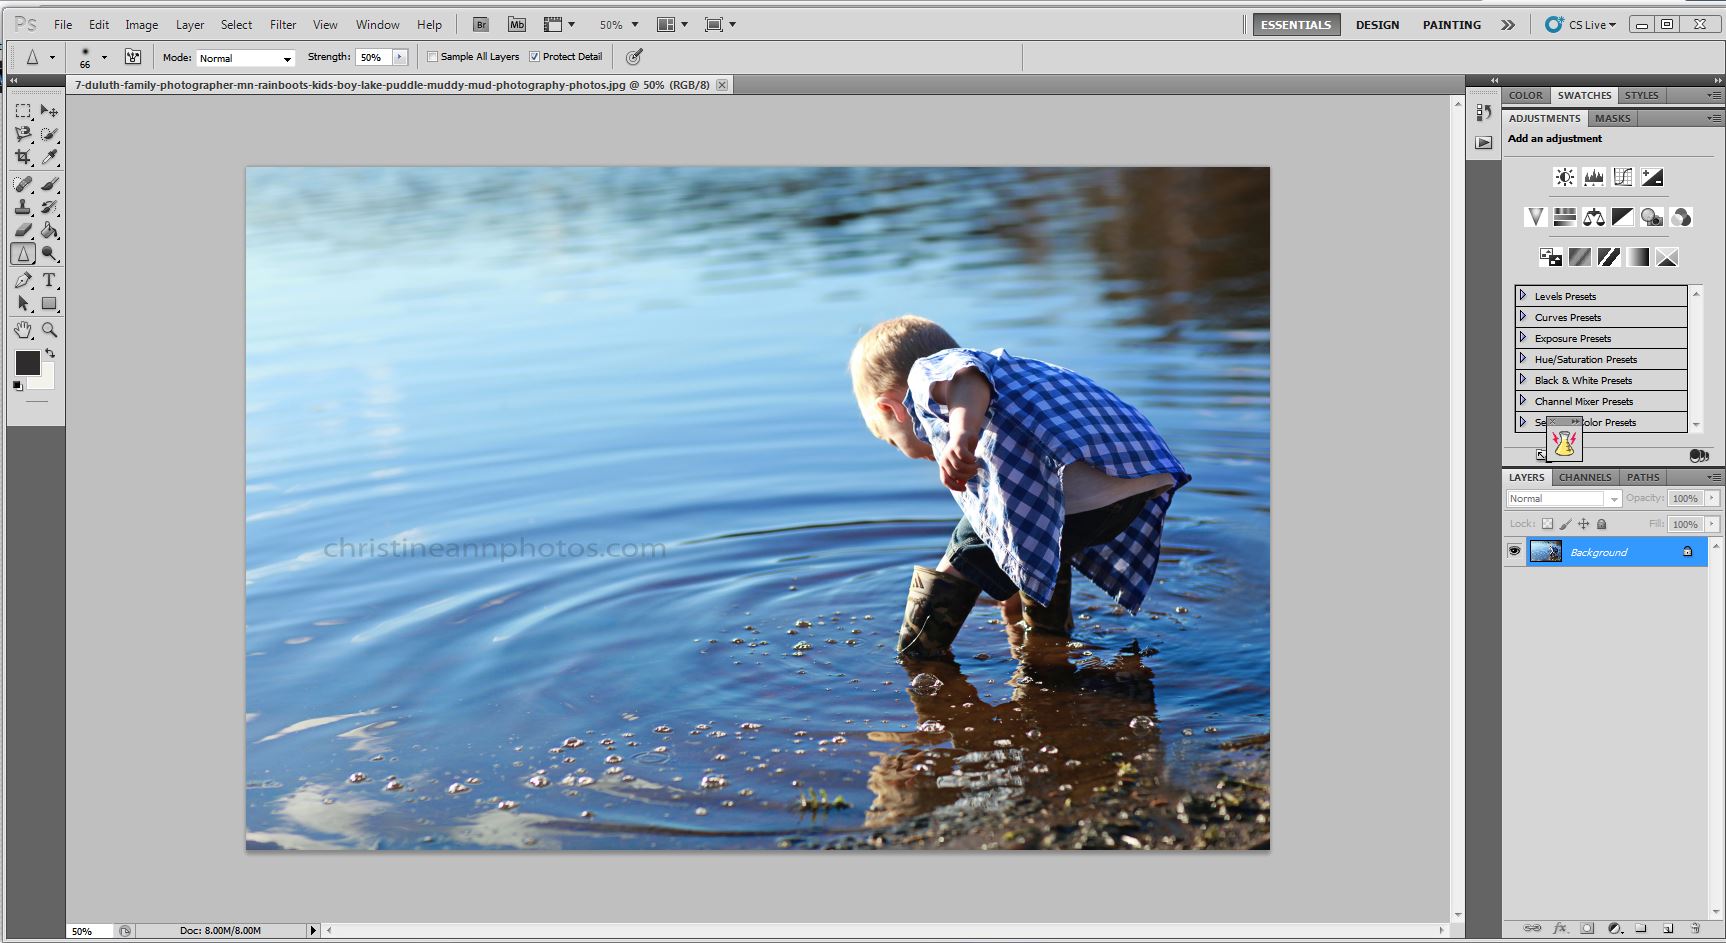
^STEP ONE: Open The Image
We’ll start with what your image looks like when you open it in Photoshop:
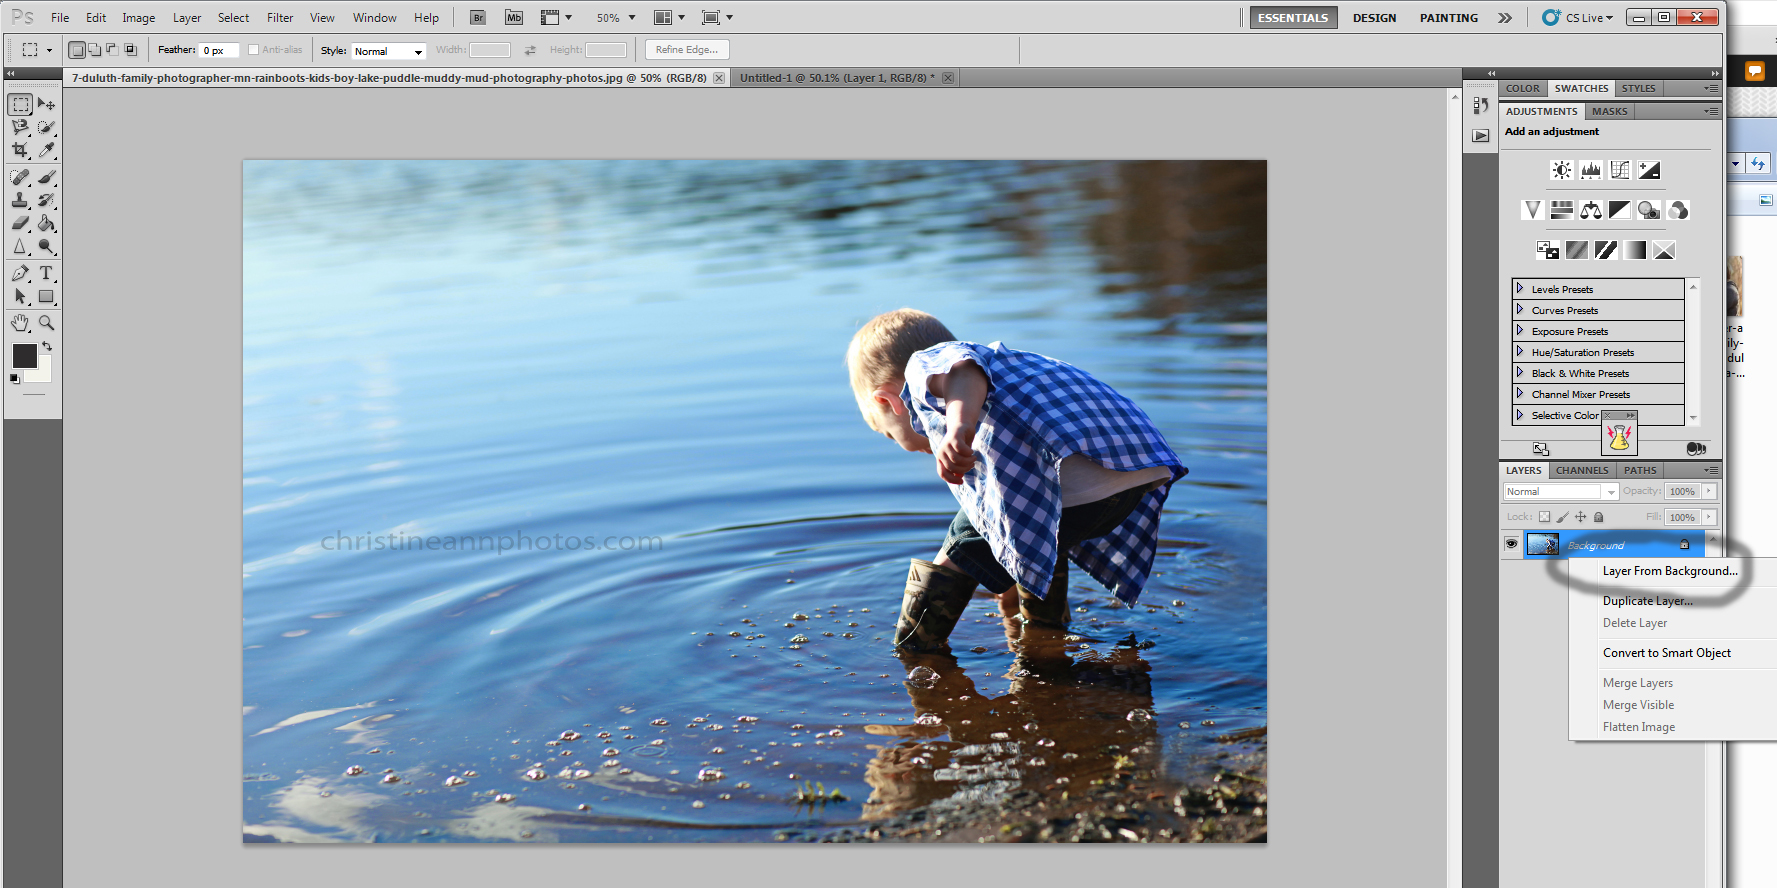
^STEP 2: Duplicate Layer
This is the step where you layer 2 images on top of one another.. do do this by going to the layers palette, right click on your layer, and select “duplicate layer”. You can also simply go to your menu on top of the screen and click “Layer>New>Layer From Background”.
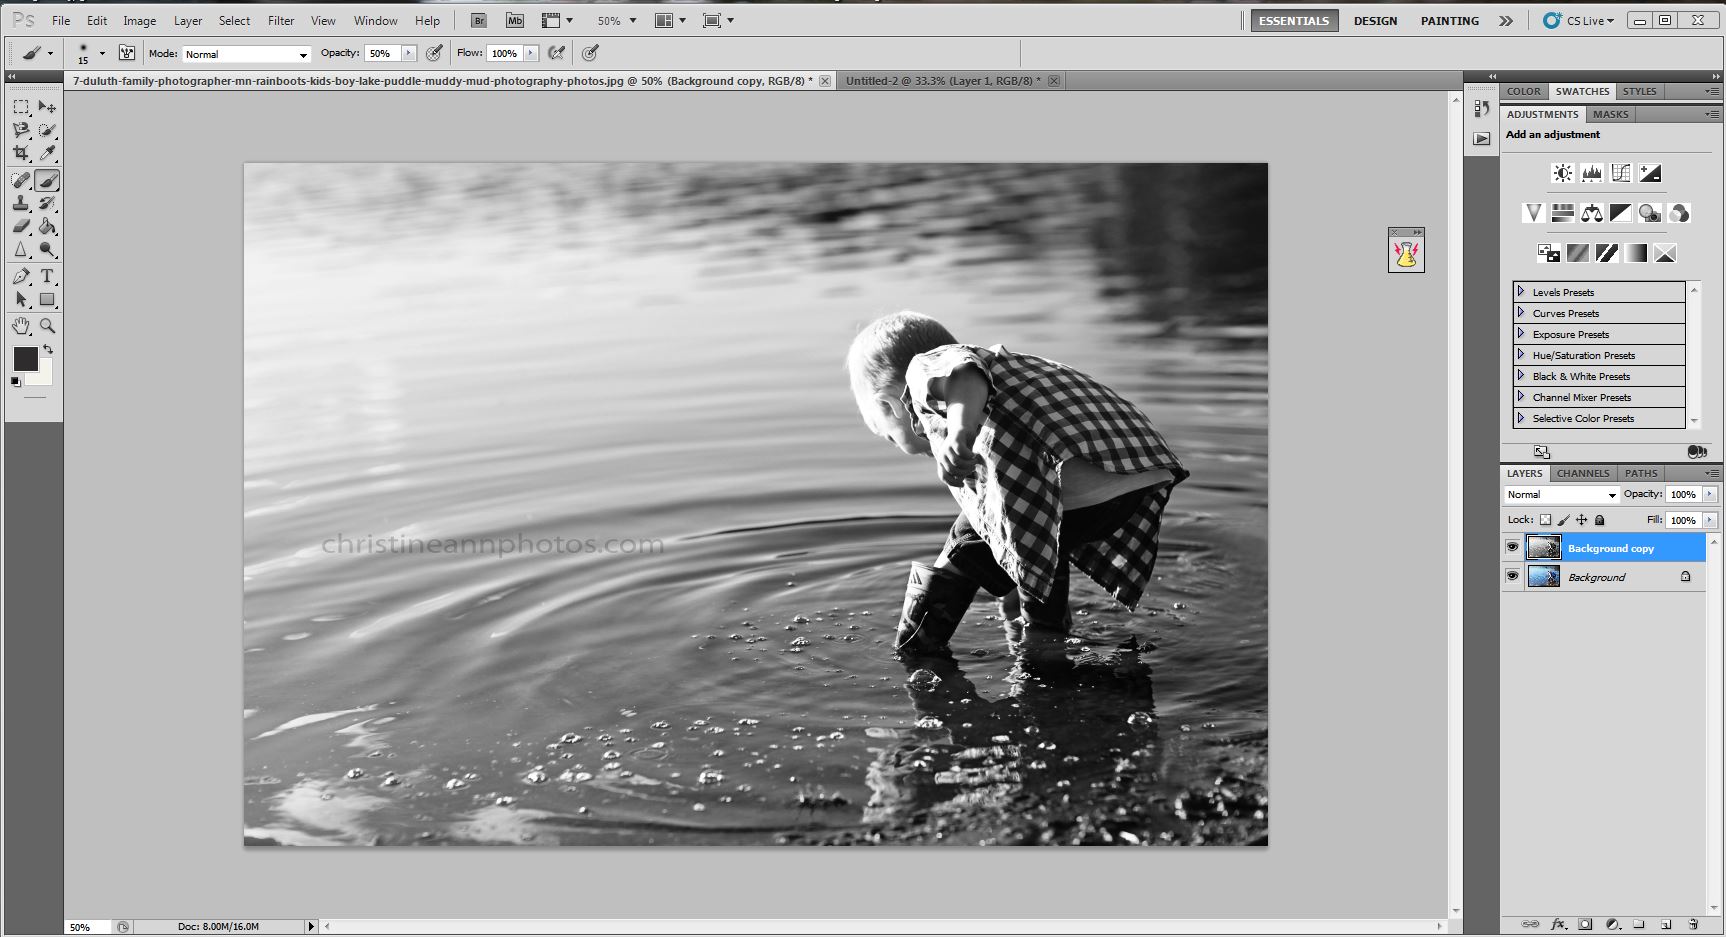
^STEP 3: Turn The Top Layer Black And White
Make sure your top layer is highlighted in the layers palette and then turn your image black and white :). You now have a black and white image on top, and a color image on bottom.

^STEP 4: Add A Layer Mask
This is where you add the layer mask I was mentioning earlier.. this mask will allow you to remove parts of the black and white image as well as bring back parts of the black and white image.
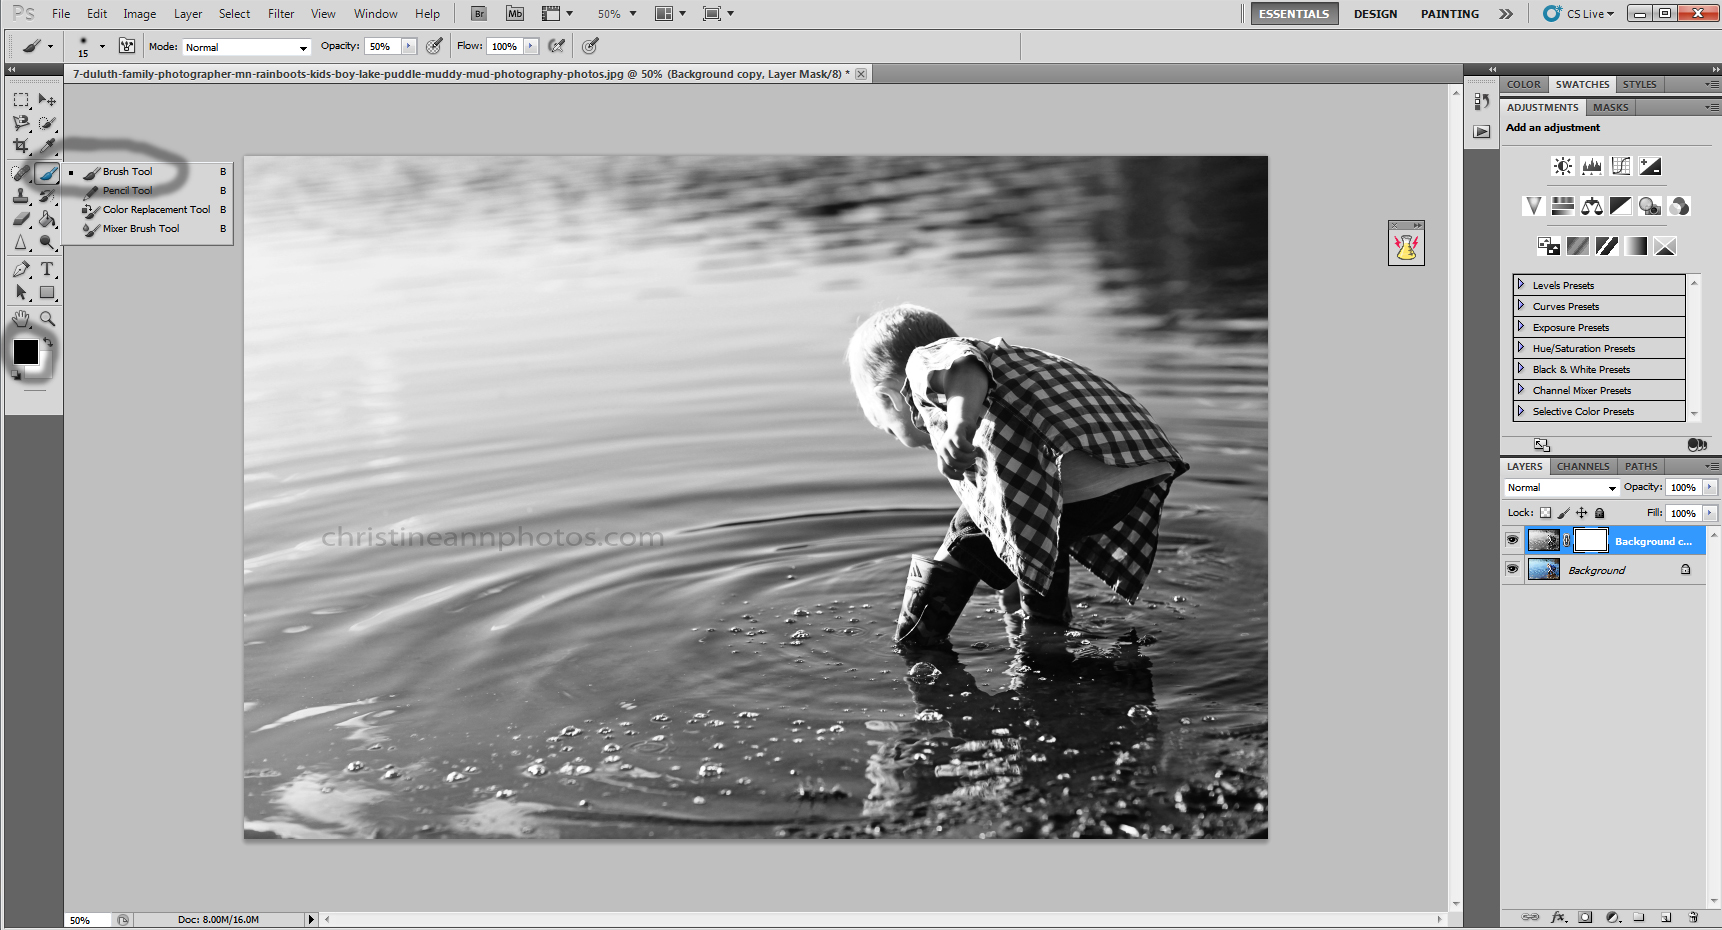
^STEP 5: Select A Black Paintbrush
Your layers palette should now look like this.. the white box next to your bw image is the layer mask. You will use the black paintbrush to remove the black and white image, and the white paintbrush to bring back the black and white image.
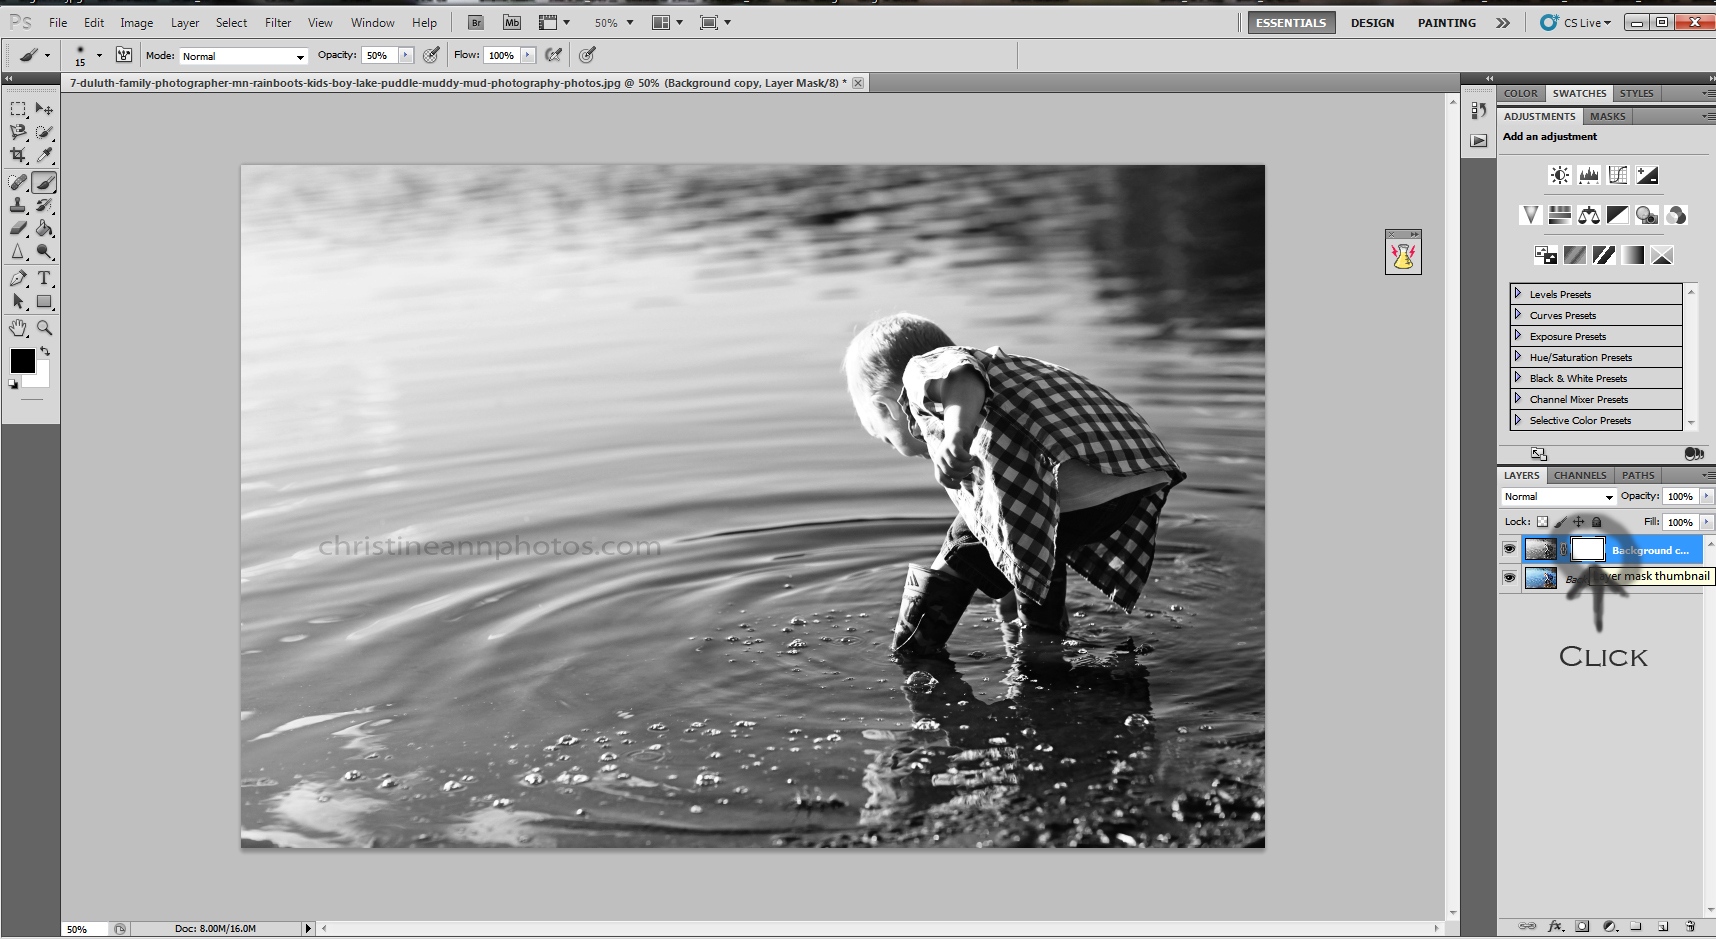
^STEP 6: Verify Your Layer Mask Is Selected
If you have anything other than the layer mask selected, this will not work and the paintbrush will work normally (adding a white or black streak on the image).
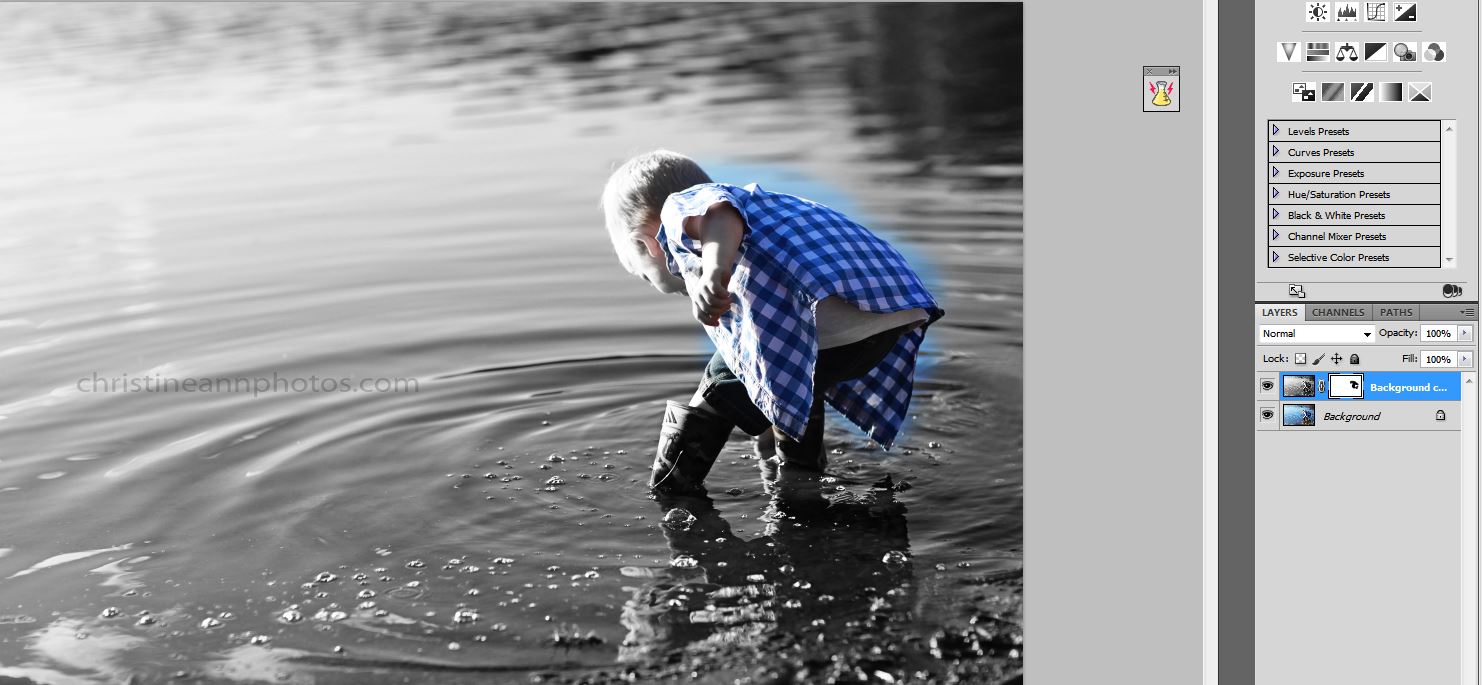
^STEP 7: Paint Anywhere You’d Like To Add Color Take your paintbrush and paint anywhere you’d like to add color! It’s that easy! If you run over the lines, it’s okay.. you can turn it back to black and white which we address in the next step.
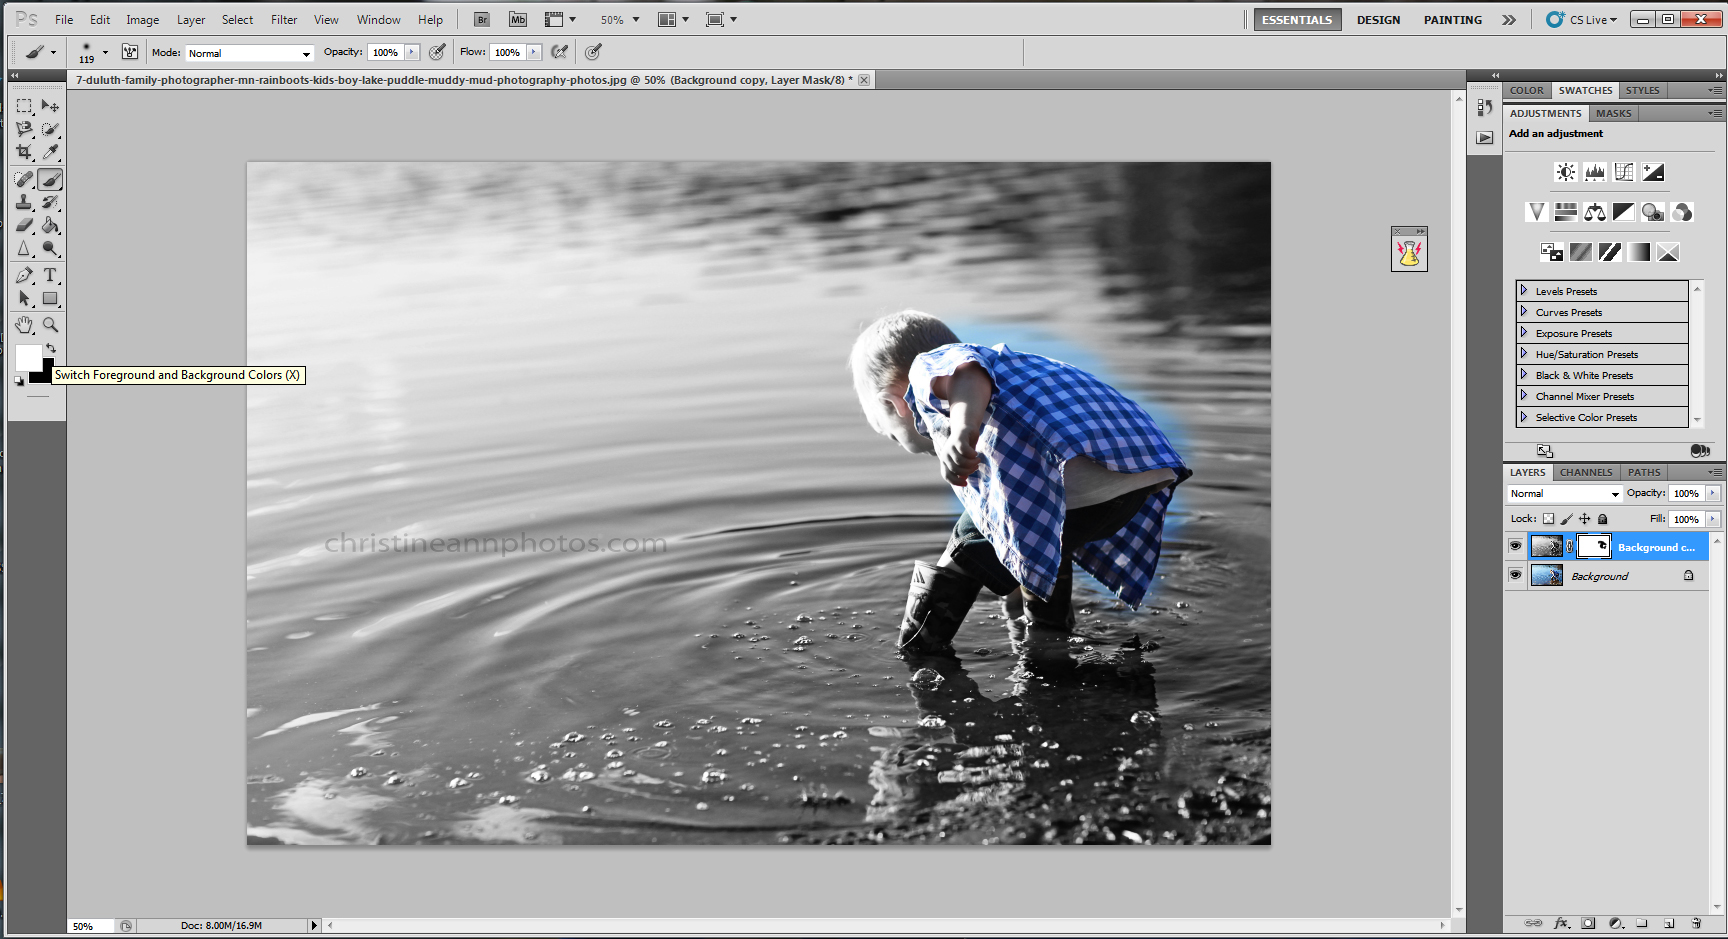
STEP 8: Select The White Paintbrush To Bring Back The Black And White Image
Change the color of your paintbrush to white and paint over anywhere you did not want to bring the color back. It helps to scroll in very close to the image, use a brush that isn’t 100% soft, and make the edges as clean as possible. It looks very sloppy when the color runs outside the lines.
^The image after cleaning it up with the white paintbrush (again verify that your layer mask is clicked on!).

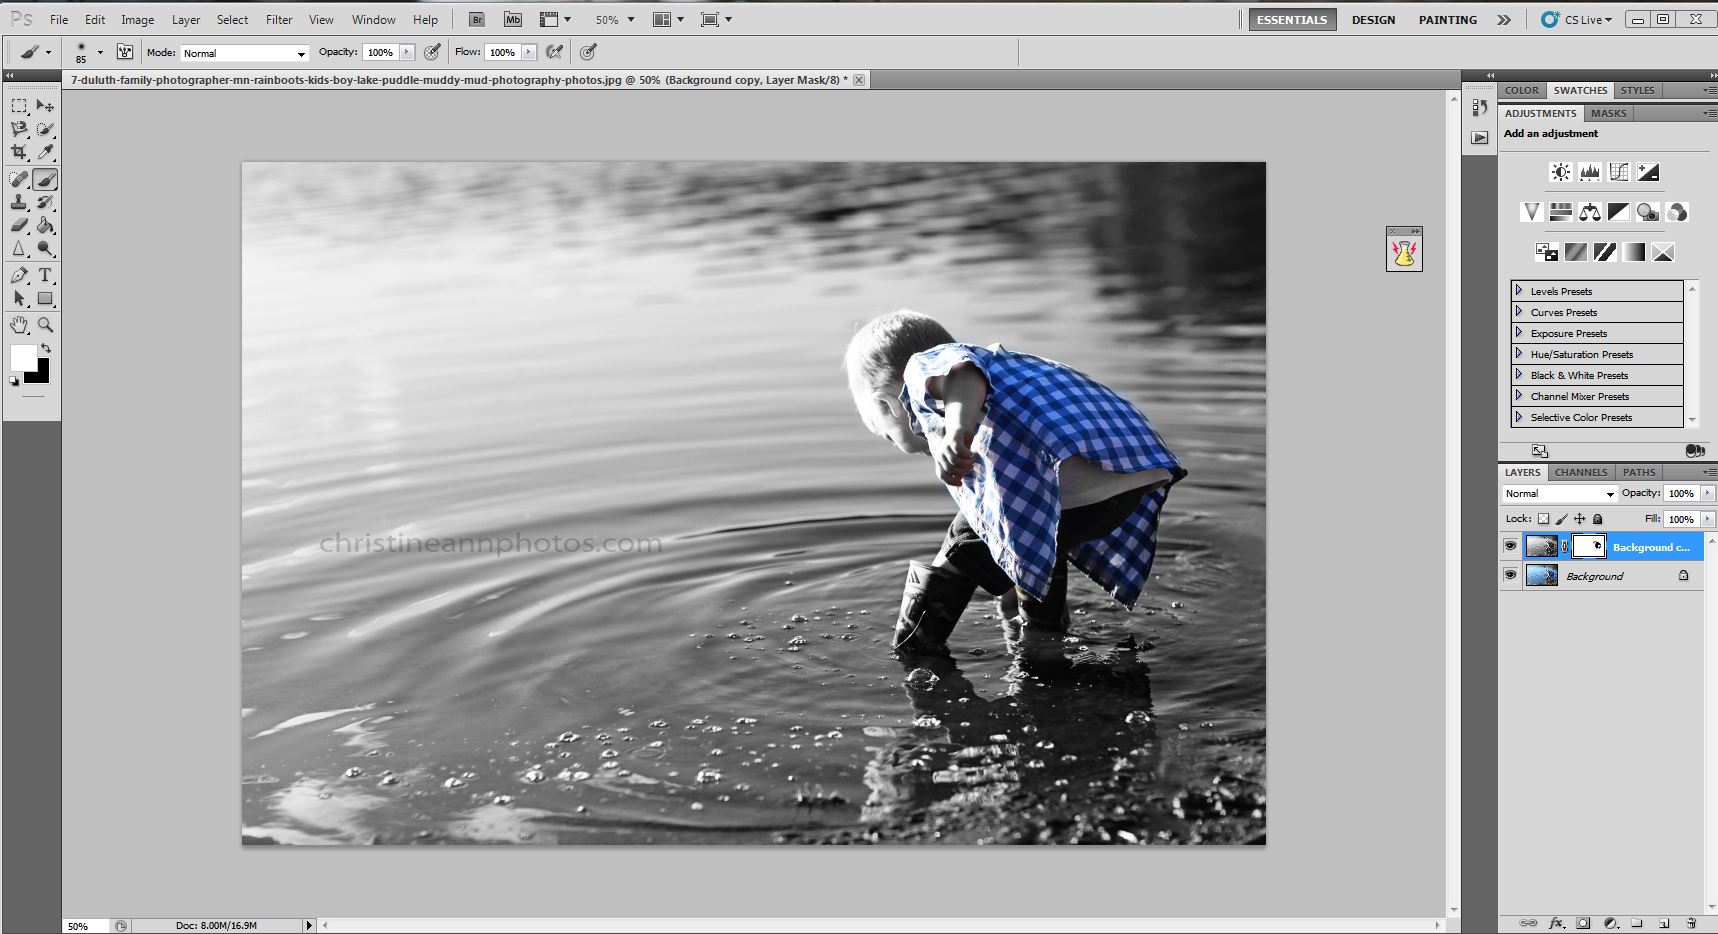
^STEP 9: (Optional Step): Reduce The Opacity/Strength Of The Colors
I always feel that bringing back the full strength of color in an image is just too intense/harsh. For this reason I like to make it sort of a blend of half black and white/half color.. this tones down the coloring a lot and makes it look much more gentle and blends better. (This is just my opinion and what you like may be different! I compare a full strength color pop image to a partial strength color pop image here if you’d like to compare for yourself).

^This is the image with the coloring reduced by 50%.. it blends much better.
I’d like to make a quite note that the above images are not ones that I would choose to do.. They are only edited this way for the purposes of this article. If I brought back color to anything I would choose the boots but for the purposes of this article I wanted to choose something that was easy to see and overall I just prefer this photo in color :).
I really hope this helps you all learn some more about how to use layers in Photoshop and how to add color to a black and white image!
-Christine Ann


