Comparing 50mm 1.8 Lens to 50mm 1.4 Lens With Side-By-Side Images With Same Settings

One of the first lenses I invested in is the Canon 50mm 1.8 lens. I do think this is a fantastic lens, especially when compared with the kit lens, and I use it without hesitation.
That said..
I also own a dreamy L lens. (You can see my lens comparison blog post here)

The L lens is amazing but very heavy. When my husband and I decided to go on a vacation backpacking overseas this summer, I hit a crossroads: Do I bring the 50mm 1.8 or the 85mm 1.2?

The 85mm is the superior lens however it is very heavy. However on a vacation I want the best quality.

The solution?

We invested in a 50mm 1.4 lens.

It’s not as nice as the 85mm 1.2 but nicer than the 50mm 1.8 – a great compromise.

The day I got it I was anxious to try it out and see what I thought. I wasn’t sure what to expect, but what I discovered really surprised me.

Based on my one test (I plan to do more!) the 1.4 seems greatly superior to the 1.4!

These are the test shots I did.. Keep in mind I sat at the same spot, used the same camera, with the same settings, with no lens hood and no filter on either lens & none of the photos are edited in any way except the text and size.  The only thing that changed is the lens.

Canon lens comparison of the 50mm 1.8 and 1.4 prime lenses

Left side is the 50mm 1.4 and the right side is the 50mm 1.8

Comparison of 50mm 1.8 and 50 mm 1.4 lenses

Left side is the 50mm 1.4 and the right side is the 50mm 1.8

So there are my side-by-side image comparisons using 2 different lenses – remember they were taken with all things equal and they are not edited in any way except for adding the text to the image and reducing the size of the image to post online.

If you’re well convinced that you would like a 50mm 1.4, here’s a link to the lens on Amazon.

I will try to do another round at a different location soon!

-Christine Ann
Duluth MN Family Photographer

Photo Comparisons of the 50mm 1.8 and the 85mm 1.2 Lens

Awhile back I did a comparison of lenses.  When I did the comparison I honestly had no idea what the results would be but I really wanted to know how much the lens matter.  When I did my test I concluded that a better lens on a crop sensor body makes a big impact, but a cheaper lens on a full frame sensor doesn’t have a lot of difference between it and a nicer lens.  Like.. my crop sensor + nice lens photos were similar to my full frame sensor + nice lens photos.
Then one night I was taking some photos and I started on my 50 then switched to the 85.  When I went to cull the photos, I could noticably tell when I switched lenses so now I am coming to realize that the lens does make a noticeable difference.  Although, that said, I still fell confident and comfortable using my 50mm.. so I don’t think my photos are doomed or anything if I use it ;).
Anyway I just thought I would show the photo comparison from 50mm to 85mm so you can see what I mean!

So this is where I noticed the quality difference.. on the top is the 50mm and on the bottom is the 85mm.  These are SOOC.. I do think I could edit the one on the top to  look a little more 3D and give it more pow but SOOC you can tell that the 85 has the advantage.

85mm 1.2 vs 50mm 1.8 image comparison
_____

Now these next photos (below) are both from the 50 MM.  It’s the same photo.  The photo on the top is SOOC and the photo on the bottom is edited.  The photo on the very bottom (third one down) is from the 85mm however, it has an advantage/difference because it was shot at f/2.2 and these were shot at f/3.2.  So while it does have more bokeh, you need to take that into account :).

85mm 1.2 vs 50mm 1.8 image comparison
{The above photos are from the 50mm, taken at f/3.2 with unedited and edited examples and below is a similar angle from the 85mm taken at f/2.2}.
85mm 1.2 vs 50mm 1.8 image comparison
^85mm SOOC.

So there you have it.  My conclusions?  The 85mm 1.2 is better.. (I should dang well hope so for the massive price difference) ;).  BUT the 50mm is still pretty amazing and doesn’t embarrass side-by-side comparisons.  If the lens were horrible or significantly inferior, it would be much more obvious.. like in the blog post I link to earlier in the page.. when you compare the kit lens to even the 50mm, it doesn’t stand a chance.  The kit lens is hands-down awful and it is very obvious when you compare the photos (noteL  if you are shooting with the kit lens – the lens that came with your camera – quickly invest in the 50mm 1.8!).  Even though I have an L lens at my disposal I don’t hesitate to use my 50mm when necessary.  I do think the difference between lenses is a lot less noticeable on a full frame sensor, though, and that is important to note.  On a crop sensor the difference between lenses is much  more obvious (these were all taken on a full frame sensor).  So, to reiterate, if you are on a crop sensor, investing in a nicer lens will have more impact for you!  However, you can and should be able to get great photos off your 50mm on a crop sensor too.  I get much better photos off my T2i (crop sensor camera) + 50mm lens now than I did 2 years ago.. the equipment is the same but I just know a lot more now and can use them better.

At the end of the day you can have the best or worst equipment but if you know how to use them (or don’t know how to use them) the equipment won’t do much for you.  I remember the day I got my full frame sensor camera and while I did notice a change in quality, I was disappointed that my photos weren’t instantly and magically like the esteemed photographers whom I so admire.  That takes a lot of time and lot of practice to get to.. there are 5 million things that go into a great photo and equipment is a mere fraction of the equation.  (That was a disappointing realization, haha, but I am proud that when I produce great photos it’s because of my knowledge and not my camera and makes me admire talented photographers that much more 🙂 ).

Anyway, I did most of these “sleeping toddler” photos on the 50mm.  If you’d like to see the full blog post click here.  All of them except the last 2 are from the 50mm.  You should be able to get great photos on your 50 and if you aren’t, it isn’t the lens, my friends.  A nice lens is always nice to have and I strongly believe in giving your photos every edge possible, especially  if you are a professional who charges people for them.  So my advice is work towards getting a nice lens but in the mean time, it isn’t essential to have one.  Keep learning, growing, practicing, and doing what you can with what you have.. you’ll keep improving and gain knowledge so that when you do get the equipment you want, you will be able to make the most of it.  I’ve had my L lens for almost 2 years and I’m just recently starting to get where I’ve wanted to be since I started on my photography journey!

Welp I am stepping off the soapbox now!  haha.  I hope this blog post helps people to decide if they want to invest in a more expensive lens or not!

-Christine Ann
Duluth Family Photographer

Does Resampling / Resizing An Image Affect Its Quality? [With Image Examples & Free Actions].

The question was recently asked – does reducing the size of an image affect its quality? I couldn’t find anything on the internet with image examples (I’m sure it exists somewhere in the depths of the internet; I just couldn’t find it!) so I thought I would make my own so we can see for ourselves what happens when you reduce the size of an image (****I need to disclaimer here that technically when you “reduce the size of an image” to make it smaller for contest submissions or website submissions, you are physically changing the number of pixels in your image (the Pixel Dimensions) and this is called resampling.. resizing is something different and has more to do with printing and the document size than the [pixel] size of your photo, but for all intents and purposes, I’ll speak colloquially, and most people just say resizing when they mean reduce the pixel size). I will upload a full res image, along with 3 additional images which have been reduced in size. Perhaps you already know what happens to reduced images and are about to click that X on the top of the screen – instead, you may want to consider scrolling to the bottom of the page where some nice, free resize/sharpen actions lurk :).

Anyway, the best way to compare each of these photos is to open a new tab for each photo (to do this you can hoover the mouse over the photo and click the scroll wheel or you can right click and select “open in a new tab”). By the end of the comparison you should have 5 new tabs in a row starting with high res and moving towards smaller res. When you get to the last 2 images the photos appear smaller.. to see how they look you may need to zoom in. To do this hold down the “control” key on your keyboard and then scroll your mouse wheel up to zoom in (and then down to zoom back out).

Compare full resolution image to lower resolution images does making it smaller hurt the quality?

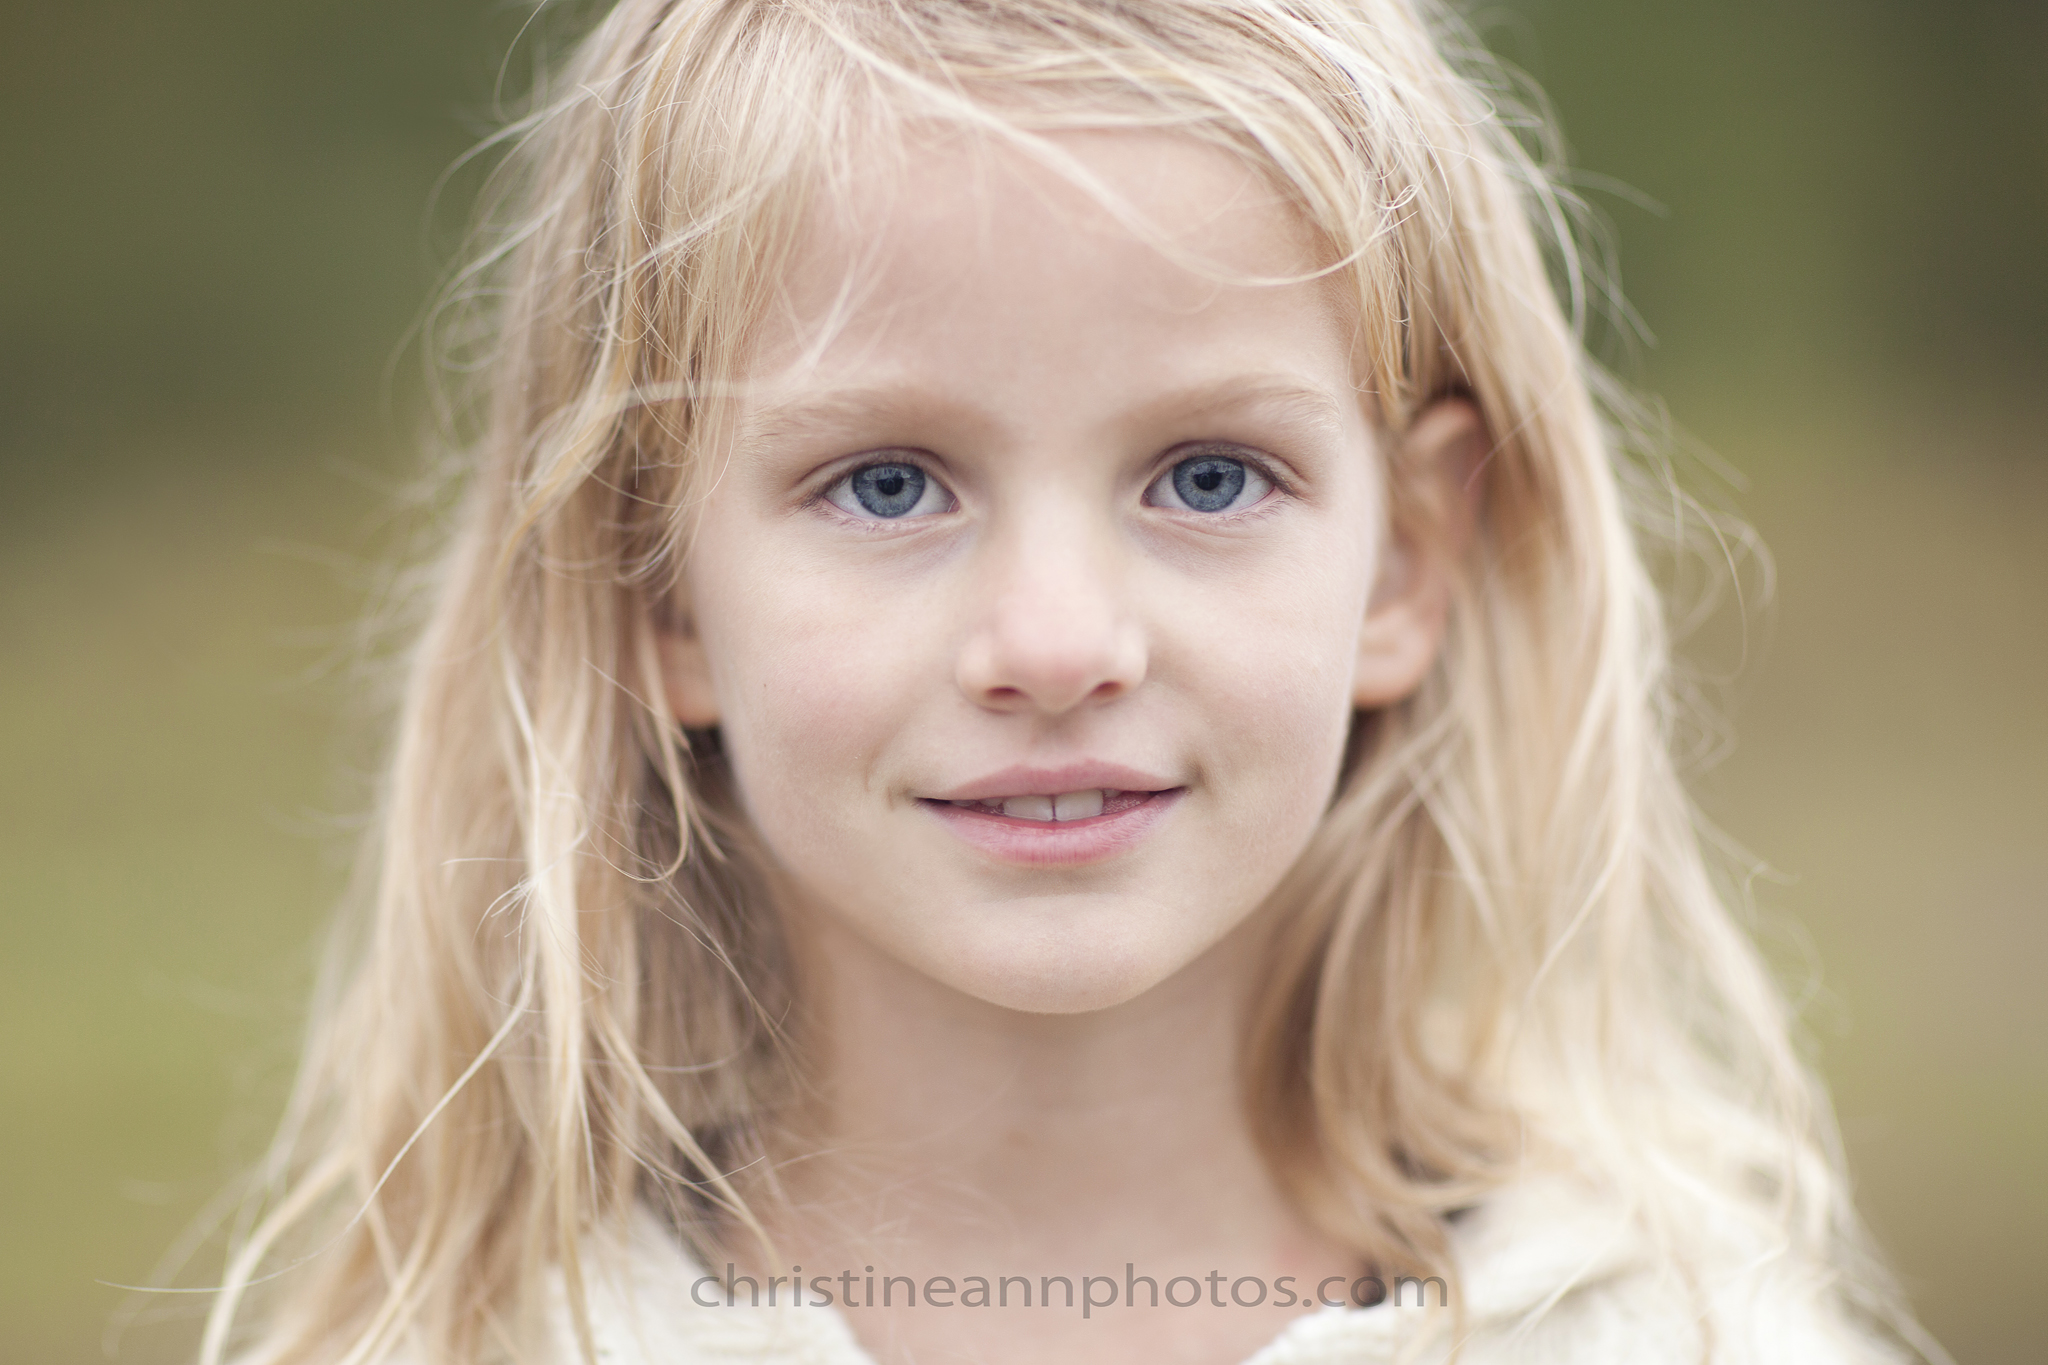
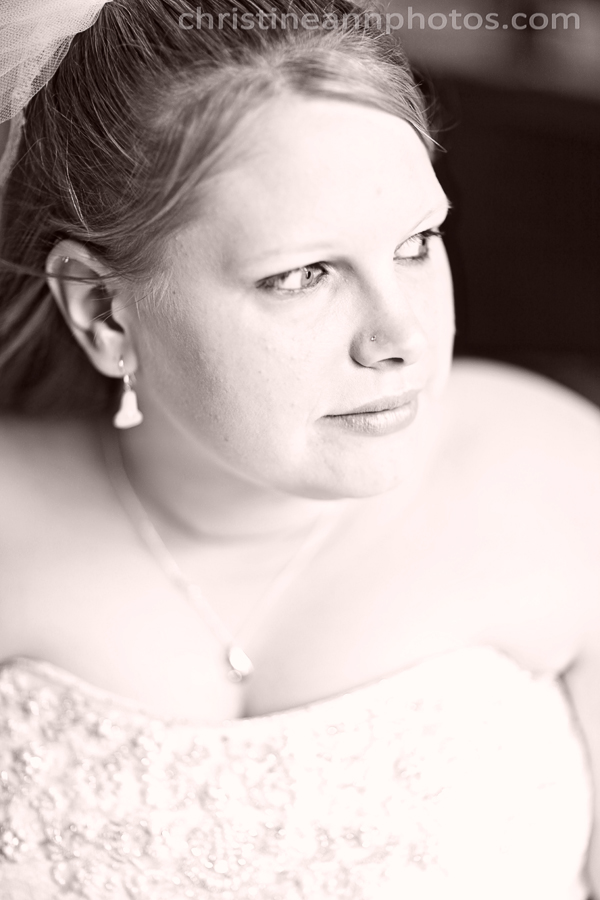
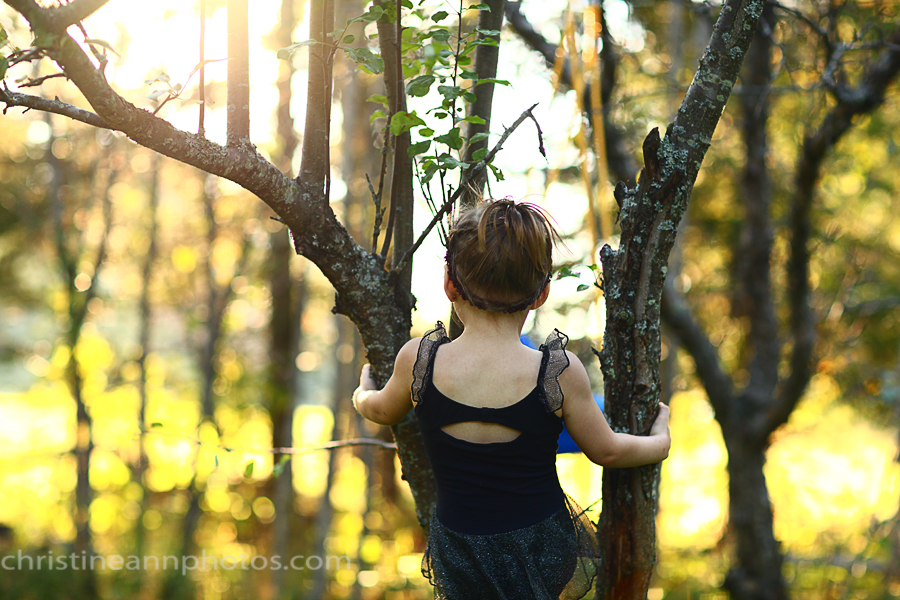
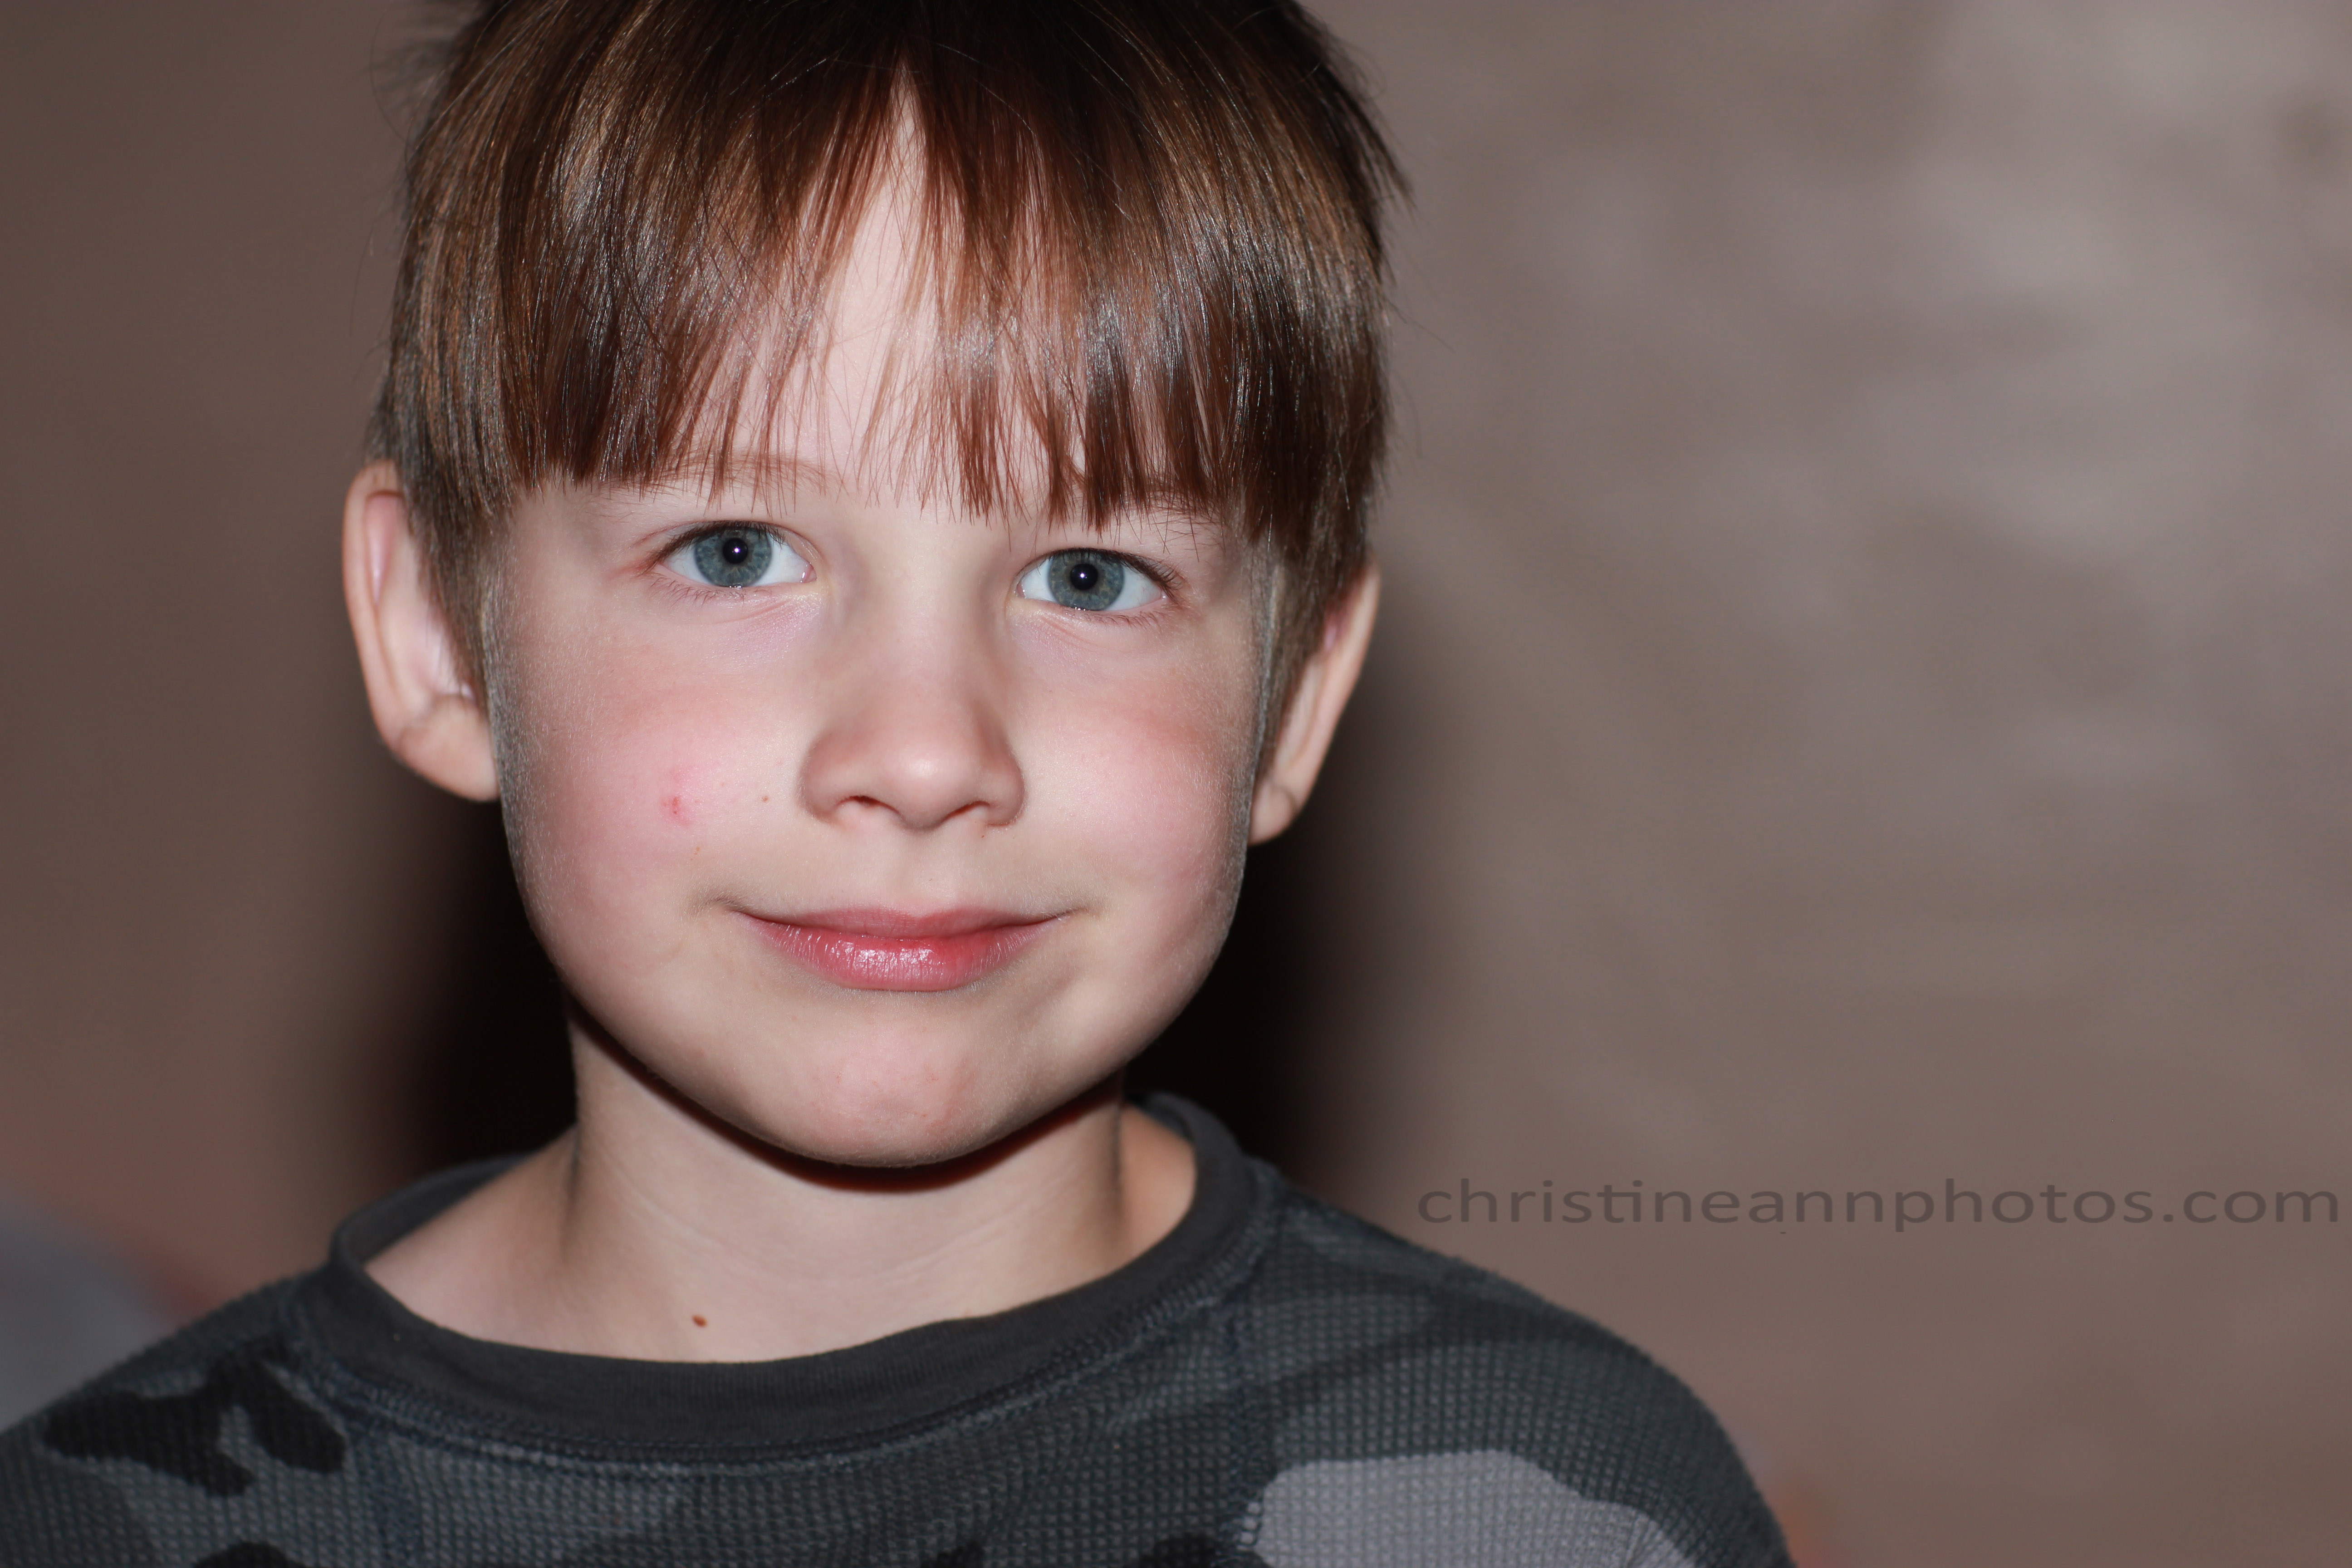
^ Full resolution image. The image is 3744×5616.

Does it affect image quality to make the photo smaller?

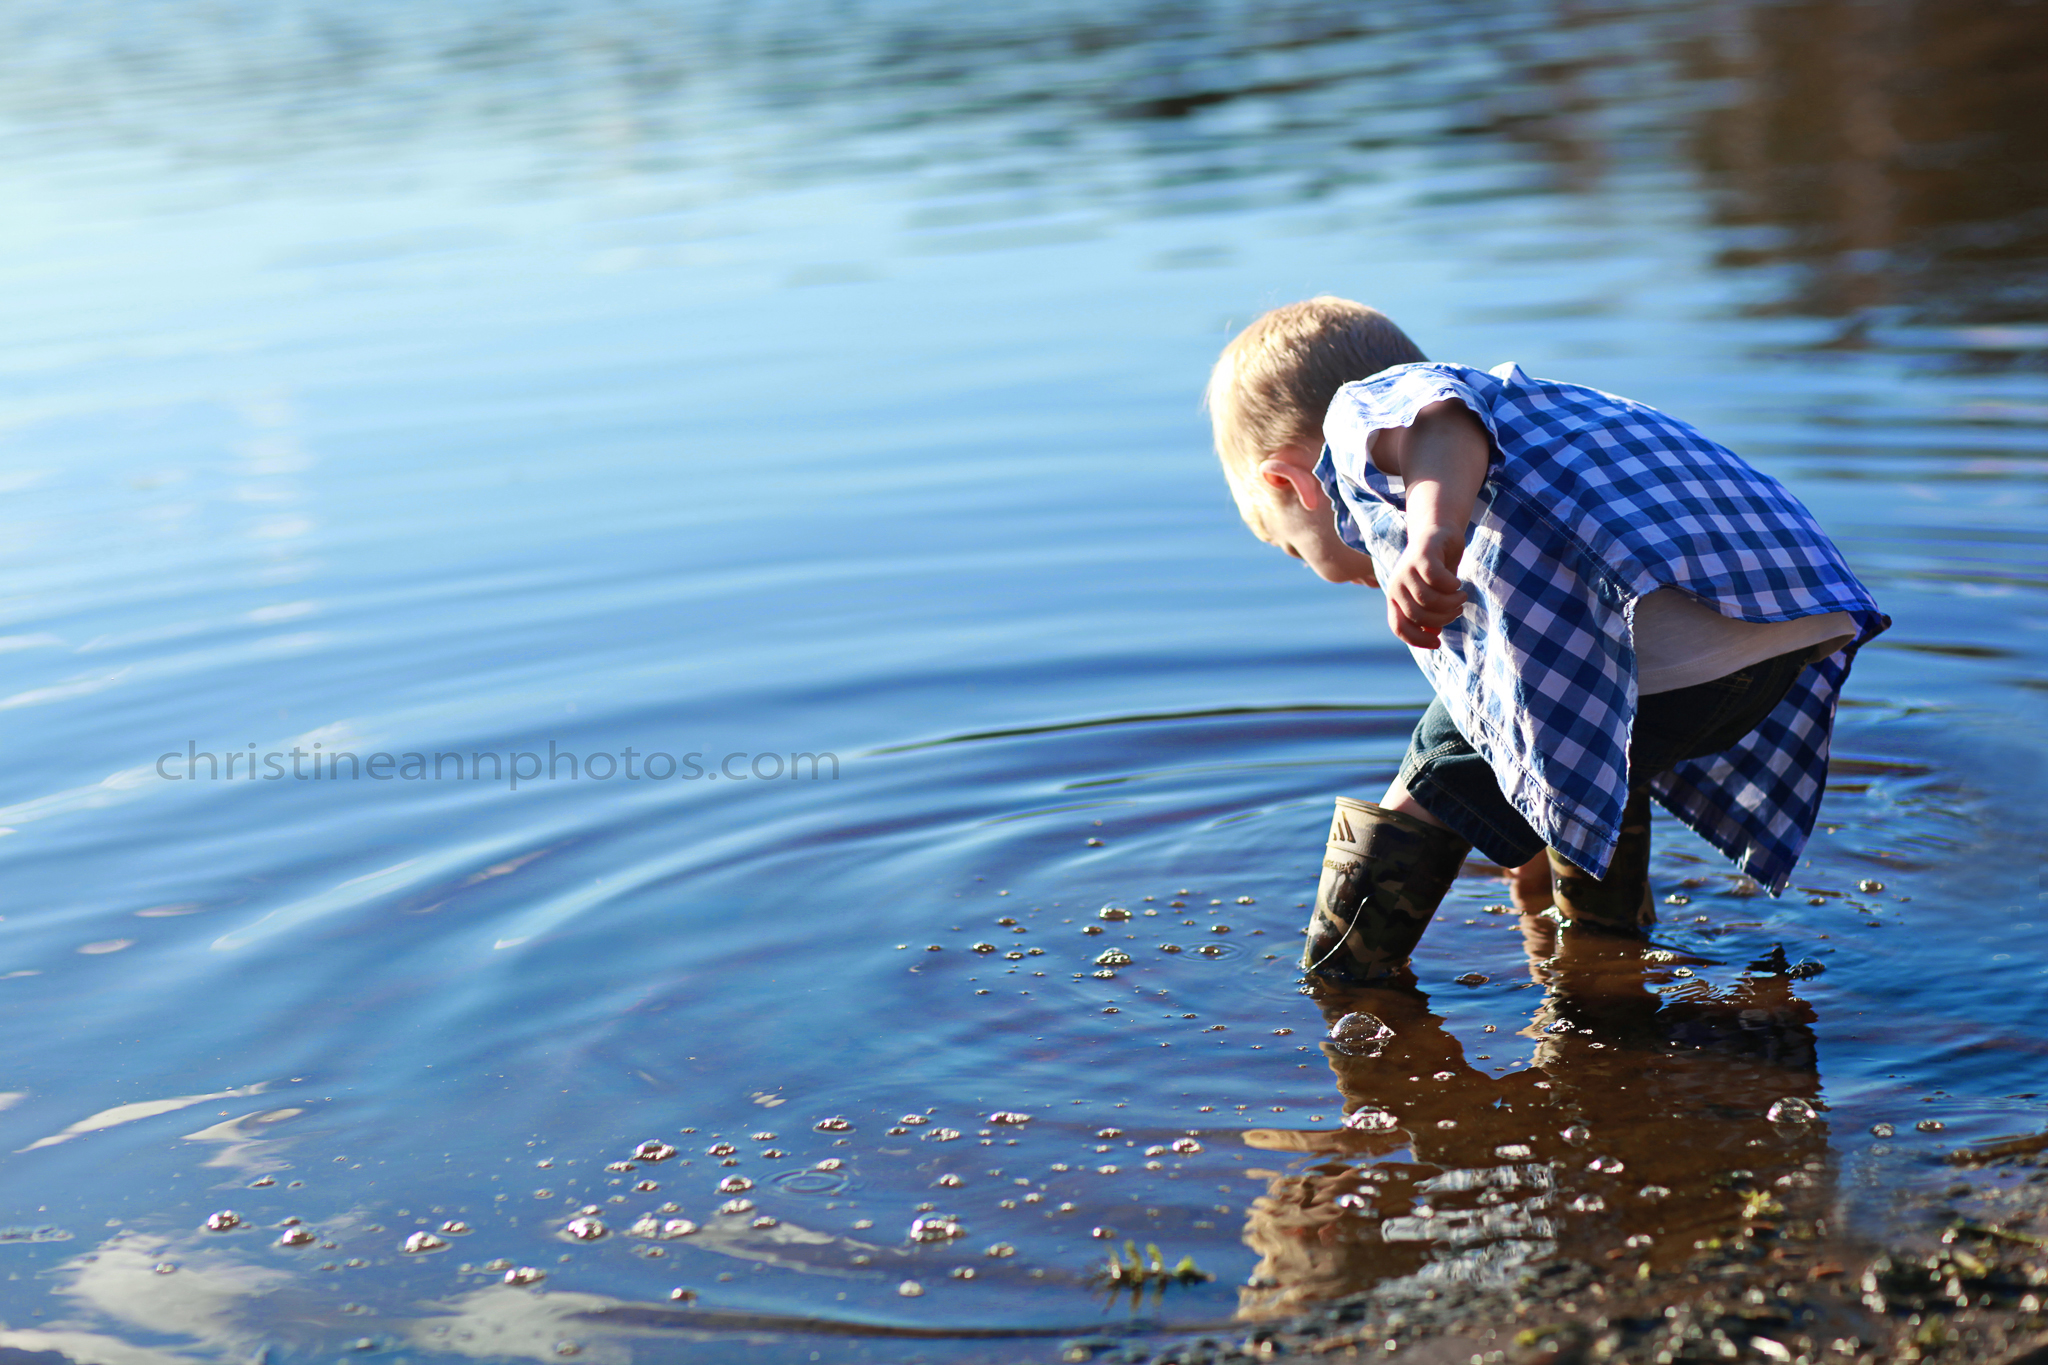
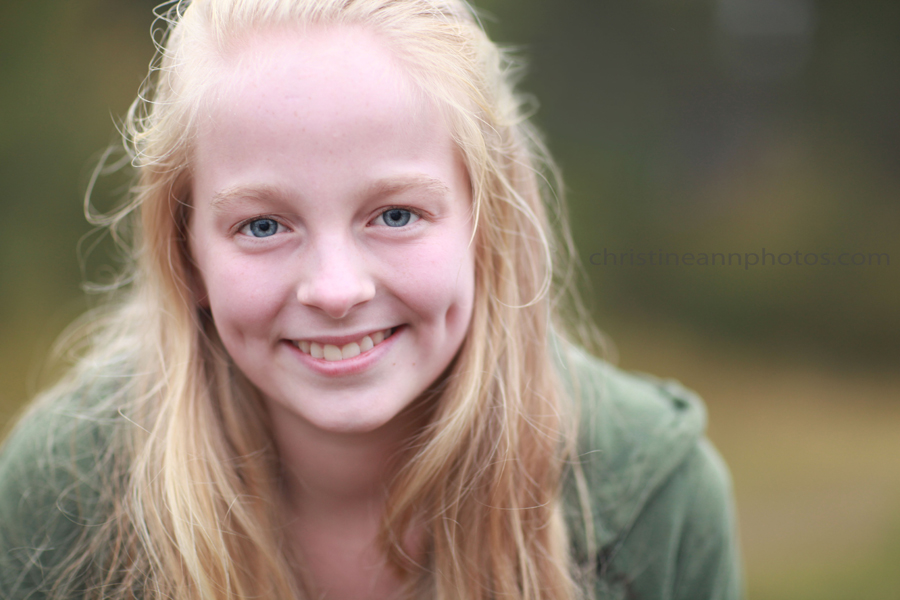
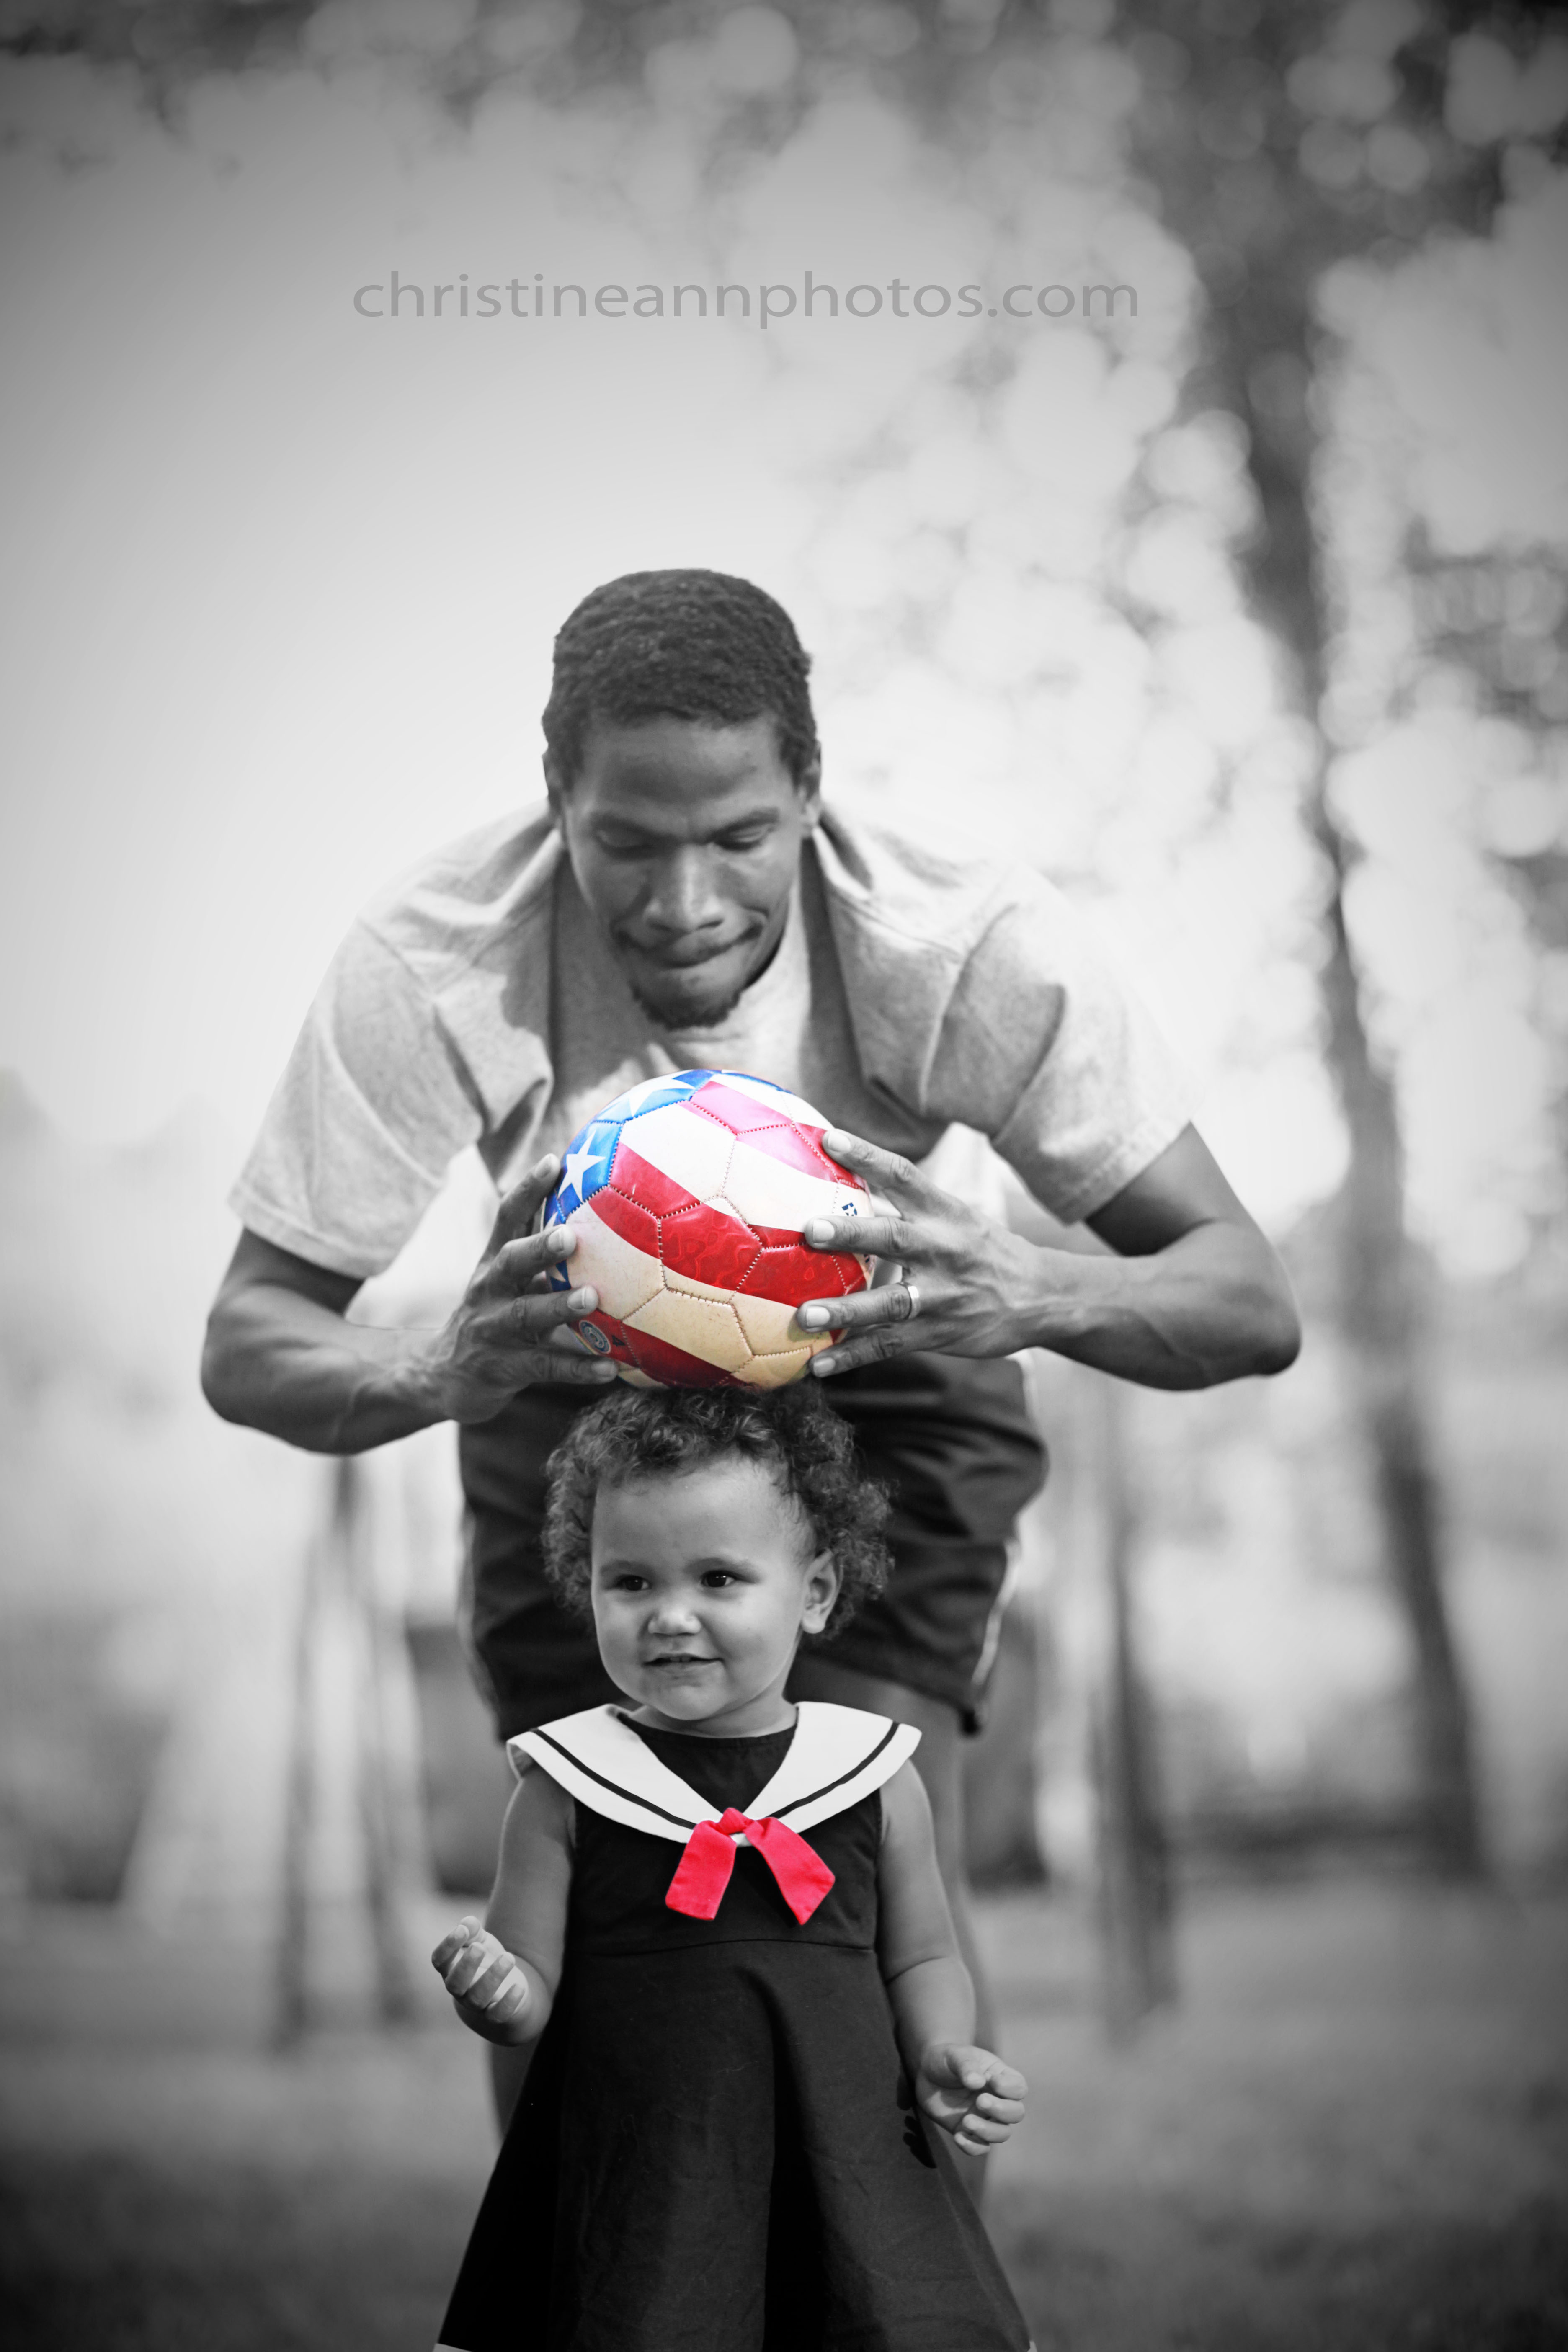
^This image has been reduced to 600×900. 600×900 is considered the “ideal” size to post to Facebook and web [update:  within the last couple months of June 2014 Facebook’s ideal image size has changed to 960 or 2048..] It is highly recommended to resize and sharpen on your own because if you upload a huge file to the internet, the internet will automatically reduce the size and quality.. if you do the job on your own, you retain control over how the photo looks. Although compressing it like this makes it lose sharpness so it is recommended to do a little bit of sharpening to anything that has been reduced this amount. Personally I run a high pass filter @ .5 – 1.0 and it’s perfect! While it is easy to do this manually I created some actions to speed up the process of resizing and sharpening. If you are saving in Lightroom there is a simple box you can check to sharpen upon export.

resizing photos and affects on the images duluth mn

Here is the same file size – 900×600 with a .5 high pass filter applied to it.. it is definitely an improvement from with no high pass filter and looks almost identical to the original file despite being significantly smaller. 600×900 is the perfect size to put on the web without worrying about how the web will change your photo. (If you want a free high pass filter action, I put a download to one I made at the bottom of this page!).

low resolution image and how it affects the quality and sharpness

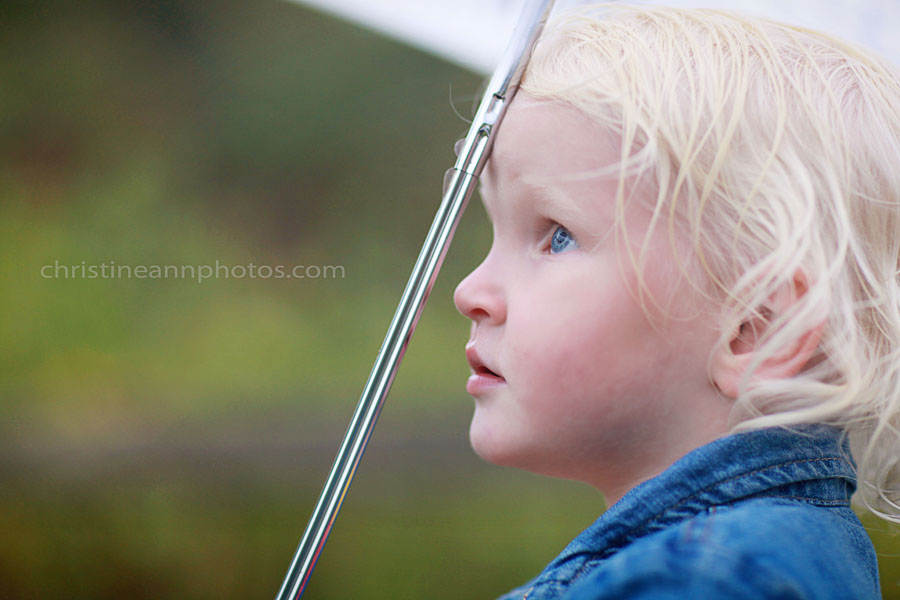
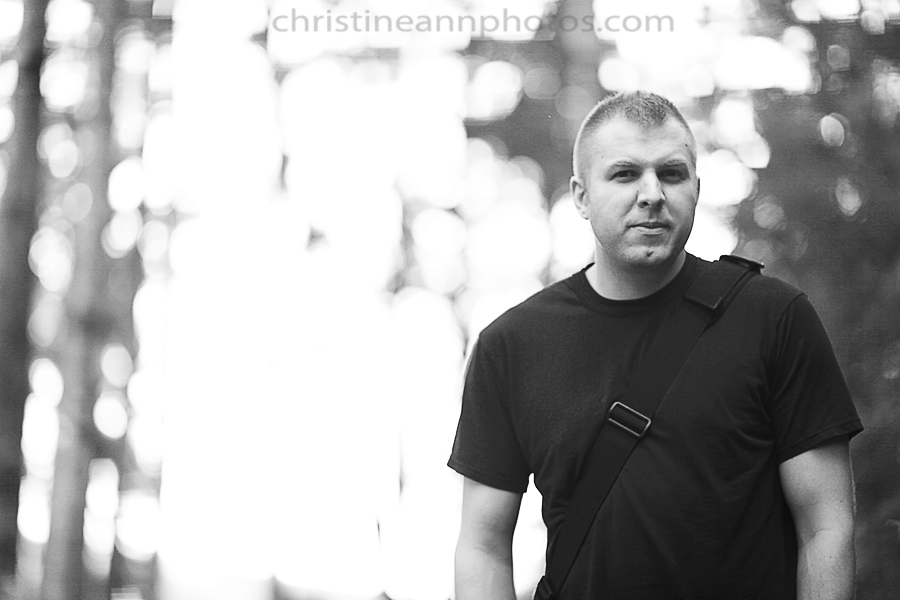
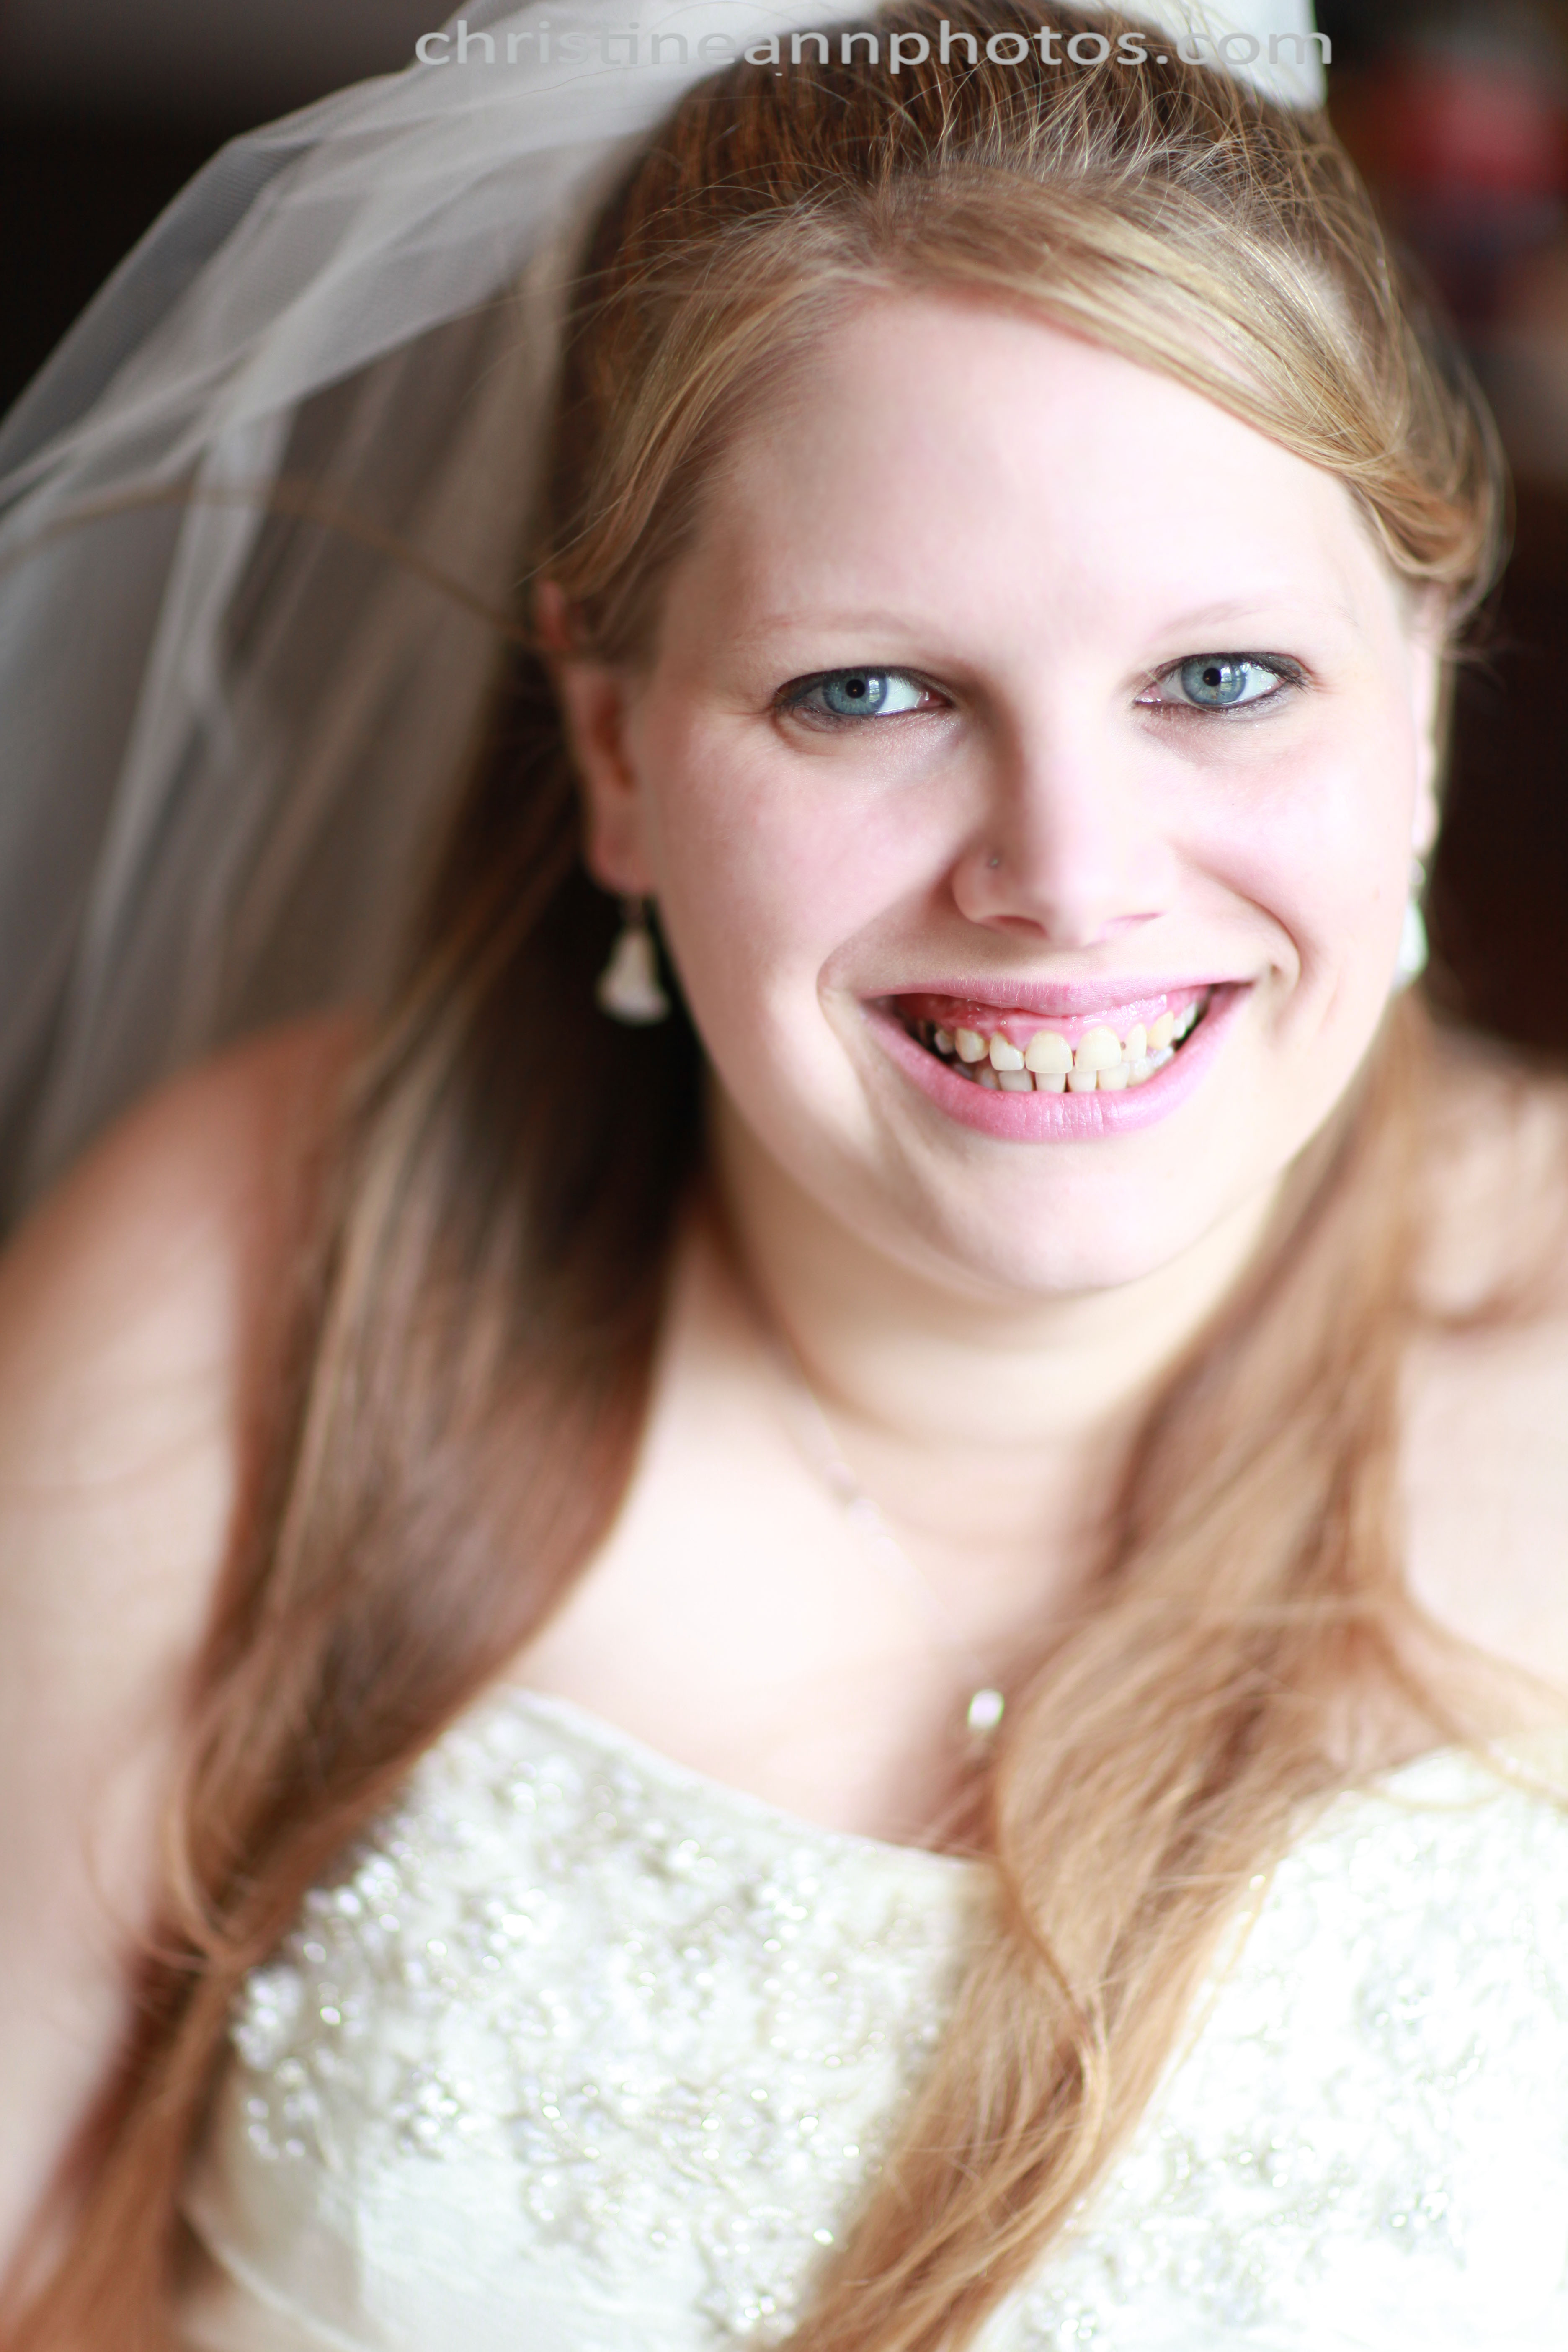
^This image is 267×400. You can very clearly see how much it has been degraded at this point so we already have our answer that reducing the size of an image does impact how it looks and degrades it.  If you cannot tell then hold down “CTRL” + scroll the scroll wheel of your mouse up.. this will zoom into the image so you can see the quality up close.

low-resolution-image-compared-to-high-resolution-image

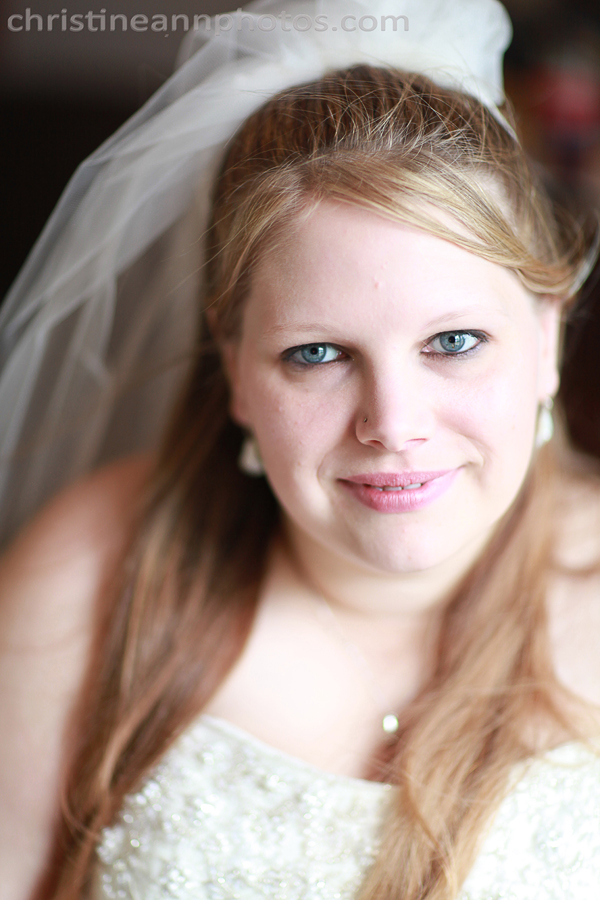
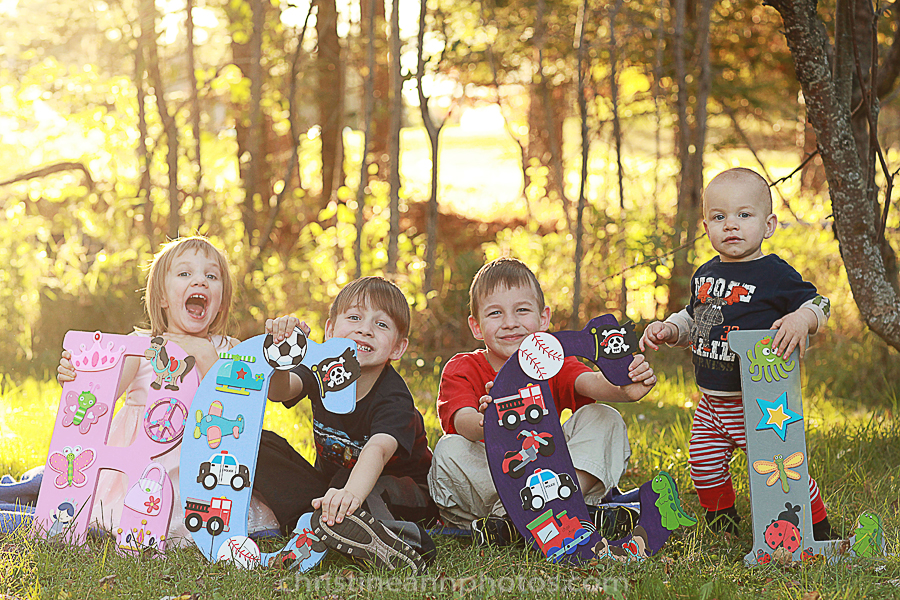
^This has been set to 134×200. Though uploading that is probably overkill at this point since the point was already made in the above photo :).

I’ve created 2 files I want to share with everyone.

The first one includes 4 actions – Two of these actions reduce your file size to web-sized files (2048 on the longest side) and the resolution to 72 and the other two actions reduce the size to the same size but also apply a .5 high pass filter to the image which helps sharpen it. When you reduce the file you are squishing pixels on top of each other and losing information.. that’s why a little bit of sharpening is ideal.

Please note this actually “resamples” the image but I am using colloquial language and most people call it resizing :).

Resize Horizontal
Resize Vertical
Resize and Sharpen Horizontal
Resize and Sharpen Vertical

You can download this free resizing and sharpening action here.

The second one also includes 4 files. All of these only sharpen images, regardless of their size. The smaller the image is, the smaller HPF you’ll want to apply. For full res images I usually run HPF 3-4. For 600×900 I run at .5. If you want above a 4 you can run HPF 4 and then HPF 1 (totaling HPF 5). Anyway these are the actions included in this set (HPF stands for High Pass Filter).

HPF .5
HPF 1
HPF 2
HPF 4

You can download this free sharpening action here.

Of course there are countless ways to do resizing and sharpening, this is just one of many 🙂 and there is software designed to assist you in resampling the image without hurting the image quality so if you need something like that, programs like that exist!

-Christine Ann

Duluth Senior and Family Photographer
Facebook Page

Photos From 85mm 1.2L Lens.

Which lens you decide to use on your camera has a big impact on how the photo turns out. A big contendor in the photography world for people who are very invested in photography is the 85mm 1.2L lens by Canon. This is the first professional level lens I invested in and I am very fond of it :).
The first thing you have to decide when picking a lens is if you want a prime lens (does not zoom in and out) or a zoom lens (has a range of how close or far you can get to the subject by rotating the lens to zoom in and out). THere are advantages and disadvantages to each (perhaps a future blog post topic 🙂 ) but one of the best and most noteworthy features of the 85mm 1.2 lens is that the aperture can reach .. *drumroll* .. f/1.2! The lowest number you usually see on a zoom lens is f/2.8 so this is quite a big difference on the prime, however you do lose the ability to zoom in and out. The f/1.2 is amazing for when you want to get as much light into the camera as possible and also if you want a very small depth of field (meaning only one thing will be sharply in focus and everything else will be blurred).
The f/1.2 is so sensitive that on my full frame sensor camera body (how far 1.2 takes you depends on a handful of factors including your camera body), if I focus on someone’s nose, their eye will be out of focus. It’s a very very narrow depth of field and very unforgiving for in focus images! There is a learning curve to harnessing this power. I would not recommend using any new equipment at a shoot that you haven’t practiced with in advance. YOu will probably get some out of focus images when you start out with this lens. I try not to go to 1.2 anymore, personally. f/2 or higher is usually ideal but if there is low light or if I want a certain look I will bump it down lower.

Anyway, I wanted to make a blog post showing image examples of photos taken on the 85mm f/1.2L lens so people could take a look and maybe it could help people make more informed purchasing decisions.

I do need to explain that I reduced the image size significantly to post to the web. Standard web size is 900×600.. the originals are around 3800×5700 so they don’t reflect the same quality as they do out of the camera but I hope it gives a good idea.. especially since the originals are better :). If you would like to see a full resolution version of anything just ask in the comments! I am happy to post!

Anyway, without further ado….

family photography kids photos duluth mn in winter with snow and snowey trees
^f/3.5

senior photography duluth mn in fall with trees leaves branches winter gear minnesota
^f/2.8

Duluth MN family photography
^f/1.8

duluth mn bride wedding photography senior photos
^f/1.2 – wide open!

duluth-family-photographer-hermantown
f/1.8

blue eye toddler duluth mn children family seniors
^f/1.4 – close to wide open :)! If you’re shooting this low you must nail the focus spot!

portrait on 85mm canon lens of preschooler posing with hands on face
^f/2.5

duluth mn christmas tree and lights photography with bokeh at low aperture
f/1.4. I was able to take a photo with one fairly dim light on @ 1.4.. this low aperture also created a very nice bokeh effect on the Christmas tree.

depth of field christmas lights bokeh blur image samples 85mm lens comparison
^f/1.8 (This lens is great for Christmas lights!).

Duluth Minnesota family photography boy with rainboots playing in lake

summer duluth mn photography photographer family seniors wedding newborn
^f/2

family photography hermantown mn
^f/1.8

canon 85mm f/1.2 lens image samples
f/1.6. Notice how narrow the focus is.. the arm is in focus and his entire body is blurred.. there’s about a foot between what is in focus and what isn’t. If the aperture were higher (around f/4+) the arm and body would both be in focus.

rainbow lens flare children portraits duluth mn
^f/1.8

duluth mn winter photographs outdoors snow scarf
f/1.8. Loving how blurred the background is! Notice how even the front of the scarf is blurred.. 1.8 is not a very large depth of field.

duluth-minnesota-toddler-cake-smash-one-year-old-family-senior-photographer
f/1.8

1 year old cake smash balloons blue outfit tie duluth mn family photography
^Here’s one at f/1.2 – this is as low as it can go. I am going to do another blog post soon zooming in so you can see the eyes are in focus but even the nose is out of focus. It still looks okay zoomed out but if you zoom in you’ll see how sensitive the focus is.

Duluth MN family photographer kindergartener with hand on face pose portrait
^f/2.8

wedding photography hermantown mn
^Wide open at f/1.2. To do this shot over I would have used a higher aperture since her hair is blurred out but I still love this photo :).

bride portrait wedding photography duluth mn natural light photograph low aperture image sample
^Another photo taken at f/1.2. I’m trying to include a lot at 1.2 since a lot of people are curious about what photos like at that aperture.

senior photography portraits duluth mn
f/1.8 portrait

duluth minnesota senior photographer photos hiking trail
^f/1.4

family and kids photography duluth minnesota hermantown
^Here’s a shot taken at a higher aperture of f/4. As youc an see.. still plenty of lovely bokeh :).

duluth mn hermantown minnesota family photographer senior photography
^f/2.2

85mm 1.2 L lens image examples comparison
^f/2.2

f/2 aperture photo with low f-stop image samples
f/2

Preschooler in forest with trees photography duluth mn
^f/2.2

minnesota bride duluth wedding photographer
^This is a full res version of an image taken at f/1.2 – click on it to see full detail.

To see zoomed in versions of the photos to see how the depth of field looks up close at f/1.2 check out this article.

If you have any questions please don’t hesitate to ask!

-Christine Ann
Duluth MN Senior and Family Photographer Website
Duluth Photographer Blog
Duluth Senior and Family Photographer Facebook Account

Neckstrap vs Hand Strap – And How to Use Both Simotaneously

When we start out taking photos, most of us will use the standard neck strap that the camera comes with. As you get more and more into photography and start exploring what kind of accessories are out there you will stumble upon a hand/handstrap. Most people will buy it and try it and some will prefer it and some will yet still prefer the neck strap – it’s all personal preference.
For me – I like both. They both serve different purposes. Since a camera only has 2 slots to attach a strap to (top left and top right) you may think you need to choose one or the other however you don’t :).
I have both attached to my camera and use them interchangeably (photos below as to how this works).

Advantages of the neck strap:
*Do not have to worry about dropping the camera
*Camera is accessible at a moments notice
*Allows you to carry the camera around for long periods of time
*Keeps camera in front of you making it safer (unless you sling it over your shoulder to the side).
*It distributes the weight of your camera/lens across your neck or shoulder making it feel less heavy

Disadvantages:
*Large/bulky
*It can get in the way of both what you are doing  and also in front of the lens, blocking your shot (if it’s not around your neck)
* It can get uncomfortable (this can help be avoided by buying a padded neckstrap – links below for help deciding which to buy)
*You can underestimate how big your camera is or forget about it all together and bump it on stuff as you pass it by

Times I use the neck strap are when I’m on a walk or at an event and need the camera accessible but am taking a break from using it, when other people use my camera I make them put it on (haha), or if I’m worried I may drop the camera and need extra assurance of its safety.

Advantages of the hand strap:
Makes the camera more stable/less camera shake
Camera is easily accessible
Good for short breaks
It looks professional (not a major point here, but worth noting)

Disadvantages:
It puts the camera more at the side of your body while you walk, making it less safe/easier to bump
It is less safe/reliable than a neck strap (this is especially important to me the times I hand my camera to someone else.. I feel confident putting the neckstrap on someone but my heart races a little if it’s just the hand strap)
It can start to feel very heavy in your hand/arm
It gets in the way of the battery door – not a big deal and you do not need to remove it to access it (at least on my camera) but I do have to loosen it and swivel it around

I use the hand strap every time I am taking photos for stability and also to keep it safer. I also use it while we we move from spot to spot in short distances (long distances I use the neck strap or camera bag) – it gives me extra assurance it will not be dropped.

There is honestly no black and white answer to which is better. A lot of professionals use the hand strap and a lot use the neck strap (though if they use the neck strap they mostly invest in a padded neckstrap – more on that in a moment).  You’ll probably have to try both for yourself to determine which you prefer. I think there is a slight sway towards the hand straps but maybe hand strap users are just more vocal about it 🙂 who knows, but either way they are both common and both well liked by their users.

As for me I use both. Someone asked me how I am able to use both so I took some photos of my camera to help give a visual aid as to how my hand strap is designed and set up so that I can keep both attached for their different uses.

This is what my camera looks like with the neck strap and hand strap attached:
Hand strap and neck strap comparison on Canon Mark II 5D DSLR

Camera attachments explained and analyzed
handstrap vs neckstrap comparison and explanation on canon mark ii 5d DSLR and how to use both simultaneously pros and cons

handstrap vs neckstrap comparison and explaination on canon mark ii 5d DSLR and how to use both simultaneously pros and cons

Use handstrap and neckstrap simultaneously together and understand and explain how the hand strap works and where it attaches and mounts on camera DSLR

So as you can see from the photos the hand strap attaches to the top right neck strap insert and screws into the tripod socket (and the strap mounts into the strap insert attached to the hand strap hardware).  The neck strap then attaches to the top left neck strap insert on the camera and the strap insert attached to the left side of the hand strap – the best of both worlds!

Lastly I said I would link to some nice, reputable neck straps to upgrade from the default one that comes with the camera.  They are cushioned, padded, have pockets for memory cards, well designed and make it much  more comfortable to use a neck strap.  Here is one article that discusses the top 6 neck straps, tested and rated click here.  The two names I see the most are Black Rapid and Op Tech.

-Christine Ann
Duluth Photographer Website
Facebook

1 Tip Which Will Improve Your Color Pop/Selective Color Images

I frequent many photography forums and one topic that comes up often is “color selection” or “color pop” edits.  This is when you have a black and white images and you bring back color on just a couple select spots.  These images are not often well received by lot of pros.  I am amongst this group 🙂 but they do have their place :).
I think the worst part about color selection is just how harsh the color is in the image.  It doesn’t flow well.  This is when I created my own way of doing color selection photos, where you just bring back about half of the color instead of all the color.  It makes a huge difference!  And I definitely much prefer the subtle color to the sharp, vivid color.

How do you accomplish this?  If you are layering a color image over a black and white image and erasing, then erase away at around 30-40% opacity.
If you are using a layer mask, set your paintbrush to around 30-40% opacity.  tada!  Very simple indeed.  This will make a huge difference in how the photo looks after you edit it.

One other tip I have is to pick just one focal point to selective color..a lot of people go a little crazy with their brush and bring back half the image so it’s half color and half black and white.  This looks a bit odd and unnatural and also there is no real concept behind it.  Usually you want to color pop something with meaning or symbolism or a concept (not always but like usually just an item vs a shirt).  In the sample image I am posting here I decided to have 2 color pops so they would balance each other out more but notice the items I picked were small so it doesn’t overwhelm the photo.  I believe my opacity for this image was around 30%.. to do it again I  might bump it up a bit higher, but you get the idea.

This is the image at 100% opacity.. this is the full color image brought back to the black and white image, and this is what most photographers who do color pop do:

IMG_3908zzzzstamped

^ Color brought back at full strength.

And the photo shown below is the same image with the color brought back around 30% opacity.  It might even be more like 20%. It is a little bit dull but it looks so much less distracting and more natural.. I much prefer it to the full color photo.

IMG_3908bwstamped
^Color brought back around 20-30% strength.

For one more example I’ll show one brought back around 50% opacity.
Selective coloring color pop how to improve technique with image example

^Color brought back around 50% strength. This is my favorite edit of the three (I might tone it down a notch but overall the color isn’t too overbearing and “sharp” and it blends much better than at full strength – in my opinion anyway!).

As with all things in photography, which is better is subjective.  Surely there are people who prefer the first to the second.  If you do like the first you could even play around with bringing back the color around 70%-80% so it’s just not so vivid and contrasting.  While I’m not a huge fan of color pop photos, I do find myself much more receptive to them when done in a more subtle manner, just thought/style I would share with everyone :).

-Christine Ann
Duluth Minnesota Photographer
Website
Facebook

Unedited Photos from T2i + 50mm Lens.

This blog is specifically dedicated to showing images straight from the T2i + 50mm lens.  This is the combo I used for a few years before upgrading to the Mark II 5D + 85mm 1.2L lens.  I got the upgrade about 2 years ago (a little less..) and have barely touched my T2i since (though I do still use the 50mm sometimes).  I picked up my T2i for the first time in a couple years and was surprised by how much better of photos I could get off it than I was ever able to before.  I could not have intentionally gotten as clear and nice of photos (though I did get some lucky ones!) when I used this combo about 2 years ago.  The equipment didn’t change, but I have :).  And I speculate if I pick it up in 2 more years they’ll be even better.  This isn’t to say you can’t get “nicer” photos on nicer equipment, but I recently compared photos from the Mark II 5d + 85mm 1.2L lens to photos on the Mark II 5D + 50mm 1.8 lens to photos on the T2i + 50mm 1.8 lens (IE:  $3,000 camera + $2,000 lens to $3,000 camera + $100 lens to $700 camera + $100 lens) and the results were not all that different from one another.  I was incredibly surprised!  You can see the image comparisons here:  https://christineannphotos.wordpress.com/2013/10/20/photos-taken-with-canon-rebel-t2i-50mm-1-8-lens/ keeping in mind they are unedited and you need to click them to see the full detail of each photo.
The point in all this is that if your photos are out of focus or not sharp it is almost definitely you and not your equipment.  I read a post from someone who has sent back the same 50mm 1.8 lens used in this blog post 2 times, got it a third time and was wondering if she should send it back again or get a different lens all together.  I can assure everyone it was not the lens any of those 3 times, it’s a lack of understanding how to use your camera and how/where to pose people and why.   You can give an artist crappy supplies and they can make something beautiful; you can give someone who is not an artist high end supplies and they will not be able to do much with it.  Focus your energy on practicing, improving, and learning how to use the equipment you have and how to edit.  My one piece of advice regarding equipment is that the kit lens is junk and if you only own a kit lens, it’s time to at least upgrade to the 50mm 1.8.. it is around $100 and you will see a quality improvement!  That is one thing my test shots did show.. a noticeable difference in quality regarding the kit lens to 50mm lens.  Anyway these are some images I have gotten off the T2i in the last couple months (most being from the last few days specifically for some blogs I want to do on starter equipment) they are unedited and I could further improve them by doing some editing 🙂 but then you wouldn’t know what is due to the equipment and what is due to the editing so I will leave them alone.

Unedited images from the T2i + 50mm lens  *CLICK EACH IMAGE FOR FULL DETAIL*:

IMG_5160zzstamp
*Click images for full detail.. the thumbnails look fuzzier than they are*.
IMG_5149crop2stamp
*Click images for full detail*
IMG_5536zzstamp
*Click images for full detail*
t2i50 (2)stamp_z-2
*Click images for full detail*.
IMG_5444stamp
*Click images for full detail.. the thumbnails look fuzzy*.
IMG_5109zzzstamp
*Click images for full detail*.
IMG_5108zzstamp
*Click images for full detail*.

t2i50mmstampzz

*Click images for full detail*.

t2i50 (3stamp)

*Click images for full detail*.

IMG_5441zzstamp

-Christine Ann
Christine Ann Photography Web Site
Christine Ann Photography Facebook

Image Comparisons T2i VS Mark II; 85mm 1.2 vs 50mm 1.8 vs Kit Lens

A hot topic in the photography world is does better equipment = better photos? I started on the Canon Rebel XSI + kit lens (18-55mm), acquired a similar-quality telephoto  lens (55-250mm), acquired the 50mm 1.8, upgraded cameras to the T2i, … Continue reading

This one thing may be ruining your photos (with image comparison).

There is one thing that we all start off doing that may be ruining your photographs: using the on-camera pop-up flash.
I thought it might be beneficial for people learning about photography to see image comparisons of photos taken with natural sunlight (in front of a window or outside) vs photos taken with the on-camera pop-up flash. Most professional photographers overwhelmingly prefer shooting with natural light however we all own external flashes and diffusers for the times where natural light just isn’t working or happening. I think we all start out using it and over years of experience and learning come to realize there are better alternatives. Some things that the on camera pop-up flash does: it creates horrible shadows! Both behind the person you are photographing and also oftentimes under their chin, depending on their angle. It creates these tiny pin-lights in the eyes (the reflection in the eyes is a tiny little dot in the pupil). It makes people squint and blink. Children complain about it hurting their eyes and it just all around looks mostly unnatural. The hair gets mega-highlighted and colors look shiny and overly textured/vibrant.

Alternatives to pop-up flash:
The best alternative: find great sources of natural light – usually in front of a window or in the shade outside.
Another great alternative: Buy a lens with a low aperture. They go down as low as f/1.2! You can handle most situations with this ability but your focus will have to be perfect (Note shooting at f/1.2 is usually not wise because of how shallow your depth of field becomes.. but it’s a nice option to have and I have shot at 1.2 before – not professionally – but for my own photos). Low aperture lenses tend to be very costly. There is one cheap lens that every photographer should own which is the 50mm f/1.8 lens. It’s around $100 and is very great for the price. It is made of plastic and you’ll want to upgrade to a very nice lens eventually but if you are a hobbiest and still learning the 1.8 is a great great option for you!!!! (And is WAY better than the kit lens which also may be ruining your photos if you are using it..).
If you do need flash, you can purchase an off-camera (external) flash and learn to bounce the light and/or diffuse it (ideal! And what professionals do).
If you find none of these are good alternatives for you right now, there are two other options. Option 1 is buying a pop-up flash diffuser. I have not tried one so I can’t vouch for it but I imagine it would help. Option 2 is changing your settings in camera and lowering the strength of the flash (not all cameras can do this but it’s worth looking into and trying out!).

Please note that if you compare flash with natural light in a spot where natural light is not good, the photo taken with a flash will usually look better. Part of learning about photography is developing an eye for and understanding of where the natural light is the best. Studio lighting can be amazing however mastering it takes a lot of time and money. Most photos, however, can be taken with natural light and most people prefer the look of it (though not everyone does, photography is entirely subjective!).

All of these photographs were taken on the same camera: Canon Rebel T2i and all were taken within the last month except the very last one which was taken back in December.

Natural light photograph, taken in front of a window. Notice now nice the reflections in their eyes are and how natural and soft everything is.

IMG_4848stamp
Natural light photograph.
IMG_5094zstamp
Natural light photograph.
IMG_6329softerstamp
Natural light photograph.
IMG_2799zstamp

___________________________________________________
___________________________________________________

Photos taken with on-camera pop-up flash – notice the tiny little pin-light being reflected in the pupil and how the hair is super shiny and the shadows being cast behind them and under the chin as well.
On-camera pop-up flash.
IMG_2860zstamp
On-camera pop-up flash.
IMG_2908stamp
On-camera pop-up flash.
IMG_3993stamp

Some people may prefer the flash photos, some prefer the natural light ones, and neither one is wrong, but it is good to be able to know how various things – such as your light source – will affect a photo!

-Christine Ann
www.christineannphotos.com
www.facebook.com/christineannphotos
Duluth Minnesota Photographer