Unedited Photos from T2i + 50mm Lens.

This blog is specifically dedicated to showing images straight from the T2i + 50mm lens.  This is the combo I used for a few years before upgrading to the Mark II 5D + 85mm 1.2L lens.  I got the upgrade about 2 years ago (a little less..) and have barely touched my T2i since (though I do still use the 50mm sometimes).  I picked up my T2i for the first time in a couple years and was surprised by how much better of photos I could get off it than I was ever able to before.  I could not have intentionally gotten as clear and nice of photos (though I did get some lucky ones!) when I used this combo about 2 years ago.  The equipment didn’t change, but I have :).  And I speculate if I pick it up in 2 more years they’ll be even better.  This isn’t to say you can’t get “nicer” photos on nicer equipment, but I recently compared photos from the Mark II 5d + 85mm 1.2L lens to photos on the Mark II 5D + 50mm 1.8 lens to photos on the T2i + 50mm 1.8 lens (IE:  $3,000 camera + $2,000 lens to $3,000 camera + $100 lens to $700 camera + $100 lens) and the results were not all that different from one another.  I was incredibly surprised!  You can see the image comparisons here:  https://christineannphotos.wordpress.com/2013/10/20/photos-taken-with-canon-rebel-t2i-50mm-1-8-lens/ keeping in mind they are unedited and you need to click them to see the full detail of each photo.
The point in all this is that if your photos are out of focus or not sharp it is almost definitely you and not your equipment.  I read a post from someone who has sent back the same 50mm 1.8 lens used in this blog post 2 times, got it a third time and was wondering if she should send it back again or get a different lens all together.  I can assure everyone it was not the lens any of those 3 times, it’s a lack of understanding how to use your camera and how/where to pose people and why.   You can give an artist crappy supplies and they can make something beautiful; you can give someone who is not an artist high end supplies and they will not be able to do much with it.  Focus your energy on practicing, improving, and learning how to use the equipment you have and how to edit.  My one piece of advice regarding equipment is that the kit lens is junk and if you only own a kit lens, it’s time to at least upgrade to the 50mm 1.8.. it is around $100 and you will see a quality improvement!  That is one thing my test shots did show.. a noticeable difference in quality regarding the kit lens to 50mm lens.  Anyway these are some images I have gotten off the T2i in the last couple months (most being from the last few days specifically for some blogs I want to do on starter equipment) they are unedited and I could further improve them by doing some editing 🙂 but then you wouldn’t know what is due to the equipment and what is due to the editing so I will leave them alone.

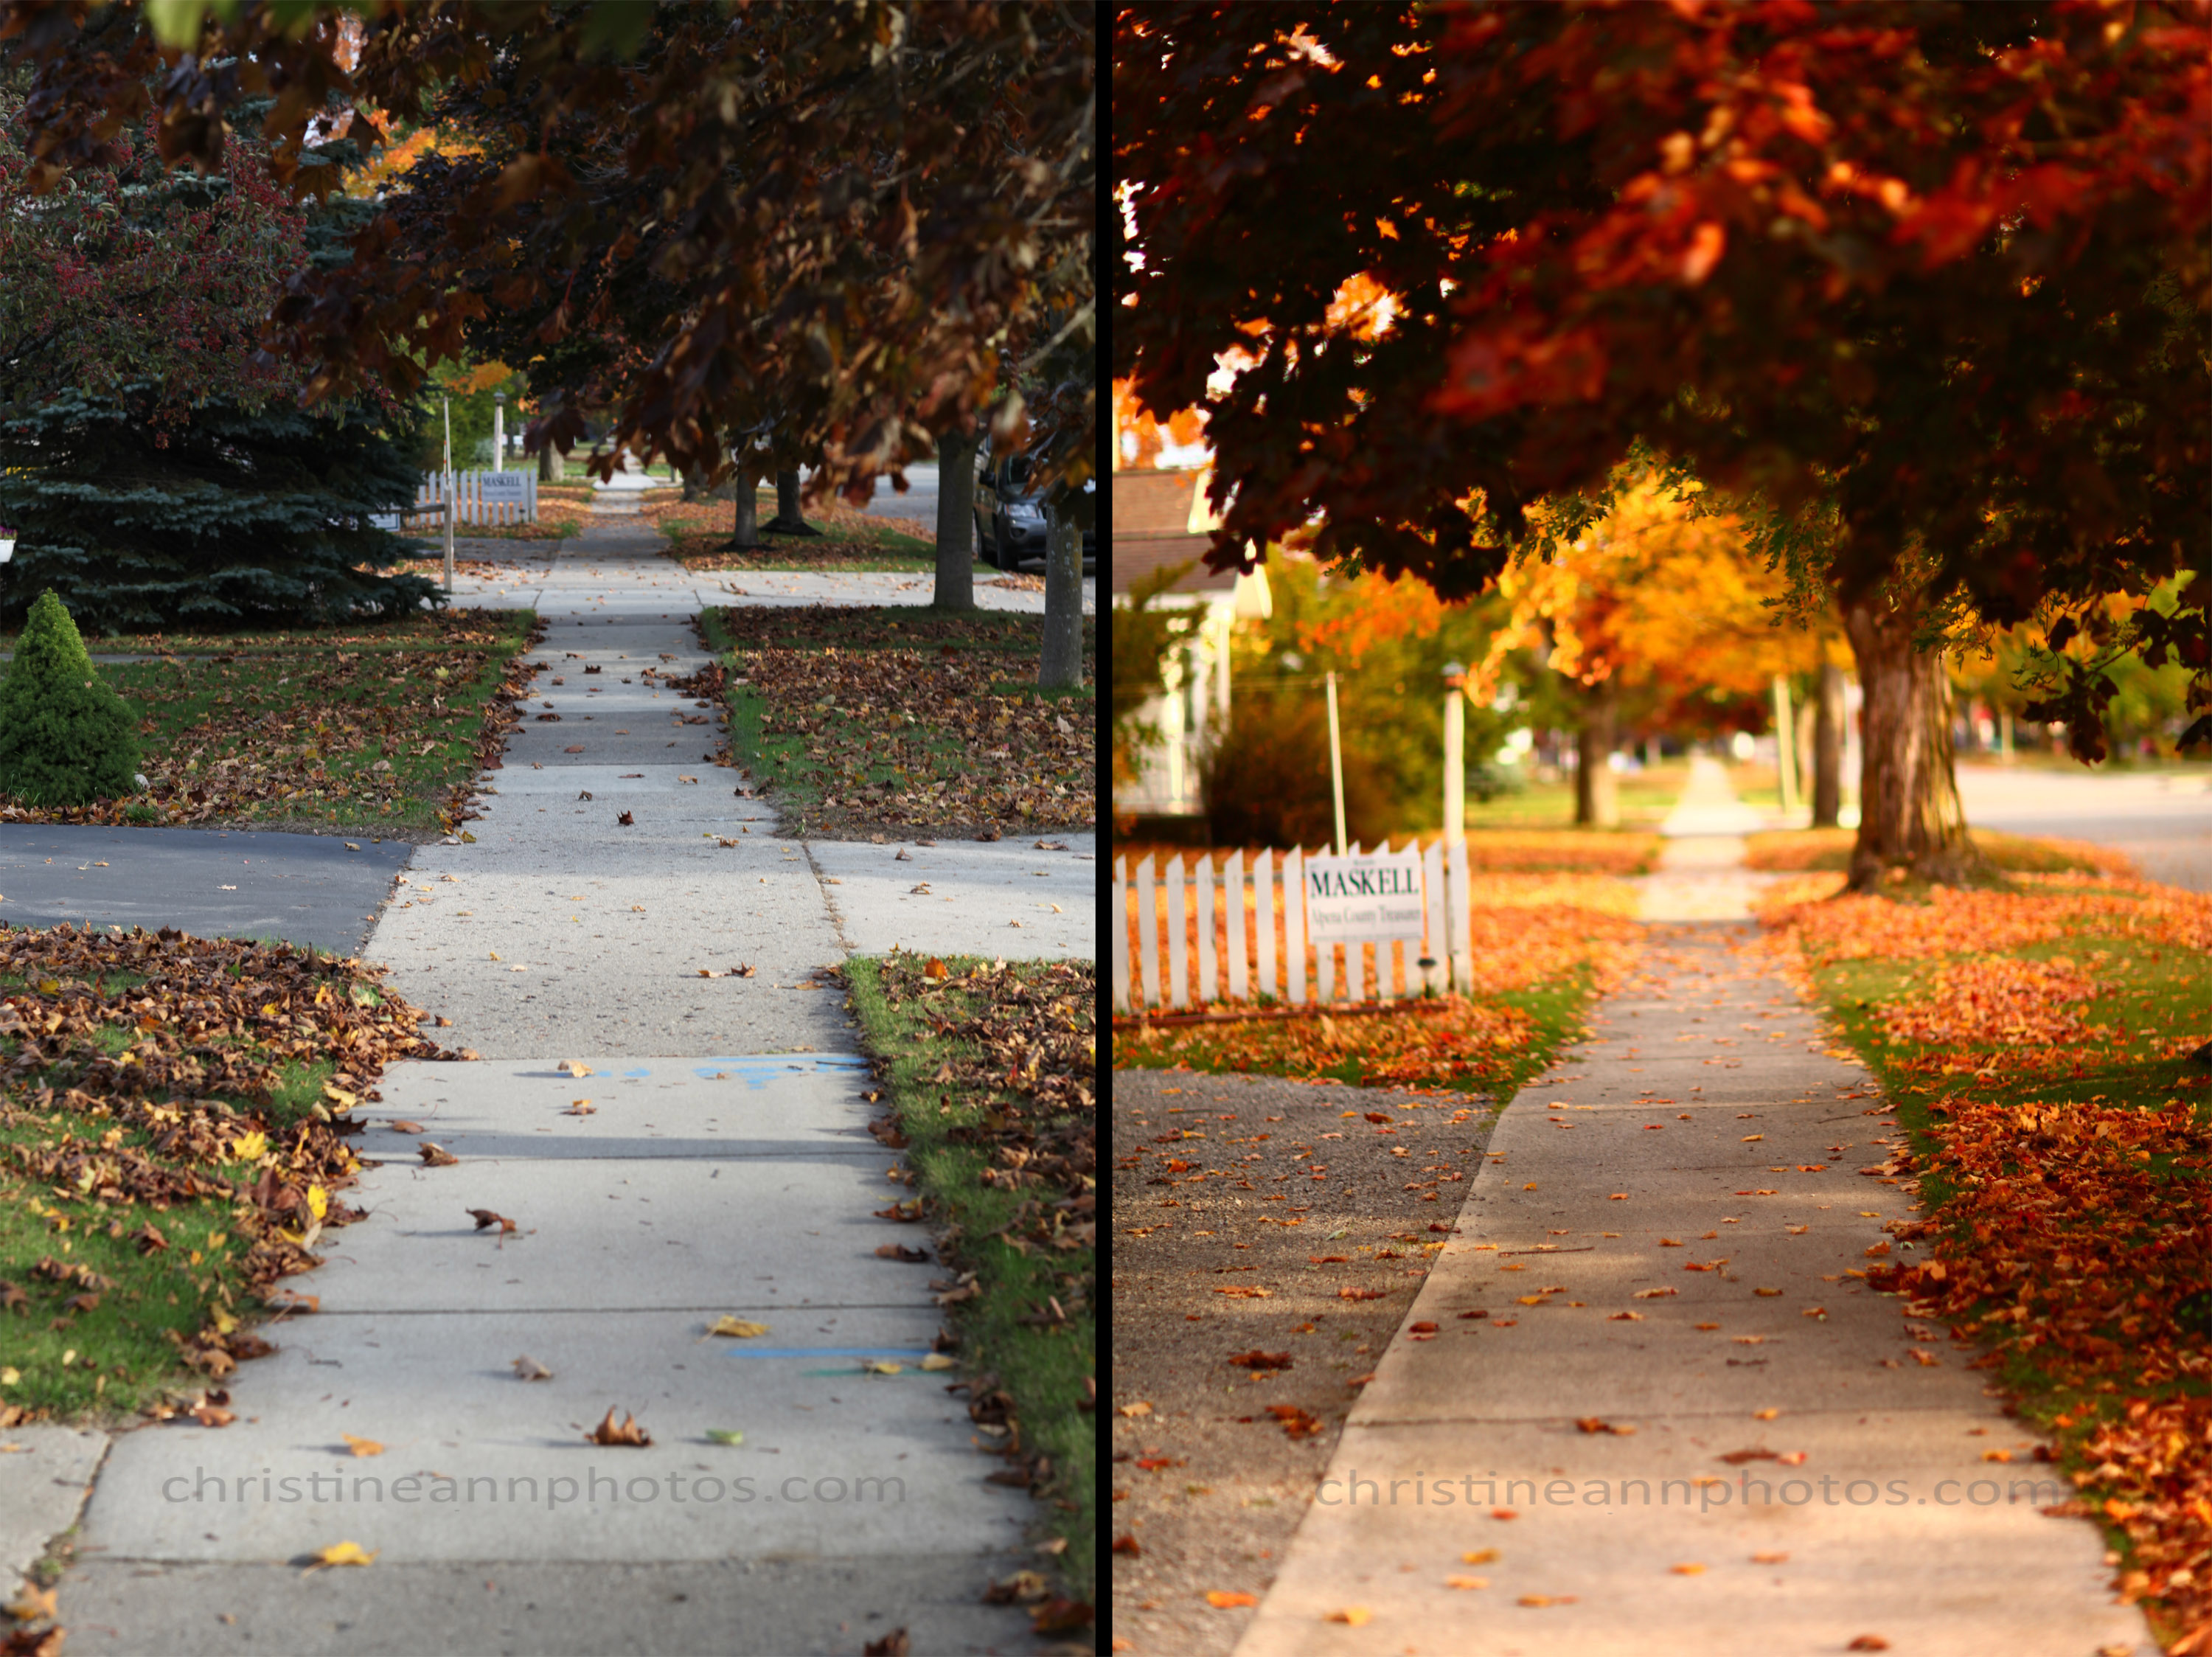
Unedited images from the T2i + 50mm lens  *CLICK EACH IMAGE FOR FULL DETAIL*:

IMG_5160zzstamp
*Click images for full detail.. the thumbnails look fuzzier than they are*.
IMG_5149crop2stamp
*Click images for full detail*
IMG_5536zzstamp
*Click images for full detail*
t2i50 (2)stamp_z-2
*Click images for full detail*.
IMG_5444stamp
*Click images for full detail.. the thumbnails look fuzzy*.
IMG_5109zzzstamp
*Click images for full detail*.
IMG_5108zzstamp
*Click images for full detail*.

t2i50mmstampzz

*Click images for full detail*.

t2i50 (3stamp)

*Click images for full detail*.

IMG_5441zzstamp

-Christine Ann
Christine Ann Photography Web Site
Christine Ann Photography Facebook

When to Become A Professional Photographer.

With DSLRs becoming very widespread and photography becoming increasingly popular, many of us have been left to wonder things like “When should I start a business?” or “Am I ready to start a business?”.  I feel the answer to these questions is very situational and there is no way to address everyone’s unique situations however I do have some things for consideration that you can assess to help you decide if you think you are.

1.  Are your good photos “lucky” or intentional?  We all get lucky shots.. the question is when you take a great photo, is it luck or did you plan out the position, location, camera settings, angle etc and take that photo on purpose?  Could you take that same great photo again?  You  need to understand why your photos are turning out well and what hurts them and makes them turn out bad.  What if you have a lucky session and then someone else wants a similar style to it and you have no idea how you did it?  The main way to learn these things is through experience and research.  One example:  taking photos at 3 PM with the sun high in the sky and harsh lighting and then taking photos in that sunlight will make the person have squinty eyes and harsh shadows.  Have you learned things like this?  Do you know how to handle this situation to fix this problem?  (Move to the shade, add some fill light, or schedule the session for a later hour in the day).

2.  Do people want to hire you?  Don’t hinge too much on this because my experience was that people said they love the photos I take however after I became a business people said things like “now we can hire you to do our photos!”.  I don’t think people even realized they could have done this before I was a business.  However it’s still a good thing to consider (but don’t let it stop you either if no one has asked you..!).  Have people made comments about wanting to hire you or asking if you would do photos for them?  Or even do you just get a lot of positive feedback on photos you take?  This is a good sign that people like what you’re doing :).

3.  Can you shoot with manual settings?  Do not leave it up to auto mode to determine your settings!  Auto mode has no qualms about going to 1600 ISO and f/8!  Things like this can & sooner or later will ruin your photos.  On auto you may be photographing children and your camera may be going to 1/100 shutter speed causing motion blur.  You need to be able to accommodate this and know how to increase your shutter speed, and how to lower your ISO.  Knowing your manual settings you can handle all situations and make sure the camera is doing what you want it to.

4.  Do you have a strong portfolio?  You don’t want to launch with 10 photos of your own kids ;).  Make sure you have a legit portfolio that portrays your style and diversity and reflects the type of shoots you want to do.

5.  Do you have a passion & love for photography?  To be frank, statistically, most photography businesses are going to fail.  The ones that succeed are the ones with passionate, driven photographers, who want to spend time getting better and reaching more people.  Your passion is what will drive you to learn more and do better and fight for your business.  It isn’t easy to start a business and you need that passion behind you!

One final thing to consider in regards to starting a business is that once you become a business then you have to begin gaining clients.  You aren’t one day a business with tons of people wanting to hire you :).  It takes time.  Most of what I have read says at least 2 years and up to 5 years to gain a good client base.  If your main reason for not wanting to start a business is you don’t have time then consider launching anyway (if you do have at least *some* time anyway..) because you probably won’t have tons of business right away anyway!

If you think you’re ready check out this Step-By-Step Guide For Starting A Photography Business to get an idea of what to do next!

-Christine

http://www.christineannphotos.com
http://www.facebook.com/christineannphotos

Importance of Understanding How to Take Photos with Manual Settings.

AutoVsManualstamp

After posting “Why Photographers Hate the Words “Your Camera Takes Such Nice Photos” yesterday I thought I would do another version of it today. Yesterday’s blog was a reference to choosing the angle and background etc, today I want to refer to understanding camera settings. You can do so much in camera! I have a billion examples of auto vs manual and things you can do in M that you cannot do in auto. For example you can capture the slight movement of a dog’s tail to show that it is wagging. You can prevent a photo from blurring when the people in it are moving. You can have a better chance at photos in low lighting. You can insert artistic twists to things by “blowing out” (giving it a really washed out/white look which is fun to do sometimes) or enhancing colors or whatever it is you want to do. In auto mode you just have to hope it works out. In Manual you know you can make it work out! Here is a photo example of auto vs manual. I am not saying the manual version is better (I personally think it is but not everyone would agree.. just a matter of taste) but what I am saying is that you can gain a lot by spending some one on one time with your camera and some tutorials to ensure you get the images to look the way you want them to! Neither of these photos are edited.. both are right out of the camera.

-Christine Ann
Duluth Minnesota Photographer
http://www.christineannphotos.com
“like” me on Facebook 🙂 ! https://www.facebook.com/christineannphotos

Tips for Photographing a Solar Eclipse or Sunset

I was super excited to get some photos of an eclipse and then it disappeared right behind that cloud just as it was starting! Big bummer 😦 .. but I do like the photos I managed to get.

A few tips if you want to get the best photos possible of an eclipse:

1. Try to use a low ISO. This is true for every photo you will ever take: ISO creates grain in your images, so try to keep this number as low as possible. Sometimes it is necessary though because a higher number means your image will be better lit. Many photos taken indoors look grainy because of the ISO wanting to be high to accommodate for the low light.
2. Shoot with a higher aperture! A lot of people agree around f/8 is a good area. Higher f-stops will create a big giant blob of light around the sun and give you a little wiggle room in case your focus is off which it might be because cameras have a hard time focusing on the sun.
3. You may need to manually focus vs auto focus.. for this reason a tripod may be handy so you know your focus is right each time but is not necessary for a solar eclipse or sunset.
4. Wear sunglasses if you are looking through the eyehole! The lens essentially magnifies the sun so it can hurt your eyes more than usual. The lens should ideally also have a uv filter on it. Some people also claim that taking photos into the sun can hurt your camera.. I don’t know for certain whether or not this is true but I can say that based on my research on it I feel comfortable shooting into the sun, especially when it is towards the end of the day and very gentle.

IMG_6247zstamp
^This photo was taken at f/32 1/2000 ISO 800. When you take photos of a sunset it is highly recommended to shoot at at least f/8. My photos turned out much better at a higher f-stop. My ISO is pretty high and it really should be much lower.

IMG_6145stamp
^This photo is taken at f/5 1/250 ISO 200. Raising the f-stop after this helped the photo immensely.

Eclipsestamp
Annnnd one more eclipse photo.